Manually running builds, executing tests and deploying can become a nightmare and an error-prone process:
In this post we will use Github Actions to automatically trigger the following processes on every merge to master or pull request:
- Fire up a clean linux + nodejs instance.
- Download the repository source code.
- Install the project dependencies.
- Execute the associated unit tests.
- Generate a docker image including the production build.
- Tag it and Publish it into the Docker Hub registry.
Steps that we are going to follow:
- We will present the sample project.
- We will work manually with Docker hub.
- We will link our github project to Github Actions.
- We will setup a basic CI step
- We will check our unit tests.
- We will check if the docker container can be built.
- We will upload a container to docker hub registry (including build number).
- We will check if our Continuous Delivery process succeeded by consuming those images from our docker compose file configuration.
Although Docker helps us standardize the creation of a given environment and configuration, building new releases manually can become a tedious and error-prone process
- We have to download the right cut of code to be built.
- We have to launch all the automated tests and check if they are passing.
- We have to generate our Docker image.
- We have to add some proper versioning (tagging in Docker terms).
- We have to manually push it to Docker Hub registry.
Imagine doing that manually on every merge to master; you will get sick of this deployment hell... Is there any automated way to do that? Github Actions to the rescue!
Just by spending some time creating an initial configuration, Github Actions will automatically:
- Get notified of any PR or merge to master being triggered (you can configure policies).
- Create a clean environment (e.g. in our case it takes an Ubuntu + Nodejs image).
- Download the right branch cut from the repository.
- Execute the tests.
- Create the docker container image that will contain the production build.
- On success deploy it to Docker Hub registry (adding a version tag).
One of the advantages of Github Actions is that it's quite easy to setup:
- You don't need to install any infrastructure (it's just cloud base).
- The main configuration is done via a yml file.
- It offers a community edition where you can play with your tests projects or use it for your open source projects (only public projects).
- It offers an enterprise version for your private projects.
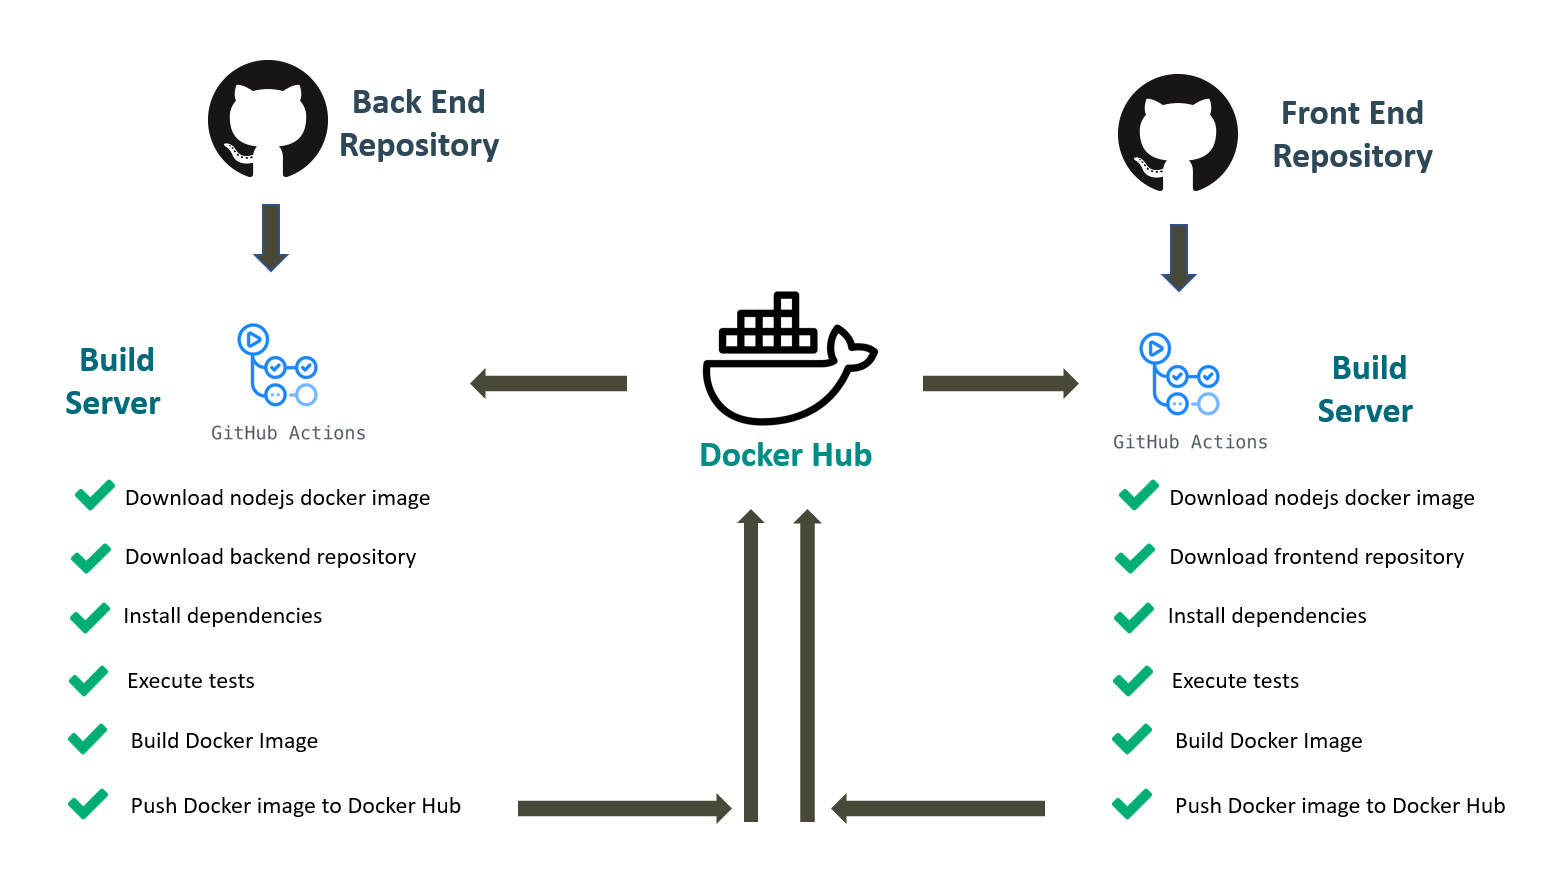
In this tutorial, we will be applying automation to our forked chat application's repositories using a Github action workflow. Github Actions will launch a task after every commit where the following tasks will be executed:
- Tests will be run.
- The application will be containerized using Docker.
- The created image will be pushed to a Docker Registry, Docker Hub in our case.
A summary of this build process:

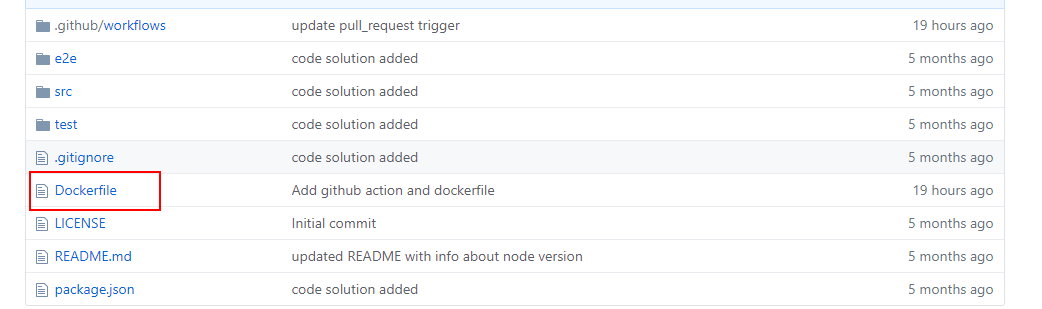
Let's create our main.yml file at the .github/workflows folder of our backend repository:

We will start by indicating the workflow name.
./.github/workflows/main.yml
+ name: Backend Chat CI/CD
We can trigger this workflow on several events like push, pull_request, etc
+ on:
+   push:
+     branches:
+       - master
+   pull_request:
+     branches:
+       - master
After that, we can create different jobs for build, deploy, etc. We will start with the ci job (build and tests) and select OS (Operating System) that all tests will run under. Here you have the list of available OS.
In this case we will choose a linux instance (Ubuntu).
+ jobs:
+   ci:
+     runs-on: ubuntu-latest
We need access to all files in repository so we need clone the repository in this environment. Instead of manually defining all steps to clone it from scratch we can use an action already created, that is, we have available official actions from Github teams or other companies in the Github Marketplace. In this case, we will use action checkout to checkout our repository from Github team (download repository to a given folder):
...

jobs:
  ci:
    runs-on: ubuntu-latest

+   steps:
+     - uses: actions/checkout@v1
We will make use of another action in order to setup-node. this action developed by the Github team will allow us to get up and running the nodejs environment (even specifying a version):
...

  steps:
    - uses: actions/checkout@v1
+   - uses: actions/setup-node@v1
+     with:
+       node-version: '12.x'
To execute it, we create a new step with name Install and we execute the command npm install in the run section.
...

  steps:
    - uses: actions/checkout@v1
    - uses: actions/setup-node@v1
      with:
        node-version: '12.x'
+   - name: Install
+     run: |
+     	 npm install
+     	 npm test
...

jobs:
  ci:
    runs-on: ubuntu-latest

    steps:
      - uses: actions/checkout@v1
      - uses: actions/setup-node@v1
        with:
          node-version: '12.x'
      - name: Install & Tests
        run: |
          npm install
          npm test
+ cd:
+   runs-on: ubuntu-latest
+   needs: ci

+   steps:
+     - uses: actions/checkout@v1
+     - name: Docker login
+       run: docker login -u ${{ secrets.DOCKER_USER }} -p ${{ secrets.DOCKER_PASSWORD }}
In the next step we will continue working on the cd job (this time building the Docker Image)
FROM node
WORKDIR /opt/back
COPY . .
RUN npm install
EXPOSE 3000
ENTRYPOINT ["npm", "start"]
Let's jump back into the yml file: inside the cd job, right after the docker login, we add the command to build the Docker Container image.
./.github/workflows/main.yml
...
jobs:
  ci:
    runs-on: ubuntu-latest
+   container:
+     image: node

    steps:
      - uses: actions/checkout@v1
-     - uses: actions/setup-node@v1
-       with:
-         node-version: '12.x'
      - name: Install & Tests
        run: |
          npm install
          npm test
  cd:
    runs-on: ubuntu-latest
    needs: ci

    steps:
      - uses: actions/checkout@v1
      - name: Docker login
        run: docker login -u ${{ secrets.DOCKER_USER }} -p ${{ secrets.DOCKER_PASSWORD }}
      - name: Build
        run: docker build -t back .
The current Docker image that we have generated has the following name: back. In order to upload it to Docker Hub registry, we need to add a more elaborated and unique name:
- Let's prefix it with the docker user name.
- Let's add a suffix with a unique build number (in this case the commit SHA from Github context).
...
    steps:
      - uses: actions/checkout@v1
      - name: Docker login
        run: docker login -u ${{ secrets.DOCKER_USER }} -p ${{ secrets.DOCKER_PASSWORD }}
      - name: Build
        run: docker build -t back .
+     - name: Tags
+       run: |
+         docker tag back ${{ secrets.DOCKER_USER }}/back:${{ github.sha }}
+         docker tag back ${{ secrets.DOCKER_USER }}/back:latest
Now that we've got unique names, we need to push the Docker Images into the Docker Registry. We will use the docker push command for this.
...
    steps:
      - uses: actions/checkout@v1
      - name: Docker login
        run: docker login -u ${{ secrets.DOCKER_USER }} -p ${{ secrets.DOCKER_PASSWORD }}
      - name: Build
        run: docker build -t back .
      - name: Tags
        run: |
          docker tag back ${{ secrets.DOCKER_USER }}/back:${{ github.sha }}
          docker tag back ${{ secrets.DOCKER_USER }}/back:latest
+     - name: Push
+       run: |
+         docker push ${{ secrets.DOCKER_USER }}/back:${{ github.sha }}
+         docker push ${{ secrets.DOCKER_USER }}/back:latest
##The final result
name: Backend Chat CI/CD

on:
  push:
    branches:
      - master
  pull_request:
    branches:
      - master

jobs:
  ci:
    runs-on: ubuntu-latest
    container:
      image: node

    steps:
      - uses: actions/checkout@v1
      - name: Install & Tests
        run: |
          npm install
          npm test
  cd:
    runs-on: ubuntu-latest
    needs: ci

    steps:
      - uses: actions/checkout@v1
      - name: Docker login
        run: docker login -u ${{ secrets.DOCKER_USER }} -p ${{ secrets.DOCKER_PASSWORD }}
      - name: Build
        run: docker build -t back .
      - name: Tags
        run: |
          docker tag back ${{ secrets.DOCKER_USER }}/back:${{ github.sha }}
          docker tag back ${{ secrets.DOCKER_USER }}/back:latest
      - name: Push
        run: |
          docker push ${{ secrets.DOCKER_USER }}/back:${{ github.sha }}
          docker push ${{ secrets.DOCKER_USER }}/back:latest
Now if you push all this configuration to Github it will automatically trigger the build .

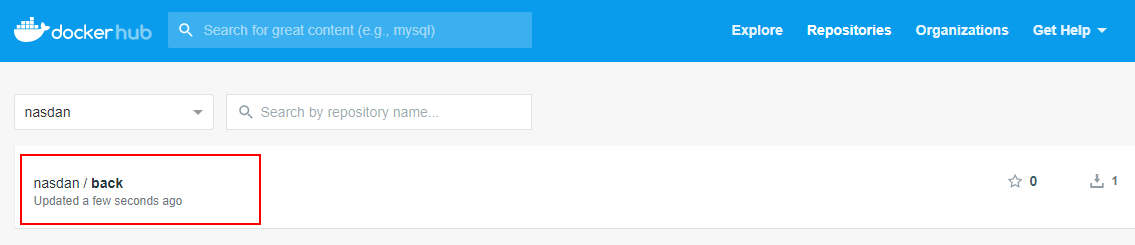
Once finished, you can check if the docker image has been generated successfully:

And we can check if the image is available in our Docker Hub Registry account: