Allows you to use tables with the dashing framework.
Create a folder in your widgets folder called table. Insert the three files
(table.coffee, table.scss, table.html).
Alternately, you can use the automated dashing installer by running dashing install 9c7cb3030f63ad10e517 from the root of your dashing project.
- Create a widget on your dashboard with
data-view="Table". Example:
<li data-row="1" data-col="1" data-sizex="2" data-sizey="1">
  <div data-id="my-table" data-view="Table" data-title="Table Title" data-moreinfo="More information about this table"></div>
</li>- Create a job to populate the widget.
To send a row to the tbody (or thead), send a array of hashes to rows (hrows for
thead). The bindings work from row to column. Every column should be it's own
array element off a cols hash. The hash must have a key of "value" in
order to show up. To send multiple rows, use an array of these hashes.
Some other keys that you use include colspan, rowspan, class, and style.
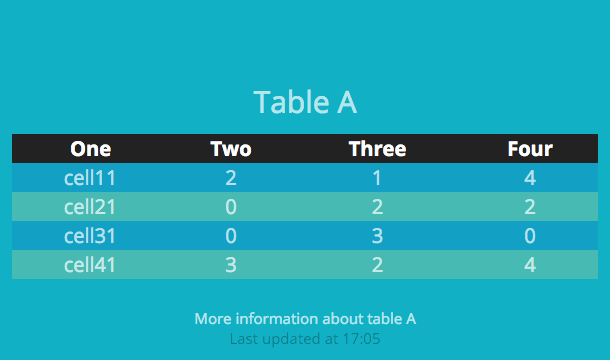
hrows = [
  { cols: [ {value: 'One'}, {value: 'Two'}, {value: 'Three'}, {value: 'Four'} ] }
]

rows = [
  { cols: [ {value: 'cell11'}, {value: rand(5)}, {value: rand(5)}, {value: rand(5)} ]},
  { cols: [ {value: 'cell21'}, {value: rand(5)}, {value: rand(5)}, {value: rand(5)} ]},
  { cols: [ {value: 'cell31'}, {value: rand(5)}, {value: rand(5)}, {value: rand(5)} ]},
  { cols: [ {value: 'cell41'}, {value: rand(5)}, {value: rand(5)}, {value: rand(5)} ]}
]
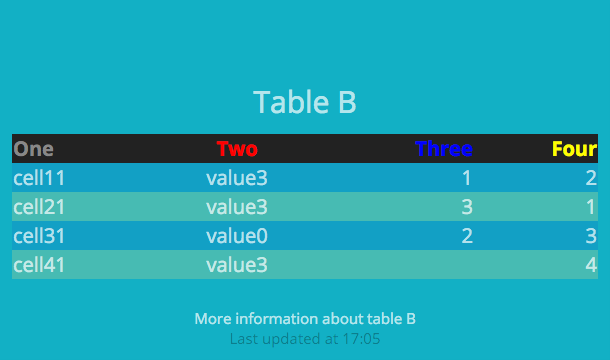
send_event('my-table', { hrows: hrows, rows: rows } )hrows = [
{
style: 'color:#888;',
class: 'right',
cols: [
{class: 'left', value: 'One'},
{style: 'color:red; text-align:center;',value: 'Two'},
{style: 'color:blue;', value: 'Three'},
{style: 'color:yellow;',value: 'Four'}
]
}
]
rows = [
{ cols: [ {class: 'left', value: 'cell11'}, {value: 'value' + rand(5).to_s}, {class: 'right', value: rand(5)}, {class: 'right', value: rand(5)} ]},
{ cols: [ {class: 'left', value: 'cell21'}, {value: 'value' + rand(5).to_s}, {class: 'right', value: rand(5)}, {class: 'right', value: rand(5)} ]},
{ cols: [ {class: 'left', value: 'cell31'}, {value: 'value' + rand(5).to_s}, {class: 'right', value: rand(5)}, {class: 'right', value: rand(5)} ]},
{ cols: [ {class: 'left', value: 'cell41'}, {value: 'value' + rand(5).to_s}, {colspan: 2, class: 'right', value: rand(5)} ]}
]
send_event('my-table', { hrows: hrows, rows: rows } ) curl -d ' { "auth_token":"YOUR_AUTH_TOKEN",
"hrows": [ {"cols": [ {"value":"Name 0"}, {"value":"Value 0"} ] } ],
"rows": [ {"cols": [ {"value":"Name 1"}, {"value":"Value 1"} ] },
{"cols": [ {"value":"Name 2"}, {"value":"Value 2"} ] },
{"cols": [ {"value":"Name 3"}, {"value":"Value 3"} ] },
{"cols": [ {"value":"Name 4"}, {"value":"Value 4"} ] } ]
}' http://localhost:3030/widgets/table
- Nick Stocchero (creator)
- Jorge Morgado
Thanks for this! One thing I've noticed though is it tends to blink with every received event. Has this happened for you?