Navigation Menu

Skip to content

Instantly share code, notes, and snippets.

@pinheadmz
Last active December 31, 2021 12:09
Show Gist options
  • Star 3 You must be signed in to star a gist
  • Fork 0 You must be signed in to fork a gist
  • Save pinheadmz/264e360742e8b35798bf88005e77f2f8 to your computer and use it in GitHub Desktop.
Save pinheadmz/264e360742e8b35798bf88005e77f2f8 to your computer and use it in GitHub Desktop.

Connect Fingertip lightweight HNS resolver + DANE verifying proxy to Firefox

Welcome

After downloading, installing, and starting Fingertip for the first time, your default browser will open with a simple landing page that provides you a path to a certificate file (or a download link if you want to save it somewhere else) and a URL for the proxy server:

0_Fingertip_setup

Open Firefox settings

Click the three-lines button on the right side of the browser window and go to "settings":

1_firefox_settings

Open the certificate manager

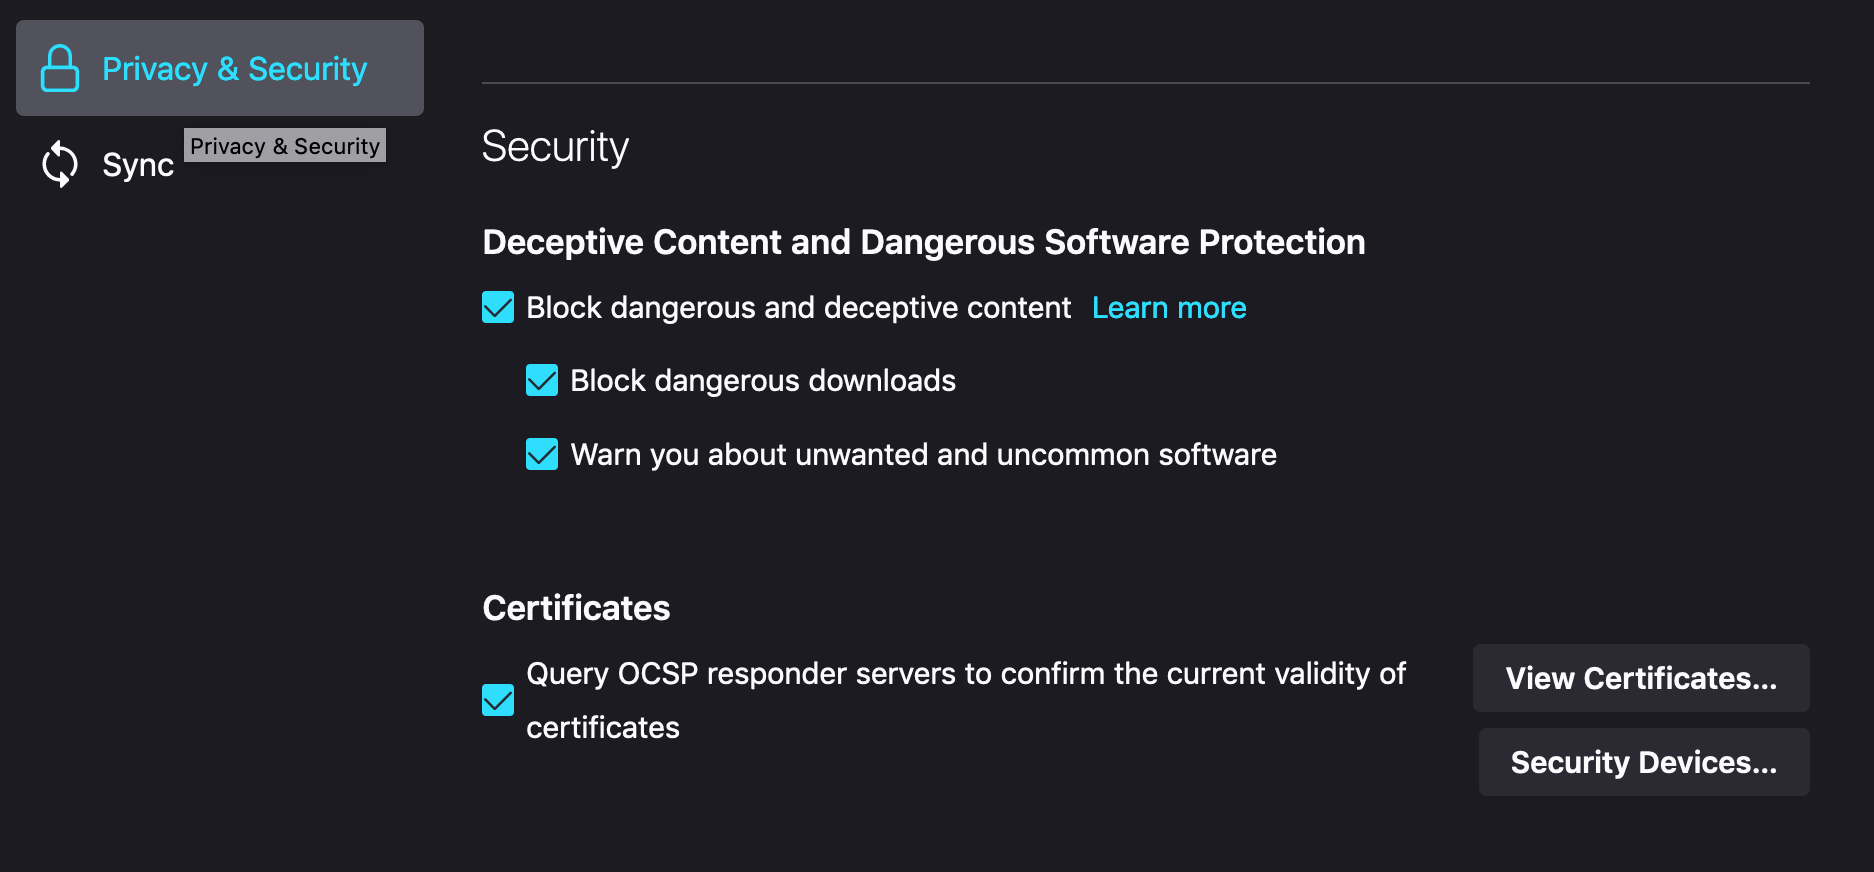
From the left side of the settings screen, click "Privacy & Security" and then click "View Certificates":

2_privacy_security_view_certificates

Import the DNSSEC certificate

Click "import..." at the bottom of this window and navigate to the certificate from the welcome page:

3_import

Set the certificate trust

Click both "trust" boxes in the dialog box that opens after importing the certificate:

4_trust

Open proxy settings

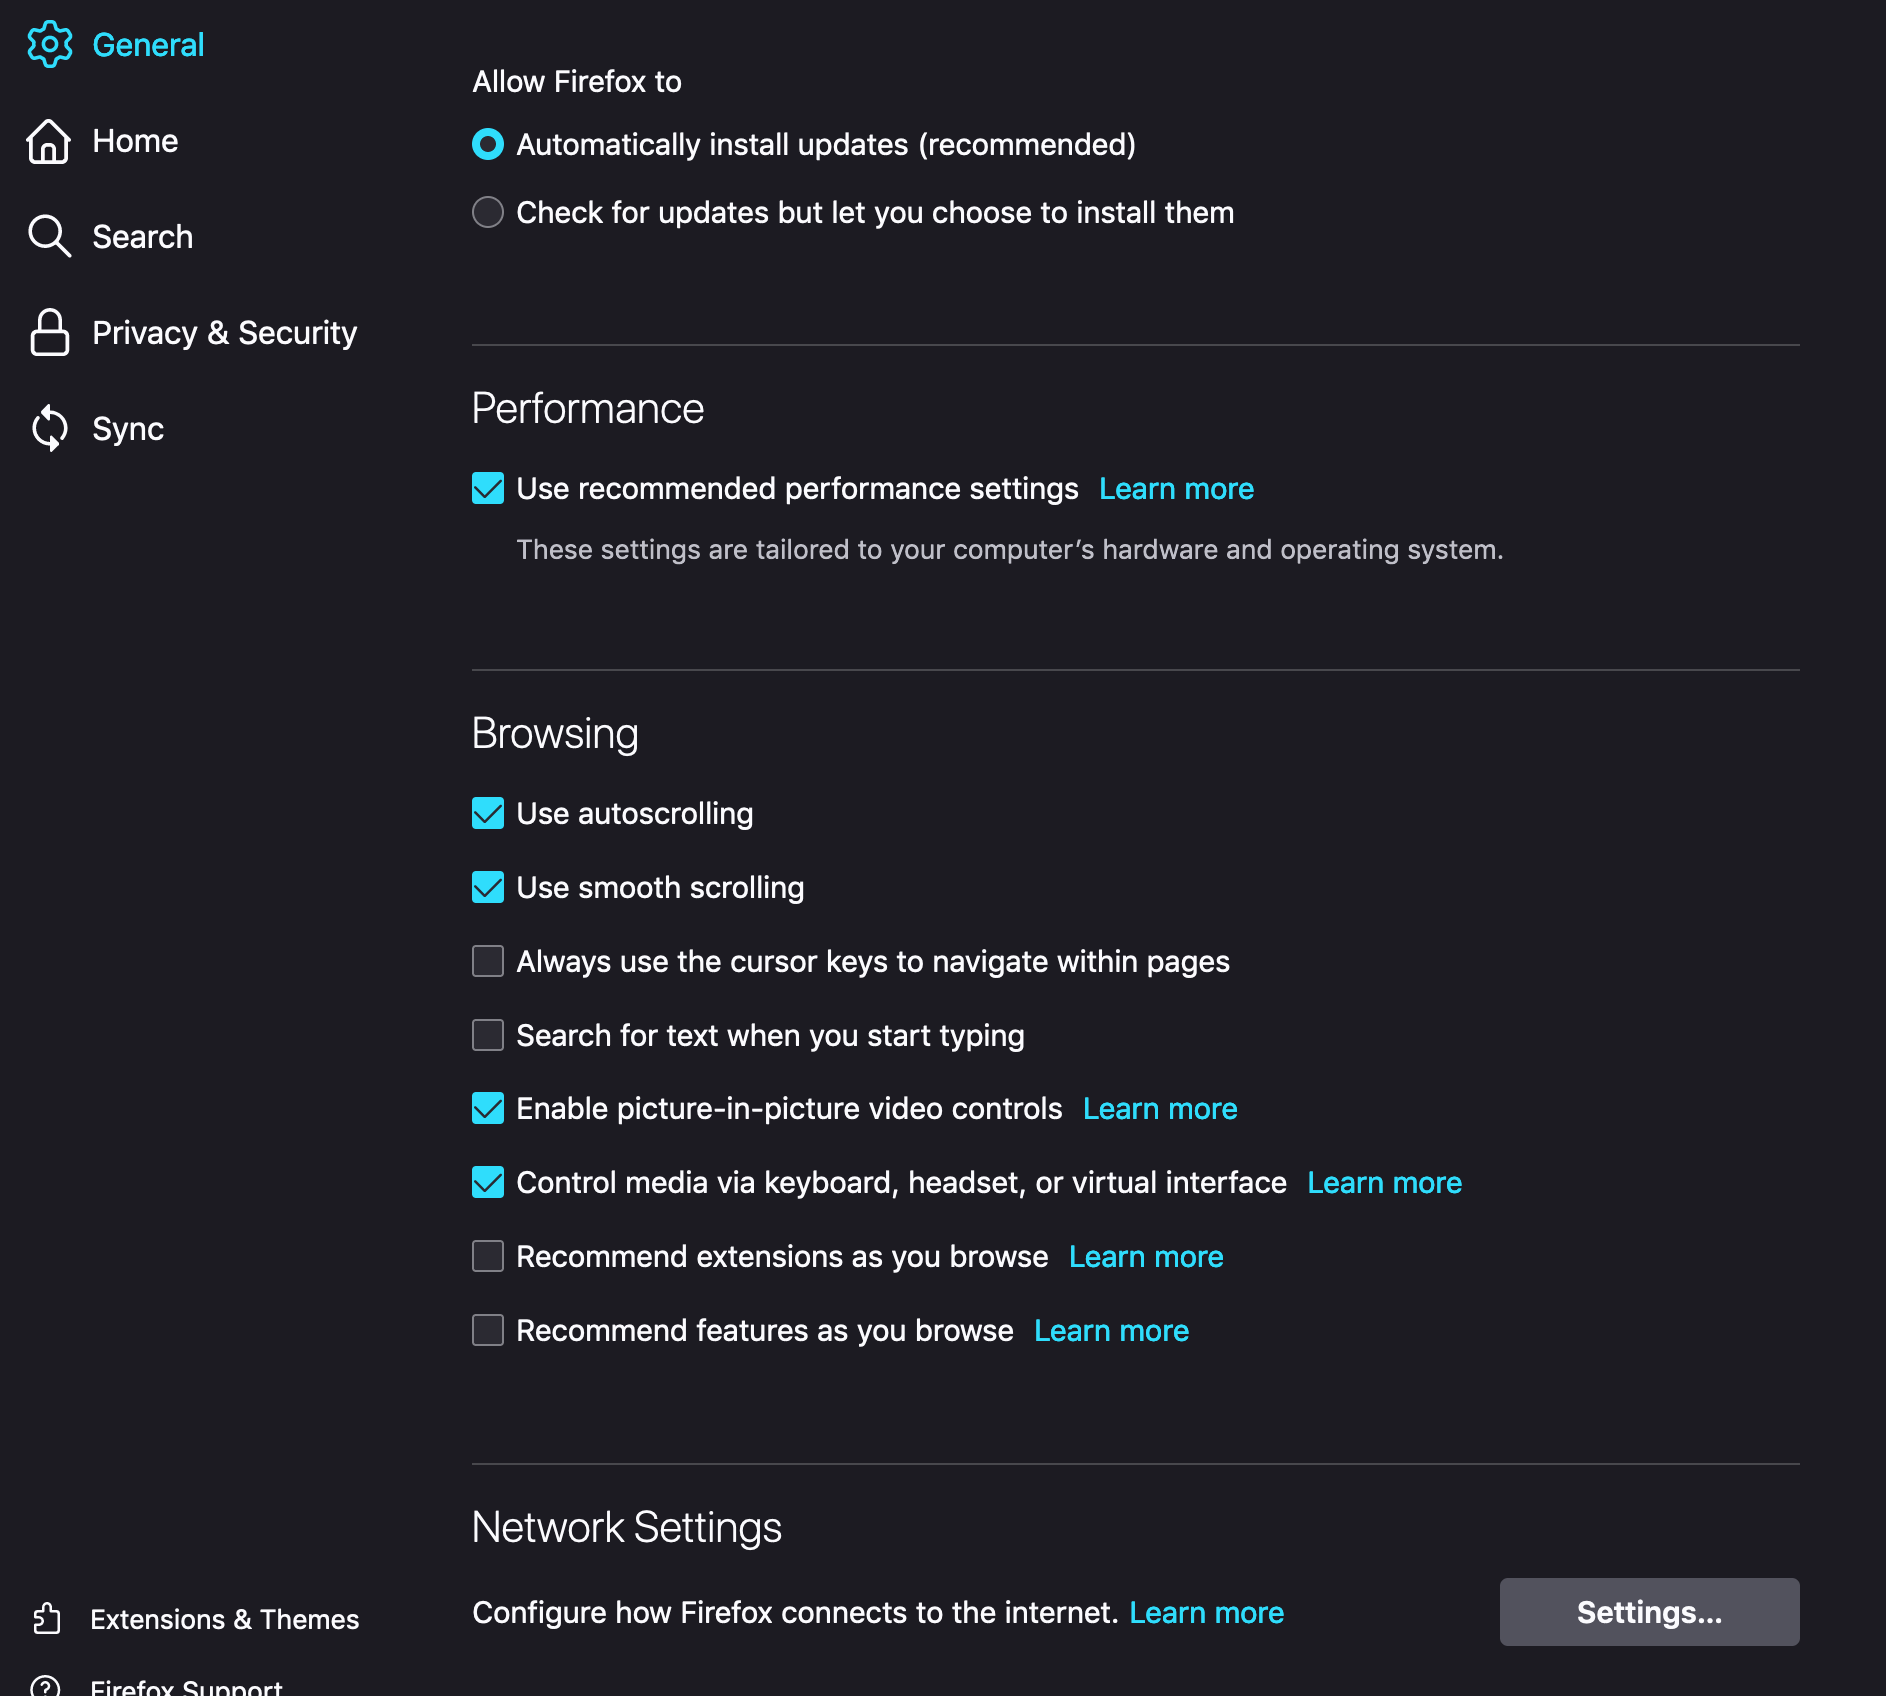
From the left side of the settings screen, click "General", scroll down and click "Settings..." under "Network Settings":

5_general_network_settings

Configure proxy server

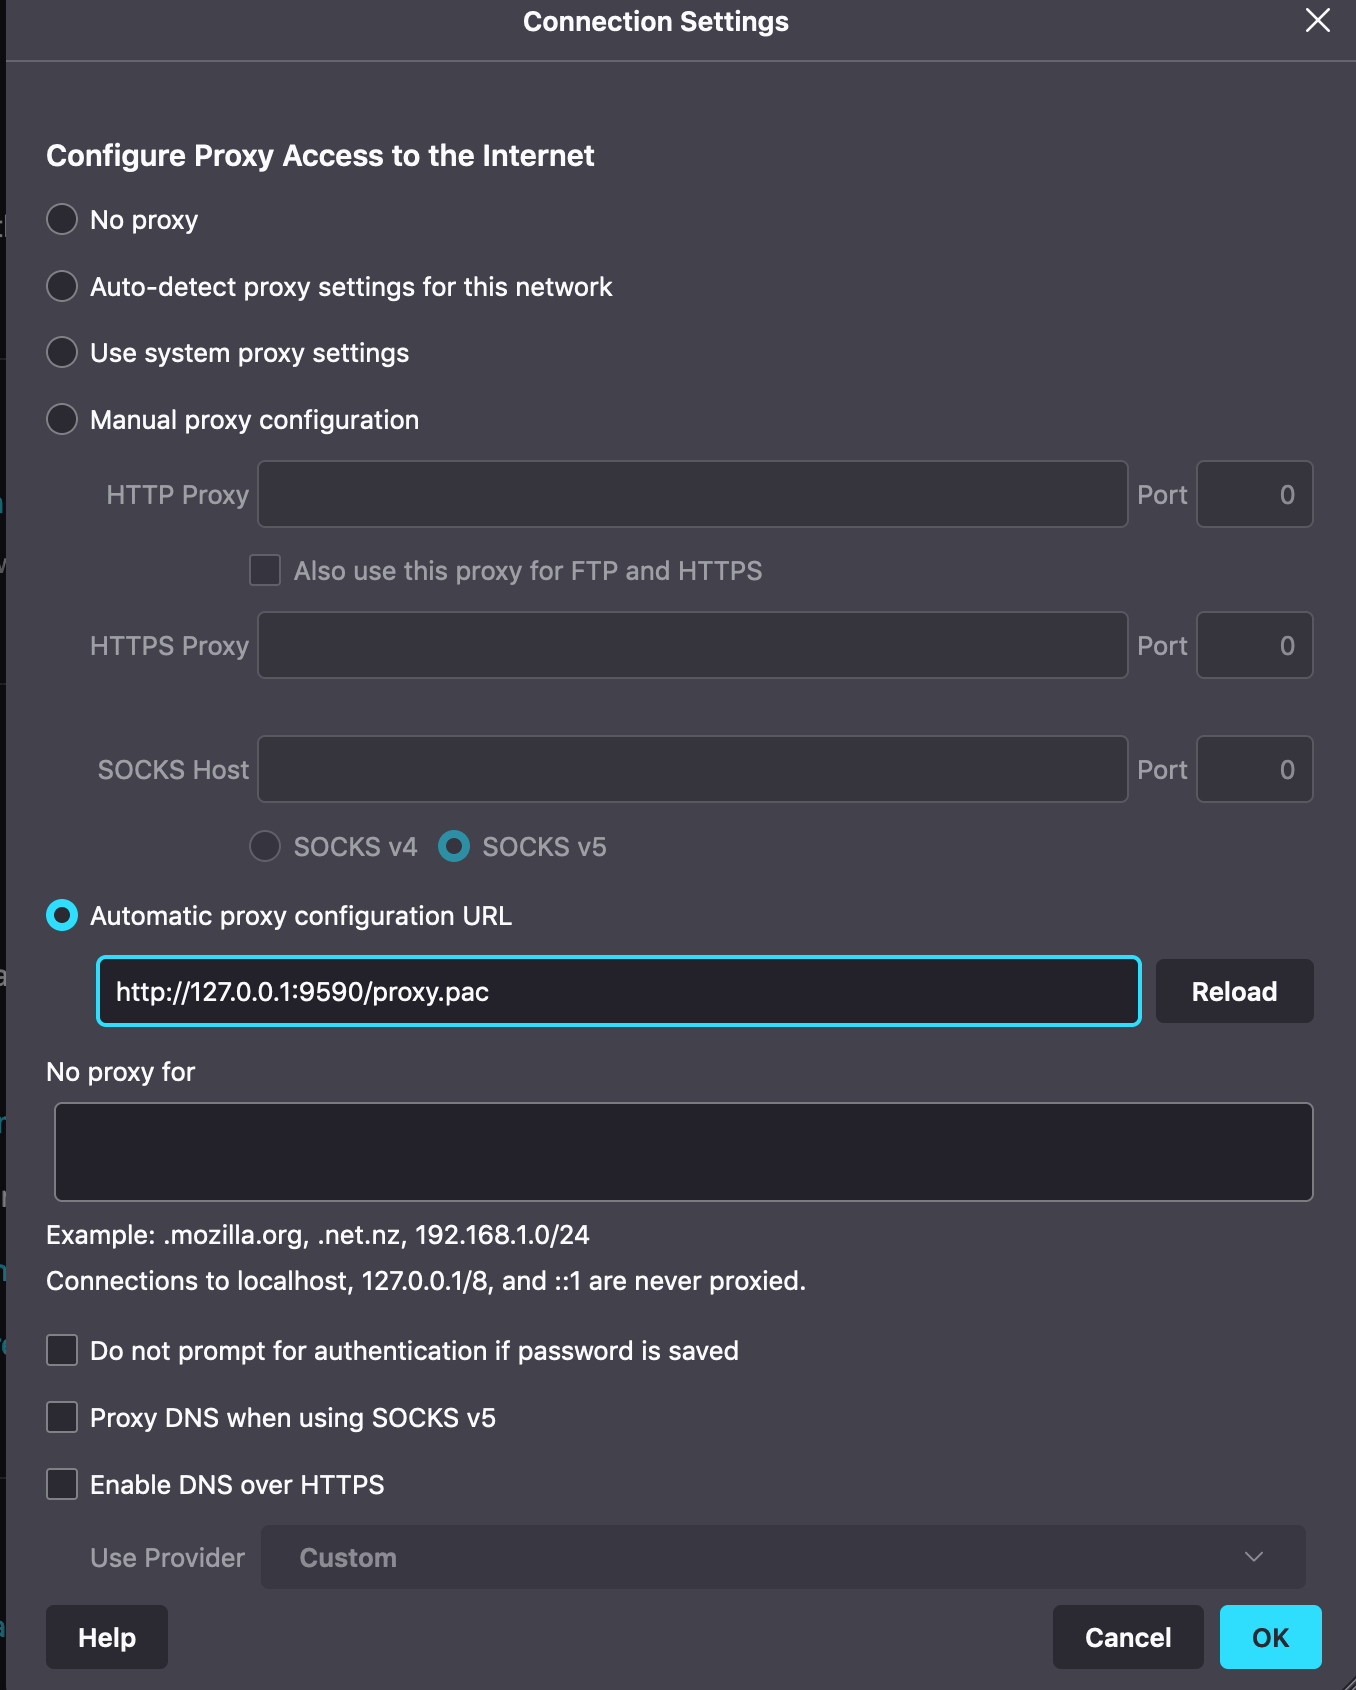
Select "Automatic proxy configuration URL" and enter the URL form the welcome page:

6_automatic_proxy

You're done!

Welcome to SECURE web browsing on Handshake domains!

Check out a few:

https://hns.blockclock

https://proofofconcept

https://impervious.forever

Sign up for free to join this conversation on GitHub. Already have an account? Sign in to comment