We now have everything we need to build a web app, except for images and other binary files. Your application will likely not get a lot of engagement if its not visual. In this lesson, we shall be adding the ability to upload images to your Posts api.
Since this will be a continuation from the class on Deploying to production you are adviced to start by cloning that workspace and then working from there.
We need to think about where your uploaded file will be stored. Since we are already serving static css and js files, we can put our assets in the same folder.
Create a new folder in the folder static called media

The folder structure will now look like this

This is where our files will be served from.
As usual remember we must hit our three core modules:
- models.py
- views.py
- urls.py
Now lets go ahead and create the model for it.
Django Model comes with a special field called ImageField. This field is a special type of FileField that is specialized for handling images.
Let us now add the picture field to the Posts api

Since this field is required, we have specified a default image. You may need to upload this image for it to work. For now this is sufficient.
As usual, make sure to migrate your model.

Let us now inform Django how to handle our media.
Django calls static files that are uploaded to it Media. Add the following lines to your settings.py module.
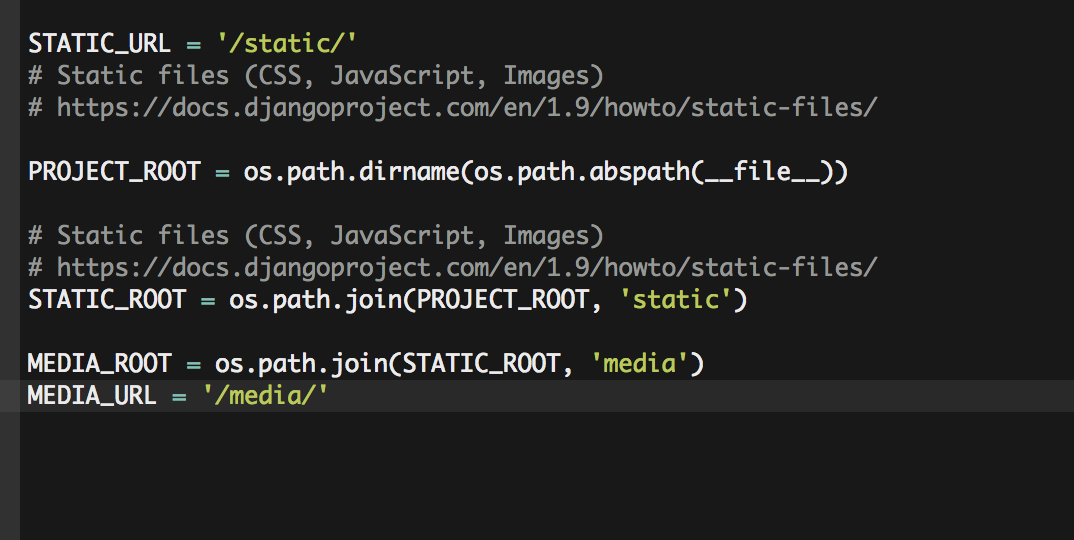
Quit simply, you notice that we are specifying a folder within the static folder called media that will hold our files. We are also providing Django with the url for the same ie media/.
Looking at our views.py file, we see there is nothing to modify, the viewset will continue staying as is. But we will need to modify the serialiezer.py which is the one providing our data.

We have now simply added the picture field to the serializer.
Finally, we need to ensure there is a route to the images, this is accomplished by adding the route in urls.py
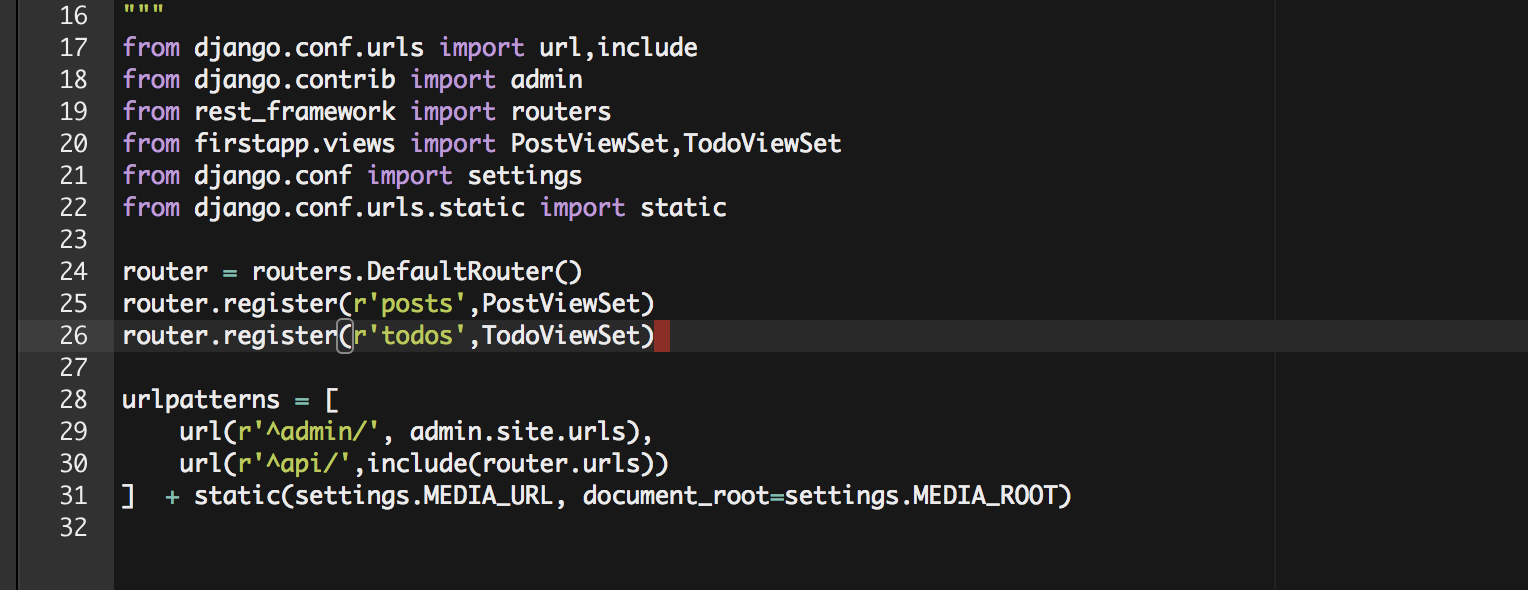
Note the following items:
- We import the necessary information needed from the settings module (line 21, 22)
- We add media urls to ensure Django can serve it (line 31)
Let us now test to see if it all works.
When you now navigate to /posts endpoint you notice a new field.

You also note on the form below, you can easily add an image if you so wish.

Similar to what we have done for Post. Add an image field to your Todos endpoint
Check Out this Tutorial - https://studygyaan.com/django/how-to-upload-and-display-image-in-django