When the course commenced, we looked a bit into Git. In this class, we will be looking at how to implement Git and Github into our C9 workflow.
Git is a version control system (VCS). What that means is it keeps a track of all the changes you make in your code.
It can manage any text based file very well. Our primary use for it will be to ensure we always have a copy of all our code and be able to share it with the world.
Let us start by creating a GitHub repository.
When you login to GitHub, you should be able to see a “+” sign at the top. This is where you click.

Select a to create a new repository. Github will ask you for some details about your project.
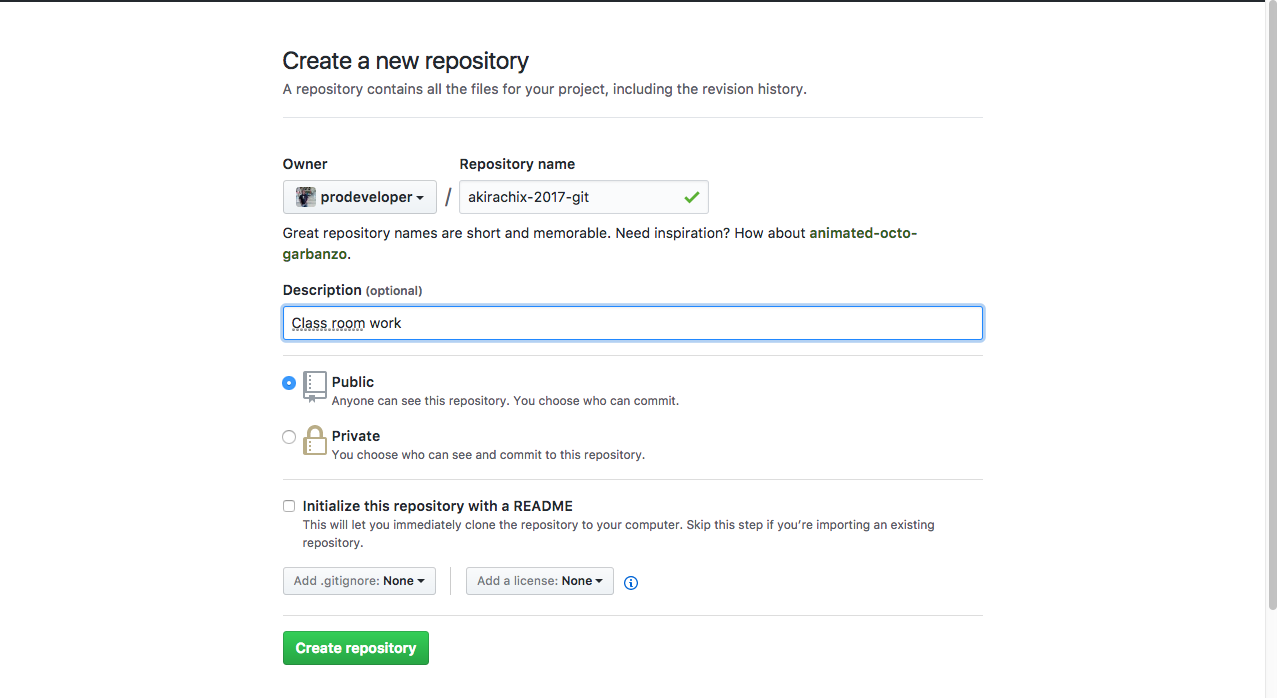
If you have a paid account, you can create a private repository. Otherwise, simply select the public option.
Since we will be importing our classwork. Ignore the offer to create default files. See the reference on the different type of default files on the links section below.
Once you run the command to create a new repository, GitHub provides you with this handy starter page
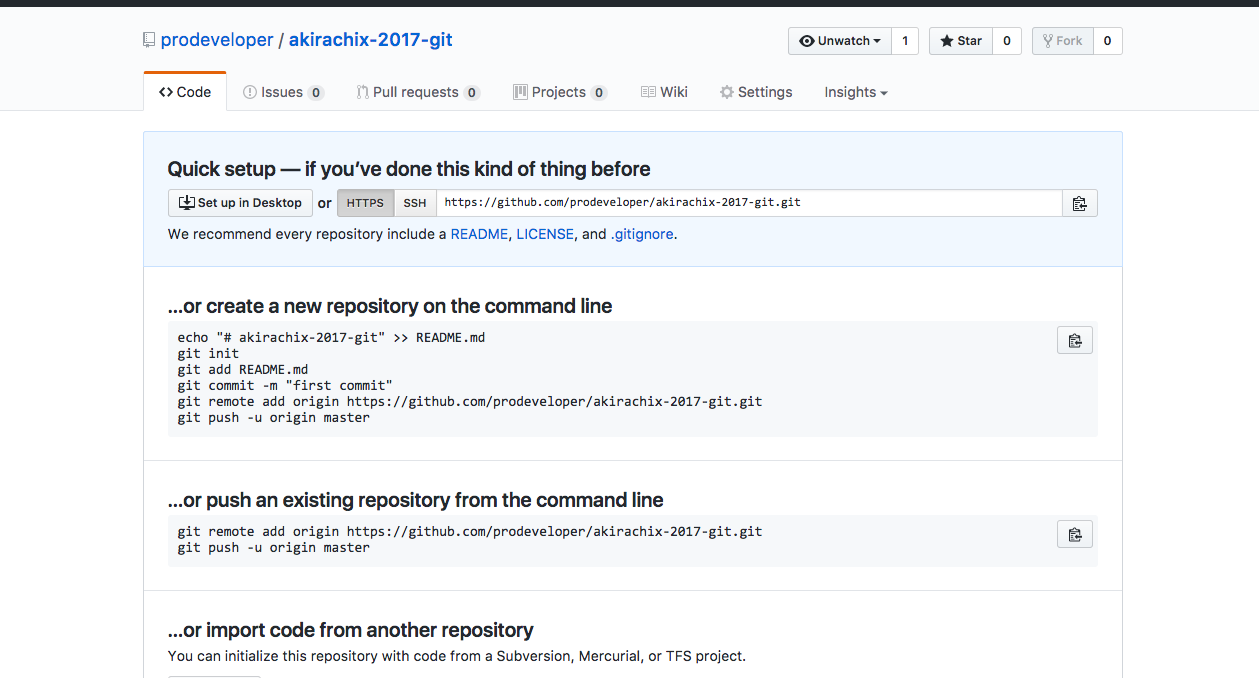
With our repo created, leave the page as is and navigate to your c9 workspace.
If you have already installed git on your windows machine you are probably familiar with its visual version. For us, we will purely use the command based version.
This means all our commands go through the terminal
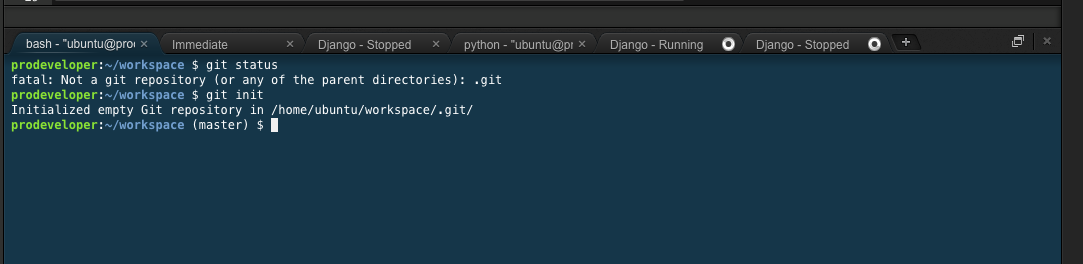
Let us start by running one of the most commands
git status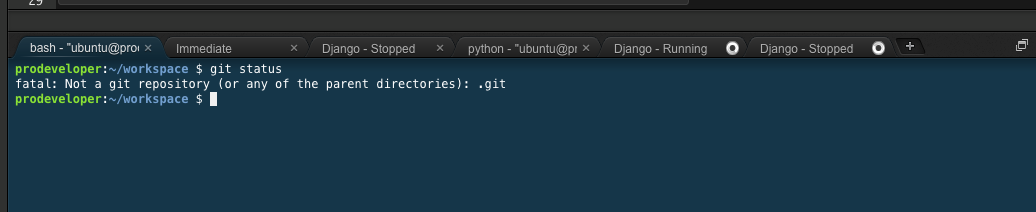
The command usually tells us the current state of our files. Since we are yet to start the repo, what you get is an error.
The link from scotch.io has a list of the most common git commands.
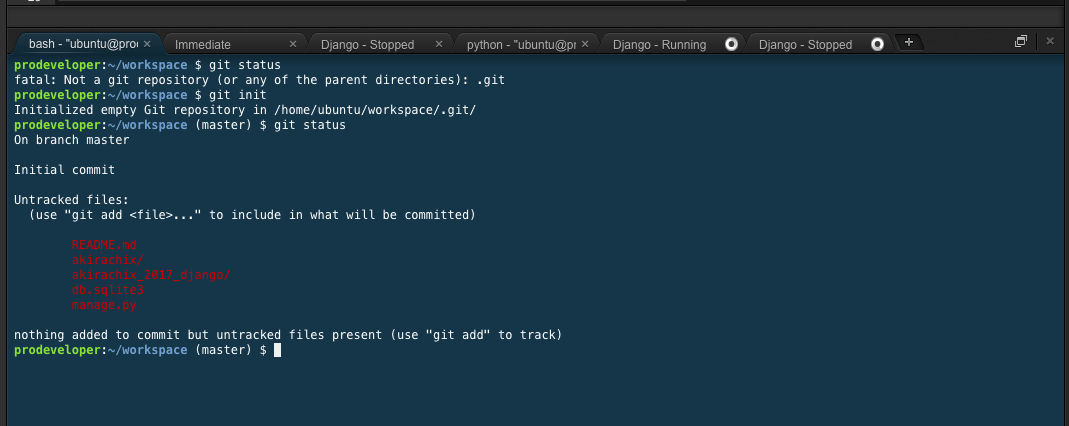
Let us now initiate git tracking on our project.
Git is now tracking changes to all file. If your run a status check you immediately note none of the files has been committed.
Saving a file and committing it are two different things. When you save the file, the local disk now has a copy. Git still has not stored it. When you commit it, now Git has a copy and will keep the version indefinitely. In this way, even if the disk copy is somehow lost or changed, you can always recover the version. How cool is that!
Now let us start by adding all our files to git. This is done using the git add . command
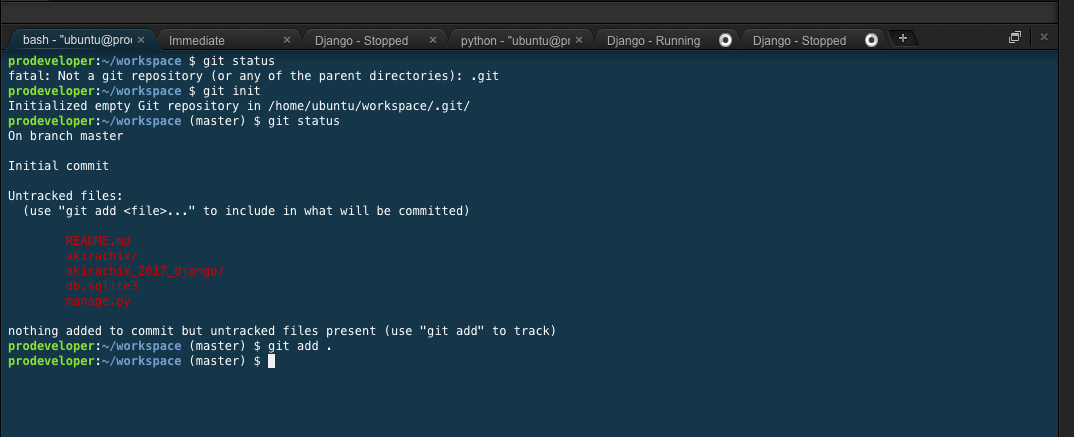
Our files are now ready to be committed to GitHub a quick check on status confirms this.
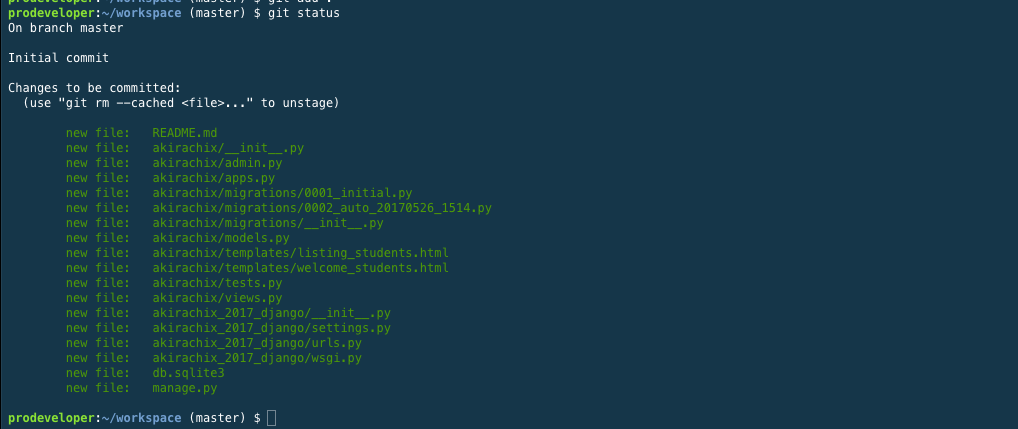
The staging area is where you put files which you are ready to commit. You can remove or add files here as you wish. Once the files are committed, a permanent record is kept by git. From the staging, this is not necessary.
Think of it as a place to park your finished work that you are yet to commit. See the link from gitready for a further description of this area.
With our files staged, we are now ready to commit.
A commit must have a message. Chris beams gives a more thorough treatment. For this class its enough to simply put the message “Our initial work”.

A status check confirms our files are now committed.
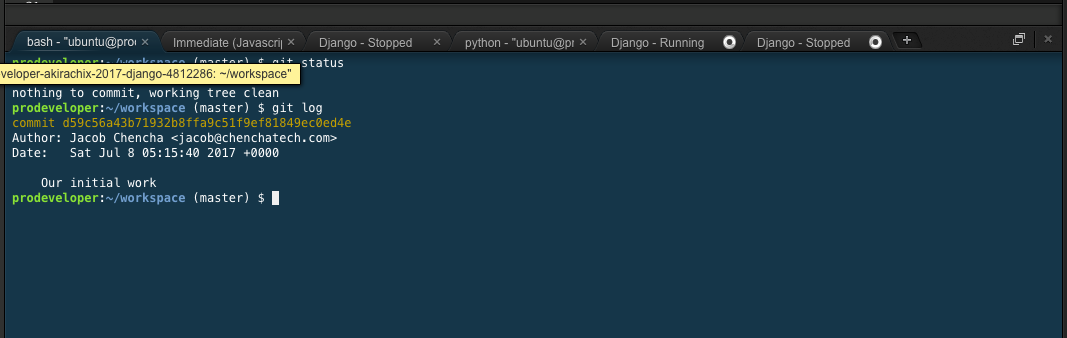
You note that our files are now committed. Running git log shows the snapshot has been captured by git.
Git is now keeping track of our changes. This happens because it keeps a folder in your repo with the different snapshots.
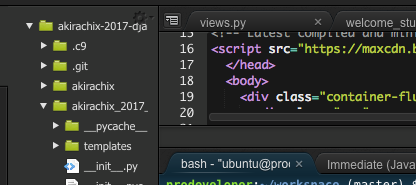
The folder is simply called .git
While quite helpful, we may need to share our project with others or even just protect it just incase c9 or whatever development machine you are using goes down.
This is where GitHub comes in. By using GitHub we can ensure a remote copy of project is kept at all times.
To tell git how to get to GitHub repo. You add the origin. The command is usually already provided on our started page

So you now run the command that was shown on YOUR start page.
I must repeat this
RUN THE COMMAND AS IT WAS SHOWN ON YOUR GITHUB START PAGE NOT AS SHOWN ON THIS IMAGE

You can now push the repo up. This basically means you synchronize your local git with GitHub .
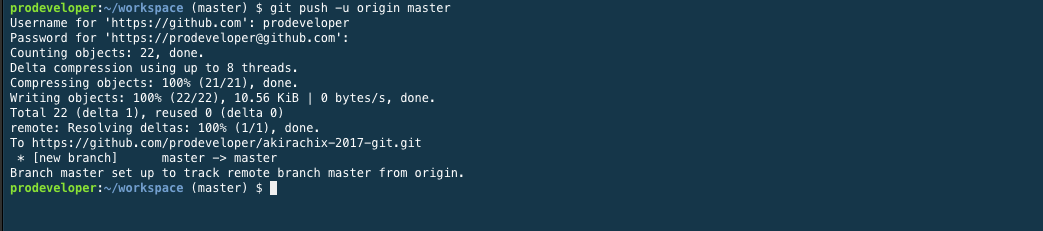
Git will now ask you for your GitHub username and password before pushing the changes.
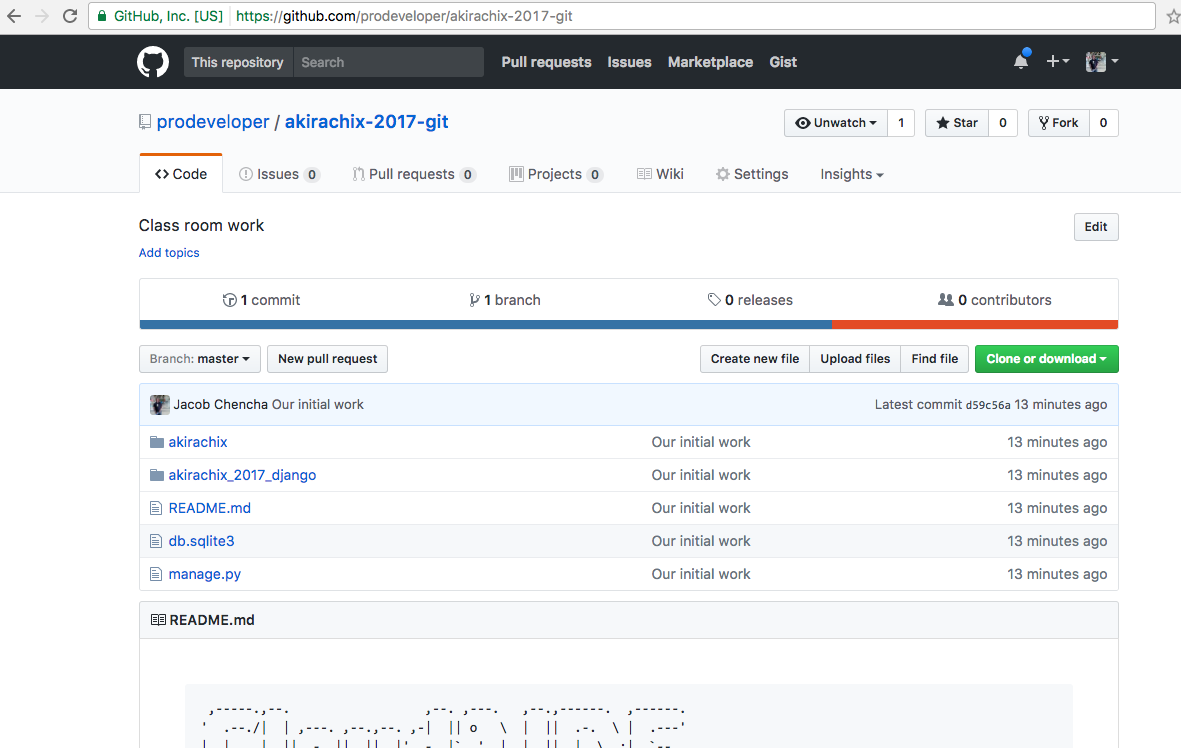
If you now refresh your GitHub page, you note it has all your project files.
From now on whenever you make a change to your codebase. Ensure to commit it by running through the simple process of:
- git add
- git commit
- git push
Run through the process described above to put all your code into GitHub.
- https://www.youtube.com/watch?v=8KCQe9Pm1kg
- https://www.codecademy.com/learn/learn-git
- http://blog.chenchatech.com/2015/07/six-files-to-include-in-your-next-project/
- https://scotch.io/bar-talk/git-cheat-sheet
- http://gitready.com/beginner/2009/01/18/the-staging-area.html
- https://chris.beams.io/posts/git-commit/