IIT Kharagpur once had one of the largest DC (Direct Connect) networks in India1. It lost its glory when the pandemic hit and everything went online. This is an effort to restore that glory, by educating students about "How can one connect to the DC Hub properly". Following is the structure of this documentation for a quick overview and easy navigation.
- Installing the client
- Configuring the client
- How to share content
- How to download content
- Some common issues
- Installing mono fonts
The IITKGP DC Hub is a private hub and inaccessible from outside the IIT Kharagpur network. Users connect to hubs using DC clients and can share files at high speeds. The most popular hub is HiT Hi FiT Hai.
There are various DC clients available for different platforms. To name a few, we have
| Platforns | Client(s) |
|---|---|
| Windows | EiskaltDC++, DC++ |
| Linux | EiskaltDC++, LinuxDC++, ncdc |
| MacOS | EiskaltDC++, Shakespeer, ncdc |
However, it is recommended to use Eiskalt DC++ for uniformity across different platforms.
To install EiskaltDC++ on your platform of interest refer to the following links:
Download Eiskalt DC++.
Go through the basic installation setup and install it.
Install Eiskalt DC++ on debian based distros like - ubuntu, linux mint etc using the following command
sudo apt install eiskaltdcppNote If you are not on a Debian-based distro, search for the package name using the package manager your distro uses and install it.
-
Install Homebrew - skip this step if already present.
-
To check whether it is installed or not, use the following command
command -v brew -
If the output is like the following, then brew is installed!
~> command -v brew
/opt/homebrew/bin/brew
-
-
Install Eiskalt DC++ using the following command
brew install eiskaltdcpp
-
Open Eiskalt DC++ & press the following keyboard shortcut to open its preferences window according to your platform
Platform Shortcut Windows ctrl + oLinux ctrl + oMacOS cmd + , -
Set a
Nickaka username for your current instance.

Note The Nick must be unique.
-
Now Goto:
Connection>Advanced>TLS settingsand chooseAllow TLS.

-
To render the welcome message aka
Message of The Dayproperly you need to set a mono font for the client GUI.
To do so Goto:GUI>Fonts, then select any mono font available on your system.
You will need to double-click on the fonts to change them.

Note If you don't have any
monofont installed on your system then refer to the section Installing mono fonts for installing one, based on your platform -
Now click
Ok. -
Press the following key combination for the quick connect dialog box, according to your platform.
Platform Shortcut Windows ctrl+nLinux ctrl+nMacOS cmd+nEnter the current IP for DC++. At the time of writing this blog, it is
10.105.12.22. PressOk.

Note Refer to this page for official updates on the Hub IP and MetaHub as a whole.
-
You should now be connected to the hub and if the fonts are set properly you should see something like this.

(Just focus on the Prompts and that you are connected, exact GUI of yours will be different since I customized mine to not to bleed my eyes)
It's not enough to just download content - to bring back the DC culture - everyone is encouraged to share their collection as well.
To share folder(s) follow the following steps:
Warning It is a must to mirror whatever you download, so you at least have to share the folder in which you download content from the HUB.
-
Open Eiskalt DC++ & press the following keyboard shortcut to open its preferences window according to your platform
Platform Shortcut Windows ctrl + oLinux ctrl + oMacOS cmd + , -
Now navigate to:
Sharing>Basicand toggle off theView share in simple mode.
-
Now select the folder(s) you want to share. Keep the following things in mind:
- You will need to click on
down arrowsto expand folders. - You might need to increase the width of the Name column to be able to see the names of the folders.
- You will need to click on
-
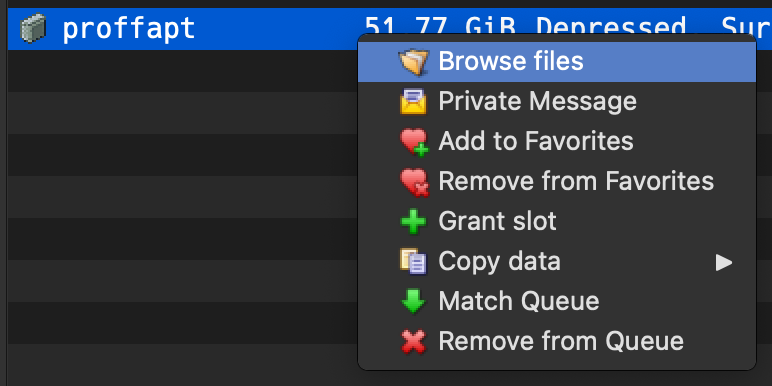
Right-clickon the user you want to browse files of, and selectBrowse Files.
-
Now you will be taken to the file explorer for the user's shared directory. Use the
Down Arrowto expand the folders of your interest. -
Now
Right clickon the file you want to download and selectDownloadorDownload to(for a list of frequently used folders to download).

-
Now enjoy tremendously fast download speed and the file will be downloaded.
Note Don't forget to mirror the content you download.
-
You are connected to the hub and can also see the list of all connected users but when you try to browse the files for any user it keeps on connecting and finally, nothing happens. This might be a result of multiple configurational and system issues. To fix them you are recommended to follow the below practices:
- Allow all incoming connections for the client through your firewall - recommended for all platforms.
- Always use the client in
Active mode.
To do so, Goto:Preferences>Connection>Connectionthen selectActive Modeand restart the client.

- Make sure you meet the minimum sharing requirement to be able to browse and download content from other users.
Refer to the rules for the exact number. At the time of writing this documentation, the rules are:

-
Nick was already taken by another user, even if your nick was unique.

This happens when the connection with the hub is dropped abruptly. It can be due to multiple reasons:
- Network was turned off abruptly.
- Network was changed abruptly.
Due to this, the connection packets remain alive and it appears to the hub that you are still connected, i.e., your previous connection wasn't closed properly.
FIX:The only way to fix it is to wait for at max 15 minutes so that the packets expire automatically and then you can connect to the hub normally. Usually, they expire quite early but sometimes might take time so better have a walk outside your room, get some fresh air then try to connect to the hub again.
This is completely an optional step based on personal preference. If you want to render the ASCII art for METAHUB to be rendered properly you will need a mono font.
However there are many options available, for the sake of documenting the exact process, we will be installing hack-nerd-font which comes with a mono version of itself. To install it on your system of preference refer to the links below
-
Download a Nerd Font - recommended Hack Nerd Font.
-
Extract the downloaded zip file.
-
To install all of them simultaneously, you first need to select them all. To do so, click the first font on the list, hold the
Shiftkey, and click the last font. You can also drag to select them if you want. As long as they’re all selected, it doesn’t matter how you do it. It should look like this.:

-
Next,
right-clickon the name of any of the font files. If you have multiple user accounts on your PC, you might want to clickInstall for All Users. Otherwise, just clickInstall.

-
If you already installed some of the fonts, you’ll get a popup warning you about it. Click
Yesand let it proceed.
-
Another window will indicate the progress of the installation. Once it disappears, your fonts are installed and ready for use.
- Download a Nerd Font - recommended Hack Nerd Font.
- Unzip and copy to
~/.fonts. - Run the following command to manually rebuild the font cache.
fc-cache -fv
- Install Homebrew if not already installed.
- Use the following command to install the
hack-nerd-fontbrew install font-hack-nerd-font
- Arpit Bhardwaj (@proffapt)
Created with lots of </> and ♥
Footnotes
-
Which campus has the highest total share and users on DC++ in India?. Quora. Retrieved May 1, 2015. ↩