This guide assumes that you already have an angular application set up by ng create and are using Angular CLI for
compilation.
Other guides that I've read rely upon re-writing your environments/environment.ts|environment.prod.ts files
with each compilation. I find this to be completely unnecessary when angular's internal use of webpack can just
be extended to include environment variables.
$ npm i -D @angular-builders/custom-webpackI use dotenv to load .env file variables on my development machine. It is not required to install, but is useful while developing locally.
$ npm i -D dotenvFor example, create a file custom-webpack.config.js in the root of your project.
After creating the custom webpack file, add the following contents (or more) to the file.
const { EnvironmentPlugin } = require('webpack');
// Add additional requirements here

// If you're using dotenv
require('dotenv').config()

// Export a configuration object
// See [Wepack's documentation](https://webpack.js.org/configuration/) for additional ideas of how to
// customize your build beyond what Angular provides.
module.exports = {
  plugins: [
    new EnvironmentPlugin([
      // Insert the keys to your environment variables here.
      // Eg: APP_API_ENDPOINT="http://localhost:3000/api/v1"
      APP_API_ENDPOINT
    ])
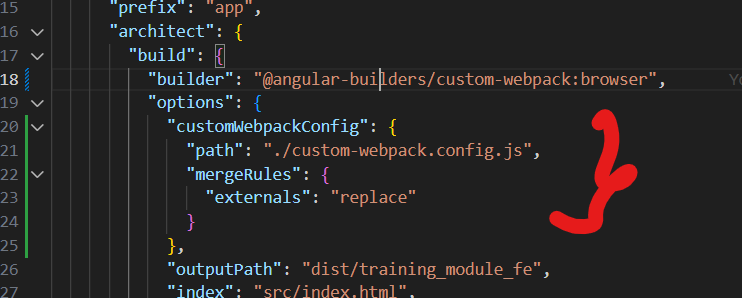
}In the fileangular.json, find the key projects.${YOUR PROJECT NAME}.architect.build and change it to:
...
"architect": {
  ...
  "build": {
    "builder: "@angular-builders/custom-webpack:browser",
    "options: {
      "path": "./custom-webpack.config.js",
      "replaceDuplicatePlugins": true
    }
    ...
  }
  ...
}
...If you're using ng serve in developemnt, you may wish to also install the custom development server.
$ npm i -D @angular-builders/dev-serverAnd in your angular.json file, replace the dev server invocation to:
...
"architect": {
  ...
  "serve": {
    "builder": "@angular-builders/dev-server:dev-server",
    ...
  }
  ...
}
...Perform the same steps as you'd use normally for the webpack EnvironmentPlugin.
Eg:
@Injectable()
export class ApiService {
  private readonly api = process.env.APP_API_ENDPOINT;

  constructor(private http: HttpClient) {  }

  public get(loc: string): Observable<any> {
    return this.http.get(api + loc);
  }
}
For the recent version of webpack you need to adjust the config like so:
