- Table of contents
- Ubuntu 20 installation
- ROS 2 Installation
- ROS2 workspace
- Simulation preparation
- Navigation preparation
- Recompilation
- Workflow tips
- download Ubuntu 20
.isoimage and prepare a startup image in your USB flash drive (at least 4 GB USB stick is required) - install the system
Note that instruction is based on official ROS documentation page and covers installation of ROS2 Foxy via Debian Packages on Ubuntu 20 machine. For those who may be interested, there is a Windows installation instruction available (not recommended though).
More extensive explanations of what each command posted below does can be found in the provided ROS documentation page.
sudo apt update && sudo apt install locales
sudo locale-gen en_US en_US.UTF-8
sudo update-locale LC_ALL=en_US.UTF-8 LANG=en_US.UTF-8
export LANG=en_US.UTF-8sudo apt update && sudo apt install curl gnupg2 lsb-release
sudo curl -sSL https://raw.githubusercontent.com/ros/rosdistro/master/ros.key -o /usr/share/keyrings/ros-archive-keyring.gpg
echo "deb [arch=$(dpkg --print-architecture) signed-by=/usr/share/keyrings/ros-archive-keyring.gpg] http://packages.ros.org/ros2/ubuntu $(lsb_release -cs) main" | sudo tee /etc/apt/sources.list.d/ros2.list > /dev/nullsudo apt update
sudo apt install ros-foxy-desktopsource /opt/ros/foxy/setup.bashTo test ROS2 operation run the Hello World system which consists of 2 nodes:
- talker (periodically increments a variable and publishes it to ROS2 topic, printing current status to the console),
- listener (subscribes to the topic, which talker publishes to, and prints received data to the console).
To run the 2 node system described above:
- in the first terminal tab run (don't forget to
source)
source /opt/ros/foxy/setup.bash
ros2 run demo_nodes_cpp talker- in another terminal tab run (don't forget to
source)
source /opt/ros/foxy/setup.bash
ros2 run demo_nodes_py listener
You should expect such logs appearing in the first console:
[INFO] [1625439732.222359294] [talker]: Publishing: 'Hello World: 38'
[INFO] [1625439733.222337534] [talker]: Publishing: 'Hello World: 39'
[INFO] [1625439734.222325740] [talker]: Publishing: 'Hello World: 40'
[INFO] [1625439735.222347314] [talker]: Publishing: 'Hello World: 41'
[INFO] [1625439736.222288798] [talker]: Publishing: 'Hello World: 42'
[INFO] [1625439737.222288015] [talker]: Publishing: 'Hello World: 43'
[INFO] [1625439738.222274067] [talker]: Publishing: 'Hello World: 44'
[INFO] [1625439739.222292692] [talker]: Publishing: 'Hello World: 45'
[INFO] [1625439740.222292784] [talker]: Publishing: 'Hello World: 46'
[INFO] [1625439741.222299658] [talker]: Publishing: 'Hello World: 47'
and such, appearing in the second console:
[INFO] [1625439732.237532966] [listener]: I heard: [Hello World: 38]
[INFO] [1625439733.224391692] [listener]: I heard: [Hello World: 39]
[INFO] [1625439734.224322398] [listener]: I heard: [Hello World: 40]
[INFO] [1625439735.224084591] [listener]: I heard: [Hello World: 41]
[INFO] [1625439736.224072430] [listener]: I heard: [Hello World: 42]
[INFO] [1625439737.224747653] [listener]: I heard: [Hello World: 43]
[INFO] [1625439738.224068149] [listener]: I heard: [Hello World: 44]
[INFO] [1625439739.224729282] [listener]: I heard: [Hello World: 45]
[INFO] [1625439740.224463957] [listener]: I heard: [Hello World: 46]
[INFO] [1625439741.224478478] [listener]: I heard: [Hello World: 47]
We will create a ROS2 workspaces directory in the home directory and tiago workspace (tiago_ws) will be one of them. What's more, create src folder - all source files of our packages will be stored here:
mkdir -p ~/ros2_workspace/tiago_ws/srcDownload .rosinstall file that contains references to packages needed to run TiAGo simulation. To do so, tiago_tutorials Git repository must be cloned (in particular foxy-devel branch):
git clone -b foxy-devel https://github.com/pal-robotics/tiago_tutorials.git ~/ros2_workspace/tiago_ws/src/tiago_tutorialsPrepare SSH key for GitHub authentication and easy packages acquisition. Follow steps, according to the tutorial:
-
Check for existing SSH keys, if there aren't any - generate one (note that you don't need to pay attention to legacy systems).
-
View your SSH key, so you can copy that into your GitHub account settings. If you used default location while generating the key, running text editor for this purpose will look like that:
gedit ~/.ssh/id_ed25519.pub -
Log in to GitHub and go to SSH and GPG keys, click
New SSH key, put sometitleand paste the key (from the*.pubfile) to the provided field in the page. ClickAdd SSH key. The key will start withsshand end with your email address.Optional: if you don't want to create a SSH key for GitHub - you must change all links in the
.rosinstallfile (if one is mentioned in installation instruction) to HTTPS form (unfoldCodebutton in the main page of the GitHub repository to get HTTPS or SSH link). Although, using SSH key is more convenient and recommended.
Gazebo simulation (which is PAL's first choice) is currently still unstable. At the moment, best option to simulate TIAGo with ROS2 interface is Webots.
Links posted below redirect to instructions related to both simulators.
Install colcon based on this instruction:
sudo sh -c 'echo "deb [arch=amd64,arm64] http://repo.ros2.org/ubuntu/main `lsb_release -cs` main" > /etc/apt/sources.list.d/ros2-latest.list'
curl -s https://raw.githubusercontent.com/ros/rosdistro/master/ros.asc | sudo apt-key add -
sudo apt update
sudo apt install python3-colcon-common-extensions
sudo apt install python3-vcstoolInstall nav2 packages:
source /opt/ros/foxy/setup.bash
sudo apt install ros-$ROS_DISTRO-nav2-amcl ros-$ROS_DISTRO-nav2-dwb-controller ros-$ROS_DISTRO-nav2-gazebo-spawner ros-$ROS_DISTRO-nav2-regulated-pure-pursuit-controller ros-$ROS_DISTRO-nav2-behavior-tree ros-$ROS_DISTRO-nav2-lifecycle-manager ros-$ROS_DISTRO-nav2-rviz-plugins ros-$ROS_DISTRO-nav2-bringup ros-$ROS_DISTRO-nav2-map-server ros-$ROS_DISTRO-nav2-bt-navigator ros-$ROS_DISTRO-nav2-system-tests ros-$ROS_DISTRO-nav2-msgs ros-$ROS_DISTRO-nav2-common ros-$ROS_DISTRO-nav2-util ros-$ROS_DISTRO-nav2-controller ros-$ROS_DISTRO-nav2-navfn-planner ros-$ROS_DISTRO-nav2-voxel-grid ros-$ROS_DISTRO-nav2-core ros-$ROS_DISTRO-nav2-planner ros-$ROS_DISTRO-nav2-costmap-2d ros-$ROS_DISTRO-nav2-waypoint-follower ros-$ROS_DISTRO-nav2-recoveriesIf you are ready to build the workspace for the first time, then run:
source /opt/ros/foxy/setup.bash
cd ~/ros2_workspace/tiago_ws
colcon build --symlink-install
source ~/ros2_workspace/tiago_ws/install/setup.bash
Note that re-sourcing opt here is required due to packages previously installed with apt install.
If you apply some changes to the source files from your workspace,
colcon build --symlink-installmust be called.
-
Note that you should always call it while being in the workspace main directory, i.e.,
~/ros2_workspace/tiago_wsin this example. -
Note that if you added a new package to the workspace, then after bulding you should
sourceworkspace'ssetup.bash, so the newly compiled package can be used:source ~/ros2_workspace/tiago_ws/install/setup.bash
-
Note that you should
buildwith--symlink-installto create symbolic links between yoursrcandinstalldirectories. Links allow you not to re-buildworkspace each time you change Python script or parameter files. Of course, changes in C++-related source files require re-building. -
Note that calling
source ~/ros2_workspace/tiago_ws/install/setup.bash
in a fresh terminal, "sources"
/opt/ros/$ROS_DISTRO/setup.bashtoo.
This section will cover some helpful tools and hints that will speed up your development work.
When it comes to code editing, Visual Studio Code is a recommended way to start.
Download from here, simply save the file instead of default Open with. Open a terminal window and change directory to the place, where .deb file was saved, for example:
cd ~/DownloadsThen, install .deb file with Debian Package Management System (dpkg), for example (note that version may differ):
sudo dpkg -i code_1.57.1-1623937013_amd64.debNow, Visual Studio Code can be launched from terminal with code command or via search in Activities (typing code should be sufficient).
Useful extensions:
- C/C++ (ID: ms-vscode.cpptools)
- C++ Intellisense (ID: austin.code-gnu-global)
- CMake (ID: twxs.cmake)
- CMake Tools (ID: ms-vscode.cmake-tools)
- ROS (ID: ms-iot.vscode-ros)
- Git Graph (ID: mhutchie.git-graph)
- GitLens — Git supercharged (ID: eamodio.gitlens)
- Trailing Spaces (ID: shardulm94.trailing-spaces)
- Todo Tree (ID: gruntfuggly.todo-tree)
A VS code ROS2 workspace template can be found at athackst/vscode_ros2_workspace.
Sublime Text is a popular lightweight text editor.
curl -fsSL https://download.sublimetext.com/sublimehq-pub.gpg | sudo apt-key add -
sudo add-apt-repository "deb https://download.sublimetext.com/ apt/stable/"
sudo apt install sublime-text- Currently, in ROS2, if you try to run ROS-related command like
ros2 run, but you forget tosourcesetup.bashfile in the current terminal, you must source ROS2 distro'ssetup.bashand then your workspace'ssetup.bash, like that:
source /opt/ros/foxy/setup.bash
source ~/ros2_workspace/tiago_ws/install/setup.bash-
If a package located in a workspace contains
COLCON_IGNOREempty file in the main directory, then it will be ommited during compilation process. -
Append your
~/.bashrcfile with:
export RCUTILS_COLORIZED_OUTPUT=1 # 0 to disableto simply see colorized log output, see details. The file can be opened via call:
gedit ~/.bashrcand the line specified above should be placed at the very end.
- Non-linux people might find these shortcuts useful:
CTRL+Ccloses current process run in terminalCTRL+Rin terminal allows to call command from a terminal historyCTRL+Shift+Vpastes copied phrase into terminalTAB-TAB-> autocompletion in terminal
- Additional resources:
Webots
TIAGo in
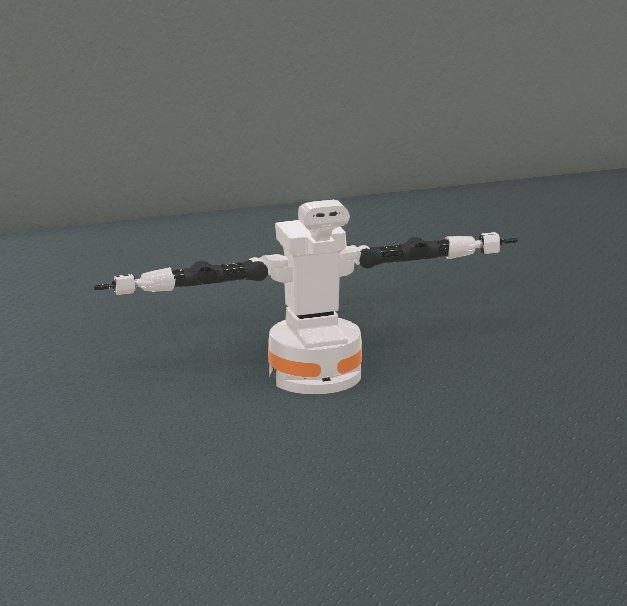
tiago++_exampleworld