Created
December 13, 2023 20:21
-
-
Save rrennick/a602f5c719f9a25c48ac41c8271bfd88 to your computer and use it in GitHub Desktop.
Unicode characters in woocommerce/docs folder
This file contains bidirectional Unicode text that may be interpreted or compiled differently than what appears below. To review, open the file in an editor that reveals hidden Unicode characters.
Learn more about bidirectional Unicode characters
| .//reporting/extending-woocommerce-admin-reports.md | |
| 298:🎉 We can now view our Orders Report and see the currency reflected in monetary values throughout the report. | |
| .//reporting/README.md | |
| 7:> ⚠️ **Notice:** This documentation is currently a **work in progress**. While it's open to the public for transparency and collaboration, please be aware that some sections might be incomplete or subject to change. We appreciate your patience and welcome any contributions! | |
| .//payments/payment-gateway-plugin-base.md | |
| 5:This code can be used as a base to create your own simple custom payment gateway for WooCommerce. If not used in a custom plugin, you need to add this code to your child theme’s functions.php file or via a plugin that allows custom functions to be added, such as the [Code snippets](https://wordpress.org/plugins/code-snippets/) plugin. Please don’t add custom code directly to your parent theme’s functions.php file as this will be wiped entirely when you update the theme. | |
| 17: Copyright: © 2009-2011 WooThemes. | |
| .//payments/payment-token-api.md | |
| .//payments/payment-gateway-api.md | |
| 5:Payment gateways in WooCommerce are class based and can be added through traditional plugins. This guide provides an intro to gateway development. | |
| 7:**Note:** We are unable to provide support for customizations under our **[Support Policy](https://woo.com/support-policy/)**. If you need to further customize a snippet, or extend its functionality, we highly recommend [**Codeable**](https://codeable.io/?ref=z4Hnp), or a [**Certified WooExpert**](https://woo.com/experts/). | |
| 13:1. **Form based** – This is where the user must click a button on a form that then redirects them to the payment processor on the gateway’s own website. _Example_: PayPal standard, Authorize.net DPM | |
| 14:2. **iFrame based** – This is when the gateway payment system is loaded inside an iframe on your store. _Example_: SagePay Form, PayPal Advanced | |
| 15:3. **Direct** – This is when the payment fields are shown directly on the checkout page and the payment is made when ‘place order’ is pressed. _Example_: PayPal Pro, Authorize.net AIM | |
| 16:4. **Offline** – No online payment is made. _Example_: Cheque, Bank Transfer | |
| 24:**Note:** We are unable to provide support for customizations under our [Support Policy](https://woo.com/support-policy/). If you are unfamiliar with code/templates and resolving potential conflicts, select a [WooExpert or Developer](https://woo.com/customizations/) for assistance. | |
| 26:**Note:** The instructions below are for the default Checkout page. If you’re looking to add a custom payment method for the new Checkout block, check out [this documentation.](https://github.com/woocommerce/woocommerce-blocks/blob/trunk/docs/third-party-developers/extensibility/checkout-payment-methods/payment-method-integration.md) | |
| 28:Payment gateways should be created as additional plugins that hook into WooCommerce. Inside the plugin, you need to create a class after plugins are loaded. Example: | |
| 44:As well as defining your class, you need to also tell WooCommerce (WC) that it exists. Do this by filtering _woocommerce_payment_gateways_: | |
| 59:Most methods are inherited from the WC_Payment_Gateway class, but some are required in your custom gateway. | |
| 65:- `$this->id` – Unique ID for your gateway, e.g., ‘your_gateway’ | |
| 66:- `$this->icon` – If you want to show an image next to the gateway’s name on the frontend, enter a URL to an image. | |
| 67:- `$this->has_fields` – Bool. Can be set to true if you want payment fields to show on the checkout (if doing a direct integration). | |
| 68:- `$this->method_title` – Title of the payment method shown on the admin page. | |
| 69:- `$this->method_description` – Description for the payment method shown on the admin page. | |
| 78:We’ll cover `init_form_fields()` later, but this basically defines your settings that are then loaded with `init_settings()`. | |
| 94:Use this method to set `$this->form_fields` – these are options you’ll show in admin on your gateway settings page and make use of the [WC Settings API](https://woo.com/document/settings-api/ "https://woo.com/document/settings-api/"). | |
| 123:Now for the most important part of the gateway — handling payment and processing the order. Process_payment also tells WC where to redirect the user, and this is done with a returned array. | |
| 169:Stock levels are updated via actions (`woocommerce_payment_complete` and in transitions between order statuses), so it’s no longer needed to manually call the methods reducing stock levels while processing the payment. | |
| 194:If you are creating an advanced, direct gateway (i.e., one that takes payment on the actual checkout page), there are additional steps involved. First, you need to set has_fields to true in the gateway constructor: | |
| 200:This tells the checkout to output a ‘payment_box’ containing your direct payment form that you define next. | |
| 202:Create a method called `payment_fields()` – this contains your form, most likely to have credit card details. | |
| 204:The next but optional method to add is `validate_fields()`. Return true if the form passes validation or false if it fails. You can use the `wc_add_notice()` function if you want to add an error and display it to the user. | |
| 206:Finally, you need to add payment code inside your `process_payment( $order_id )` method. This takes the posted form data and attempts payment directly via the payment provider. | |
| 232:If you are building a gateway that makes a callback to your store to tell you about the status of an order, you need to add code to handle this inside your gateway. | |
| 234:The best way to add a callback and callback handler is to use WC-API hooks. An example would be as PayPal Standard does. It sets the callback/IPN URL as: | |
| 248:For more information, see [WC_API — The WooCommerce API Callback](https://woo.com/document/wc_api-the-woocommerce-api-callback/). | |
| 252:It’s important to note that adding hooks inside gateway classes may not trigger. Gateways are only loaded when needed, such as during checkout and on the settings page in admin. | |
| .//wc-cli/overview.md | |
| 162:Updating or creating some fields will require passing JSON. These are fields that contain arrays of information — for example, setting [https://woocommerce.github.io/woocommerce-rest-api-docs/#customer-properties](billing information) using the customer command. This is just passing key/value pairs. | |
| .//localization-translation/translating-woocommerce.md | |
| 5:WooCommerce is already translated into several languages and is translation-ready right out of the box. All that’s needed is a translation file for your language. | |
| 15:1. Go to `WP Admin » Settings » General` and adjust the `Site Language`. | |
| 16:2. Go to `WP Admin » Dashboard » Updates` and click the `Update Translations` button. | |
| 28:If you’re new to translating, check out the [translators handbook](https://make.wordpress.org/polyglots/handbook/tools/glotpress-translate-wordpress-org/) to get started. | |
| 72:6. Update your `.po` file by opening it and then go to `Catalog » Update from POT file`. | |
| 129:1. Go to `WooCommerce » Settings » Shipping » Shipping Zones`. | |
| 137:1. Go to `WooCommerce » Settings » Payments`. | |
| 145:1. Go to `WooCommerce » Settings » Accounts & Privacy`. | |
| 150:Navigate back to the Checkout page – translations should be reflected there. | |
| 152:### I have translated the strings I needed, but some of them don’t show up translated on the front end. Why? | |
| 154:If some of your translated strings don’t show up as expected on your WooCommerce site, the first thing to check is if these strings have both a Single and Plural form in the Source text section. To do so, open the corresponding translation on [https://translate.wordpress.org/projects/wp-plugins/woocommerce/](https://translate.wordpress.org/projects/wp-plugins/woocommerce/), e.g. [the translation for Product and Products](https://translate.wordpress.org/projects/wp-plugins/woocommerce/stable/de/default/?filters%5Bstatus%5D=either&filters%5Boriginal_id%5D=577764&filters%5Btranslation_id%5D=24210880). | |
| .//security/security-best-practices.md | |
| 20:## Step 1 — Keep WordPress, WooCommerce, and plugins up to date | |
| 27:## Step 2 — Choose secure plugins and themes | |
| 35:## Step 3 — Implement secure coding practices | |
| 44:## Step 4 — Harden WordPress security | |
| 54:## Step 5 — Secure user data | |
| 62:## Step 6 — Implement a security plugin | |
| 69:## Step 7 — Regularly monitor and audit your store's security | |
| 77:## Step 8 — Create regular backups | |
| .//security/reporting-security-issues.md | |
| 7:You can find our security policy [over here](https://github.com/woocommerce/woocommerce/security/policy) and, if you believe you have discovered a vulnerability, we encourage you to follow it and submit your findings via [HackerOne](https://hackerone.com/automattic?type=team)—a trusted third party service that facilitates reporting of security issues. Please refer to the policy for more details, however some key points are as follows: | |
| .//security/README.md | |
| 7:> ⚠️ **Notice:** This documentation is currently a **work in progress**. While it's open to the public for transparency and collaboration, please be aware that some sections might be incomplete or subject to change. We appreciate your patience and welcome any contributions! | |
| .//contributing/api-critical-flows.md | |
| 12:## Products 🛒 | |
| 25:## Orders 📃 | |
| 35:| Orders | Can add new Order complex – multiple product types & tax classes | `/wp-json/wc/v3/orders` | `tests/api-core-tests/tests/orders/order-complex.test.js` | | |
| 37:## Refunds 💸 | |
| 43:## Coupons 🤑 | |
| 52:## Shipping 🚚 | |
| .//contributing/common-issues.md | |
| 44: Store owner can complete onboarding wizard › can complete the product types section | |
| .//contributing/deprecation-in-core.md | |
| 16:Whilst deprecation notices are not ideal or attractive, they are just _warnings_ — not errors. | |
| 28:The function or method itself is not removed from the codebase. This preserves backwards compatibility until removed — usually over a year or several major releases into the future. | |
| 30:We mentioned `wc_deprecated_function` above – this is our own wrapper for the `_deprecated_function` WordPress function. It works very similar except for that it forces a log entry instead of displaying it — regardless of the value of `WP_DEBUG` during AJAX events — so that AJAX requests are not broken by the notice. | |
| 44:### Warnings in production (store owners — read this!) | |
| .//contributing/deciding-pr-high-impact.md | |
| 15:- Updates **SQL queries**. | |
| 27:- It only contains readme or changelog changes. | |
| 29:- Doesn’t need to be verified in multiple environment types. | |
| .//data-management/crud-objects.md | |
| 5:CRUD is an abbreviation of the four basic operations you can do to a database or resource – Create, Read, Update, Delete. | |
| 13:* Structure – Each object has a pre-defined structure and keeps its own data valid. | |
| 14:* Control – We control the flow of data, and any validation needed, so we know when changes occur. | |
| 15:* Ease of development – As a developer, you don’t need to know the internals of the data you’re working with, just the names. | |
| 16:* Abstraction – The data can be moved elsewhere, e.g. custom tables, without affecting existing code. | |
| 17:* Unification – We can use the same code for updating things in admin as we do in the REST API and CLIs. Everything is unified. | |
| 18:* Simplified code – Less procedural code to update objects which reduces likelihood of malfunction and adds more unit test coverage. | |
| 22:The [`WC_Data`](https://github.com/woocommerce/woocommerce/blob/trunk/plugins/woocommerce/includes/abstracts/abstract-wc-data.php) class is the basic implementation for CRUD objects, and all CRUD objects extend it. The most important properties to note are `$data`, which is an array of props supported in each object, and `$id`, which is the object’s ID. | |
| 130:Note how it sets the ID based on the data passed to the object, then calls the data store to retrieve the data from the database. Once the data is read via the data store, or if no ID is set, `$this->set_object_read( true );` is set so the data store and CRUD object knows it’s read. Once this is set, changes are tracked. | |
| .//high-performance-order-storage/README.md | |
| 7:[High-Performance Order Storage (HPOS)](https://developer.woo.com/2022/09/14/high-performance-order-storage-progress-report/) also previously known as “Custom Order Tables” is a solution that provides an easy-to-understand and solid database structure – specifically designed for eCommerce needs. It uses the WooCommerce CRUD design to store order data in custom tables – optimized for WooCommerce queries with minimal impact on the store’s performance. | |
| 9:In January 2022, we published the [initial plan for the Custom Order Tables feature](https://developer.woo.com/2022/01/17/the-plan-for-the-woocommerce-custom-order-table/) and since then, we’ve been working hard to bring the High-Performance Order Storage (HPOS) to WooCommerce Core. In May 2022, we invited you to [test the order migration process](https://developer.woo.com/2022/05/16/call-for-early-testing-custom-order-table-migrations/) and provide feedback on how our initial work performs on real stores of varied configurations. | |
| 13:## [What’s New with High-Performance Order Storage?](https://github.com/woocommerce/woocommerce/blob/trunk/docs/high-performance-order-storage/#section-1) | |
| 19:The rise in the number of customers and customer orders increases the load on your store’s database – making it difficult to handle customer order requests and deliver a seamless user experience. | |
| 21:With High-Performance Order Storage, you get dedicated tables for data like orders and order addresses and thus dedicated indexes which results in fewer read/write operations and fewer busy tables. This feature enables eCommerce stores of all shapes and sizes to scale their business to their maximum potential – without expert intervention. | |
| 25:High-Performance Order Storage makes implementing and restoring targeted data backup easier. You’ll no longer need to worry about losing orders, inventory numbers, or client information with reliable backup in these custom order tables. It’ll also facilitate implementing read/write locks and prevent race conditions. | |
| 37:However, High-Performance Order Storage introduces dedicated tables for data like orders and order addresses and thus dedicated indexes which results in fewer read/write operations and fewer busy tables. This feature enables eCommerce stores of all shapes and sizes to scale their business to their maximum potential – without expert intervention. | |
| 109:When the “**High-Performance Order Storage**” and “**Compatibility mode**” are enabled, WooCommerce populates the HPOS tables with data from posts & postmeta tables. The synchronization between the tables is [explained in detail in this document](https://developer.woo.com/2022/09/29/high-performance-order-storage-backward-compatibility-and-synchronization/#synchronization). | |
| 127:- If you select **“WordPress Post Tables”**, the system will save the order data within `_post` and `_postmeta` tables. The order tables are not utilized in this scenario. | |
| 131:- If you select **“High-Performance Order Storage”**, the system will save the order data within the new WooCommerce order tables | |
| 135:- If you select **“WordPress Post Tables”** and **“Enable compatibility mode”**, the system will sync the order data between the posts/postmeta and the WooCommerce order tables. | |
| 146:- You can click on “**View and manage**” to review the list of incompatible plugins | |
| 151:> **Note:** If you are using a third-party extension that isn’t working properly with High-Performance Order Storage then please notify the developers of the extension and ask them to update their extension to add support for HPOS. It’s up to the extension developers to add support for HPOS. We have [developer resources and documentation](https://developer.woo.com/2022/09/14/high-performance-order-storage-progress-report/) available to help with their integration efforts. | |
| 158:To do this, navigate to **WooCommerce ▸ Settings ▸ Advanced ▸ Features** and start by making sure that **compatibility mode** is enabled. If it was not already enabled, you may find you need to wait for some time while order data is synchronized across data-stores. | |
| 160: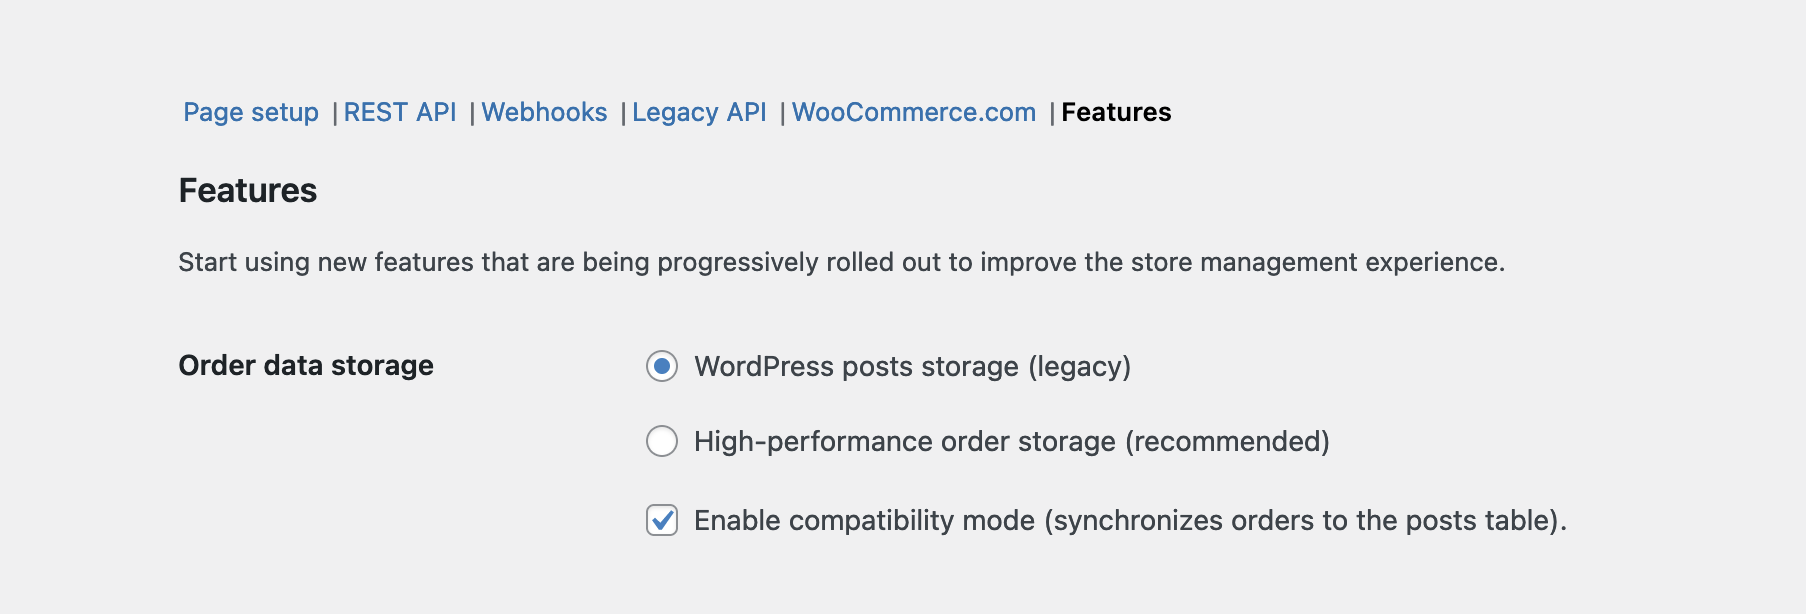 | |
| .//high-performance-order-storage/enable-hpos.md | |
| 5:From WooCommerce 8.2, released on October 2023, HPOS is enabled by default for new installations. Existing stores can switch to the “High-Performance Order Storage” from “WordPress Posts Storage” by following the below steps. | |
| 7:To activate High-Performance Order Storage, existing stores will first need to get both the posts and orders table in sync, which can be done by turning on the setting “**Enable compatibility mode (synchronizes orders to the posts table)**“. | |
| 10:2/ Turn on the **“Enable compatibility mode (synchronizes orders to the posts table)”** setting. | |
| 24:4/ After both tables are successfully synchronized, you’ll be able to select the option to switch to High-Performance Order Storage (HPOS). | |
| .//product-editor-development/README.md | |
| 5:> ⚠️ **Notice:** This documentation is currently a **work in progress**. Please be aware that some sections might be incomplete or subject to change. We appreciate your patience and welcome any contributions! | |
| .//product-editor-development/product-editor-extensibility-guidelines.md | |
| 5:> ⚠️ **Notice:** These guidelines are currently a **work in progress**. Please be aware that some details might be incomplete or subject to change. We appreciate your patience and welcome any contributions! | |
| 25: - … | |
| 29: - … | |
| 30: - … | |
| 35: - … | |
| 39: - … | |
| 40: - … | |
| 41: - … | |
| 43: … | |
| 49:The new product form consists of groups currently displayed as tabs. Each is a separate view and may contain any number of sections and subsections. All areas serve a specific purpose, allowing merchants to quickly find the information they’re looking for (both in default Woo features and extensions). | |
| 53:If a tab doesn’t contain any sections, it won’t be shown to merchants. | |
| 62:Custom product types manage the visibility of the default groups and add new ones. This is particularly useful if a custom product has a unique structure and requires extra information that isn’t included in the default groups. | |
| 70:To choose, put yourself in the merchant’s shoes: where would you go to find this feature? What is it related to? Adding your extension to a group of similar features will help make it easier for merchants to find your extension. | |
| 82:The identifier is a single piece of information that helps merchants describe and categorize the product across their store and other sales channels. It’s best suited to be added as a field in the Product catalog section in the Organization group. | |
| 104:✅ **What they *are* for:** | |
| 109:❌ **What they *aren’t* for:** | |
| 115:Field extensions should always be logically related to the form area they are in. For example, if you’re building a dropshipping extension, your warehouse selection field should live in the first section of the Inventory group. To ensure an excellent experience for our merchants, we do not recommend placing it in a separate group, section, or subsection. | |
| 129:✅ **What they *are* for:** | |
| 131:- Relevant features that can be crucial to merchants’ product creation flow | |
| 135:❌ **What they *aren’t* for:** | |
| 141:💡 **Example:** | |
| 143:If you’re developing an extension that allows merchants to upload 360 images or videos, you could add it as a field or a button in the Images section in the General tab. This way, merchants can create the perfect product gallery without jumping between multiple tabs. | |
| 157:✅ **What they *are* for:** | |
| 160:- Standalone features that don’t build off of anything else | |
| 163:❌ **What they *aren’t* for:** | |
| 169:💡 **Example:** | |
| 171:If you’re working on an extension that allows merchants to offer discounts based on the number of purchased items, you may consider adding a new section in the Pricing tab. This will give you enough space to present the information in a legible, easy-to-navigate manner. | |
| 183:Top bar extensions offer supplementary experiences **not vital** to the critical product creation flows. They’re secondary, meaning that they shouldn’t contain information that may impact the product’s overall quality or completeness. | |
| 185:Each top bar extension has its unique icon in the top navigation bar. Note that when the number of extensions exceeds 4, they’re truncated in a dropdown menu. | |
| 201:Dialogs can have different sizes (small, medium, large, or custom) and trigger locations (text or icon button anywhere in the form or in the form’s top bar). | |
| 203:✅ **What they *are* for:** | |
| 209:❌ **What they *aren’t* for:** | |
| 231: - Can be set up conditionally based on a custom field’s value | |
| 233:Custom product types include niche and specific use cases, such as bookings, tickets, gift cards, rentals, etc. Here’s when we suggest you should consider creating a custom product type: | |
| .//shipping/shipping-method-api.md | |
| 9:First off, create a regular WordPress/WooCommerce plugin – see our [Extension Developer Handbook](/docs/extension-development/extension-developer-handbook.md) to get started. You’ll define your shipping method class in this plugin file and maintain it outside of WooCommerce. | |
| 27:Create your class and place it inside the function you just created. Make sure it extends the shipping method class so that you have access to the API. You’ll see below we also init our shipping method options. | |
| 77:You can then define your options using the settings API. In the snippets above you’ll notice we init_form_fields and init_settings. These load up the settings API. To see how to add settings, see [WooCommerce settings API](https://woo.com/document/settings-api/). | |
| 81:`calculate_shipping()`` is a method which you use to add your rates – WooCommerce will call this when doing shipping calculations. Do your plugin specific calculations here and then add the rates via the API. How do you do that? Like so: | |
| 105:Your shipping method can pass as many rates as you want – just ensure that the id for each is different. The user will get to choose rate during checkout. | |
| .//README.md | |
| 5:> ⚠️ **Notice:** This documentation is currently a **work in progress**. While it's open to the public for transparency and collaboration, please be aware that some sections might be incomplete or subject to change. We appreciate your patience and welcome any contributions! | |
| .//utilities/configuring-caching-plugins.md | |
| 7:Oftentimes if using caching plugins they’ll already exclude these pages. Otherwise make sure you exclude the following pages from the cache through your caching systems respective settings. | |
| 17:If the caching system you’re using offers database caching, it might be helpful to exclude `_wc_session_` from being cached. This will be dependent on the plugin or host caching so refer to the specific instructions or docs for that system. | |
| 31:We’re unable to cover all options, but we have added some tips for the popular caching plugins. For more specific support, please reach out to the support team responsible for your caching integration. | |
| 35:Ensure you add ‘mfunc’ to the ‘Ignored comment stems’ option in the Minify settings. | |
| 39:WooCommerce is fully compatible with WP-Rocket. Please ensure that the following pages (Cart, Checkout, My Account) are not to be cached in the plugin’s settings. | |
| 45:WooCommerce is natively compatible with WP Super Cache. WooCommerce sends information to WP Super Cache so that it doesn’t cache the Cart, Checkout, or My Account pages by default. | |
| 98:This is due to the My Account page being cached, Some hosts with server-side caching don’t prevent my-account.php from being cached. | |
| 100:If you’re unable to reset your password and keep being returned to the login screen, please speak to your host to make sure this page is being excluded from their caching. | |
| .//getting-started/set-up-a-child-theme.md | |
| 12:Before we start it’s important that you understand what a child theme is. In short, a child theme is a layer that you put on top of the parent theme to make alterations without having to develop a new theme from scratch. There are two major reasons to use child themes: | |
| 21:Before customizing a website, you should always ensure that you have a backup of your site in case anything goes wrong. More info at: [Backing up WordPress content](https://woo.com/document/backup-wordpress-content/). | |
| 42:Next, we need to change the **Template** field to point to our installed WooTheme. In this example, we’ll use the Storefront theme, which is installed under `wp-content/themes/storefront/`. The result will look like this: | |
| 57:**Note:** With Storefront, you do not need to enqueue any of the parent theme style files with PHP from the theme’s `functions.php` file or `@import` these into the child themes `style.css` file as the main parent Storefront theme does this for you. | |
| 65:- **Through FTP.** If you’re using FTP, it means that you go directly to the folders of your website. That means you’ll need **FTP access** to your host, so you can upload the new child theme. If you don’t have this, you should talk to your host and they can give you your FTP login details, and then download an FTP program to upload your files. | |
| 68:Once you’ve done that, your child theme will be uploaded to a new folder in `wp-content/themes/`, for example, `wp-content/themes/storefront-child/`. Once uploaded, we can go to our **WP Dashboard > Appearance > Themes** and activate the child theme. | |
| 72:Your child theme is now ready to be modified. Currently, it doesn’t hold any customization, so let’s look at a couple of examples of how we can customize the child theme without touching the parent theme. | |
| 76:Let’s do an example together where we change the color of the site title. Add this to your `/storefront-child/style.css`: | |
| 88:**Note:** This doesn’t apply to Storefront child themes. Any customizations to a Storefront child theme’s files will be lost when updating. Instead of customizing the Storefront child theme’s files directly, we recommended that you add code snippets to a customization plugin. We’ve created one to do just this. Download [Theme Customizations](https://github.com/woocommerce/theme-customisations) for free. | |
| 90:But wait, there’s more! You can do the same with the template files (`*.php`) in the theme folder. For example if w, wanted to modify some code in the header, we need to copy header.php from our parent theme folder `wp-content/themes/storefront/header.php` to our child theme folder `wp-content/themes/storefront-child/header.php`. Once we have copied it to our child theme, we edit `header.php` and customize any code we want. The `header.php` in the child theme will be used instead of the parent theme’s `header.php`. | |
| 92:The same goes for WooCommerce templates. If you create a new folder in your child theme called “WooCommerce”, you can make changes to the WooCommerce templates there to make it more in line with the overall design of your website. More on WooCommerce’s template structure [can be found here](https://woo.com/document/template-structure/). | |
| 96:**NOTE**: The functions.php in your child theme should be **empty** and not include anything from the parent theme’s functions.php. | |
| 98:The `functions.php` in your child theme is loaded **before** the parent theme’s `functions.php`. If a function in the parent theme is **pluggable**, it allows you to copy a function from the parent theme into the child theme’s `functions.php` and have it replace the one in your parent theme. The only requirement is that the parent theme’s function is **pluggable**, which basically means it is wrapped in a conditional if statement e.g: | |
| 112:WordPress has a few things that it handles differently in child themes. If you have a template file in your child theme, you have to modify how WordPress includes files. `get_template_directory()` will reference the parent theme. To make it use the file in the child theme, you need to change use `get_stylesheet_directory();`. | |
| .//getting-started/woocommerce-endpoints.md | |
| 5:**Note:** We are unable to provide support for customizations under our **[Support Policy](https://woo.com/support-policy/)**. If you need to further customize a snippet, or extend its functionality, we highly recommend [**Codeable**](https://codeable.io/?ref=z4Hnp), or a [**Certified WooExpert**](https://woo.com/experts/). | |
| 9:For example: You may have a ‘my account’ page shown at URL **yoursite.com/my-account**. When the endpoint ‘edit-account’ is appended to this URL, making it ‘**yoursite.com/my-account/edit-account**‘ then the **Edit account page** is shown instead of the **My account page**. | |
| 19:- Pay page – `/order-pay/{ORDER_ID}` | |
| 20:- Order received (thanks) – `/order-received/` | |
| 21:- Add payment method – `/add-payment-method/` | |
| 22:- Delete payment method – `/delete-payment-method/` | |
| 23:- Set default payment method – `/set-default-payment-method/` | |
| 27:The following endpoints are used for account-related functionality and are appended to the URL of the /my-account page: | |
| 29:- Orders – `/orders/` | |
| 30:- View order – `/view-order/{ORDER_ID}` | |
| 31:- Downloads – `/downloads/` | |
| 32:- Edit account (and change password) – `/edit-account/` | |
| 33:- Addresses – `/edit-address/` | |
| 34:- Payment methods – `/payment-methods/` | |
| 35:- Lost password – `/lost-password/` | |
| 36:- Logout – `/customer-logout/` | |
| 40:The URL for each endpoint can be customized in **WooCommerce > Settings > Advanced** in the Page setup section. | |
| 54:Remember that some endpoints, such as view-order, require an order ID to work. In general, we don’t recommend adding these endpoints to your menus. These pages can instead be accessed via the my-account page. | |
| 60:`$order->get_checkout_payment_url( $on_checkout = false );` | |
| 72:- If you see a 404 error, go to **WordPress Admin** > **Settings > Permalinks** and Save. This ensures that rewrite rules for endpoints exist and are ready to be used. | |
| 77:On Windows servers, the **web.config** file may not be set correctly to allow for the endpoints to work correctly. In this case, clicking on endpoint links (e.g. /edit-account/ or /customer-logout/) may appear to do nothing except refresh the page. In order to resolve this, try simplifying the **web.config** file on your Windows server. Here’s a sample file configuration: | |
| 102:Landing on the wrong page when clicking an endpoint URL is typically caused by incorrect settings. For example, clicking ‘Edit address’ on your account page takes you to the Shop page instead of the edit address form means you selected the wrong page in settings. Confirm that your pages are correctly configured and that a different page is used for each section. | |
| 104:### How to Remove “Downloads” from My Account | |
| 106:Sometimes the “Downloads” endpoint on the “My account” page does not need to be displayed. This can be removed by going to **WooCommerce → Settings → Advanced → Account endpoints** and clearing the Downloads endpoint field. | |
| .//getting-started/developer-tools.md | |
| 23:This command-line tool lets you easily set up a local WordPress environment for building and testing plugins and themes. It’s simple to install and requires no configuration. | |
| 41:Use these resources to help take some of the heavy lifting off of fetching and transforming data –– as well as creating UI elements. | |
| 45:#### [WooCommerce REST API — JavaScript](https://www.npmjs.com/package/@woocommerce/woocommerce-rest-api) | |
| .//getting-started/README.md | |
| 7:> ⚠️ **Notice:** This documentation is currently a **work in progress**. While it's open to the public for transparency and collaboration, please be aware that some sections might be incomplete or subject to change. We appreciate your patience and welcome any contributions! | |
| .//getting-started/developer-resources.md | |
| 13:If you’re brand new to Woo, this guide will show you How to build an online store on WooCommerce. This is where you can learn the ins and outs of how WooCommerce works before you start developing. | |
| 56:The Store API provides public Rest API endpoints for the development of customer-facing cart, checkout, and product functionality. It follows many of the patterns used in the [WordPress REST API](https://developer.wordpress.org/rest-api/key-concepts/). | |
| 76:This is the official WooCommerce organization on GitHub. Here you’ll find the majority of development work that happens on open source projects that the WooCommerce team maintains. | |
| 84:This is the official WordPress organization on GitHub –– a go-to source for the development work that happens on open source projects that the WordPress community maintains. | |
| 92:All the resources you need for developing with WordPress. If you’re not familiar with the WordPress development ecosystem, this is a great place to start. | |
| .//user-experience/notices.md | |
| 7:Use notices primarily to provide user feedback in response to an action. Avoid using notices to communicate offers or announcements. Don’t apply brand colors, fonts, or illustrations to your notices. | |
| 9:If a post-activation notice is required, keep it within the WordPress plugin area—do not display it on the dashboard, or any other parts of the platform. | |
| 21:The placement of feedback is vital so the user notices it. For example, when validation messages are needed to prompt the user to enter data, get the user’s attention by displaying a message close to the inputs where data needs to be revised. | |
| 25:**Success** message: When the user performs an action that is executed successfully. | |
| 27:**Error Message**: When the user performs an action that could not be completed. (This can include validation messages.) When requiring the user to input data, make sure you verify whether each field meets the requirements, such as format, ranges, and if the field is required. Provide validation messages that are adjacent to each field so that the user can act on each in context. Avoid technical jargon. | |
| 29:**Warning Message**: When the user performs an action that may have completed successfully, but the user should review it and proceed with caution. | |
| 31:**Informational Message**: When it’s necessary to provide information before the user executes any action on the screen. Examples can be limitations within a time period or when a global setting limits actions on the current screen. | |
| .//user-experience/best-practices.md | |
| 7:**Plugin name should simply state the feature of the plugin and not use an existing core feature or extension in its’ title**. The plugin name should appear at all times in the UI as a functional and original name. e.g “Appointments” instead of “VendorXYZ Bookings Plugin for WooCommerce.” | |
| 11:**Be considerate of mobile for the merchant (and shopper-facing if applicable) experience**. Stores operate 24/7. Merchants shouldn’t be limited to checking their store on a desktop. Extensions need to be built responsively so they work on all device sizes. | |
| 13:**It’s all about the merchant**. Don’t distract with unrelated content. Keep the product experience front and center to help the user achieve the tasks they purchased your product for. | |
| 15:**Present a review request at the right time**. Presenting users with a request for review is a great way to get feedback on your extension. Think about best placement and timing to show these prompts. | |
| 19:- Avoid showing the user a review request upon first launching the extension. Once the user has had a chance to set up, connect, and use the plugin they’ll have a better idea of how to rate it. | |
| 20:- Try to present the review request at a time that’s least disruptive, such as after successful completion of a task or event. | |
| 22:**Don’t alter the core interface**. Don’t express your brand by changing the shape of containers in the Woo admin. | |
| 24:**Focus on the experience**. After the customer installs your product, the experience should be the primary focus. Keep things simple and guide the user to successful setup. Do not convolute the experience or distract the user with branding, self promotion, large banners, or anything obtrusive. | |
| 26:**Keep copy short and simple**. Limit instructions within the interface to 120-140 characters. Anything longer should be placed in the product documentation. | |
| 28:**Maintain a consistent tone when communicating with a user**. Maintain the same communication style and terminology across an extension, and avoid abbreviations and acronyms. | |
| .//user-experience/colors.md | |
| 7:When creating extensions for the WordPress wp-admin, use the core colors, respect the user’s WordPress admin color scheme selection, and ensure your designs pass AA level guidelines. | |
| 9:When using components with text, such as buttons, cards, or navigation, the background-to-text contrast ratio should be at least 4.5:1 to be [WCAG AA compliant](https://www.w3.org/WAI/WCAG21/Understanding/contrast-minimum.html). Be sure to [test your color contrast ratios](https://webaim.org/resources/contrastchecker/) to abide by WCAG standards. | |
| .//user-experience/accessibility.md | |
| 7:Your extensions must meet the [Web Content Accessibility Guidelines](https://www.w3.org/WAI/standards-guidelines/wcag/) (WCAG). Meeting 100% conformance with WCAG 2.0 is hard work; meet the AA level of conformance at a minimum. | |
| .//user-experience/task-list-and-inbox.md | |
| 7:Plugins should choose between implementing a Task or Inbox note based on the following guidelines. Avoid implementing both Task and Inbox note for the same message, which adds clutter and reduces the impact of the message. | |
| 22:- *What doesn’t appear in the Things to do Task List:* | |
| 44:- *What doesn’t appear in the Inbox*: | |
| .//user-experience/user-experience-guidelines.md | |
| 7:We strongly recommend you review the current [WooCommerce setup experience](https://woo.com/documentation/plugins/woocommerce/getting-started/) to get familiar with the user experience and taxonomy. | |
| 9:We also recommend you review the [WordPress core guidelines](https://developer.wordpress.org/plugins/wordpress-org/detailed-plugin-guidelines/) to ensure your product isn’t breaking any rules, and review [this helpful resource](https://woo.com/document/grammar-punctuation-style-guide/) on content style. | |
| 15:Plugins which draw on WordPress’ core design aesthetic will benefit from future updates to this design as WordPress continues to evolve. If you need to make an exception for your product, be prepared to provide a valid use case. | |
| 18:- [Figma for WordPress](https://make.wordpress.org/design/2018/11/19/figma-for-wordpress/) | ([WordPress Design Library Figma](https://www.figma.com/file/e4tLacmlPuZV47l7901FEs/WordPress-Design-Library)) | |
| .//user-experience/onboarding.md | |
| 7:The first experience your users have with your extension is crucial. A user activating your extension for the first time provides an opportunity to onboard new and reorient returning users the right way. Is it clear to the user how to get started? Keep in mind that the more difficult the setup, the more likely a user will abandon the product altogether so keep it simple and direct. | |
| 9:**Use primary buttons as calls to action and keep secondary information deprioritized for clarity**. Guide merchants towards successful setup with a clear next step and/or step-by-step process with progress indicator if the extension isn’t configured or if setup is not complete. | |
| 11:**If necessary, provide a dismissible notification in the plugin area**. Add a notification to communicate next steps if setup or connection is required to successfully enable the plugin. | |
| 15:- Keep the post-activation notice with the WordPress plugin area in context of the plugin listing—do not display it on the dashboard, or any other parts of the platform. | |
| 16:- Don’t display more than one notice. | |
| 19:If no action is required for setup it’s best to rely on other onboarding aids such as the Task List (link to component) and Inbox (link to component) to help users discover features and use your plugin. | |
| 21:**Get to the point and keep it instructional**. This is not a time to promote your brand or pitch the product. The user has bought your product and is ready to use it. Keep the information instructional and precise and avoid the use of branded colors, fonts, and illustrations in empty states and other onboarding aids. Help users with context on next steps. | |
| 23:**Show helpful empty states**. Rely on the existing plugin UI, if any, to guide users towards successful setup and use of the plugin. Avoid onboarding emails, push notifications, and welcome tours. | |
| 25:**Plugins should not redirect on activation from WordPress plugins area**. This can break bulk activation of plugins. Following the [dotorg plugin guideline 11](https://developer.wordpress.org/plugins/wordpress-org/detailed-plugin-guidelines/#11-plugins-should-not-hijack-the-admin-dashboard), the extension shouldn’t hijack the dashboard or hide functionality of core or other extensions. | |
| 27:**Avoid dead end links and pages**. There should always be a way forward or back. | |
| 29:**Error Handling and Messaging**. If users encounter an error during setup, provide a clear and useful notification with clear and easily understood information on what went wrong and how to fix it. | |
| .//code-snippets/add-a-currency-symbol.md | |
| 5:Add this code to your child theme’s `functions.php` file or via a plugin that allows custom functions to be added, such as the [Code Snippets](https://wordpress.org/plugins/code-snippets/) plugin. Avoid adding custom code directly to your parent theme’s functions.php file, as this will be wiped entirely when you update the theme. | |
| .//code-snippets/before-login--register-form.md | |
| 5:This code will add a custom message above the login/register form on the user’s my-account page. | |
| 7:Add this code to your child theme’s `functions.php` file or via a plugin that allows custom functions to be added, such as the [Code snippets](https://wordpress.org/plugins/code-snippets/) plugin. Avoid adding custom code directly to your parent theme’s `functions.php` file, as this will be wiped entirely when you update the theme. | |
| 33:Please note that for this code to work, the following options must be checked in the WooCommerce “Accounts & Privacy” settings: | |
| .//code-snippets/add-a-country.md | |
| 6:Add this code to your child theme’s `functions.php` file or via a plugin that allows custom functions to be added, such as the [Code Snippets](https://wordpress.org/plugins/code-snippets/) plugin. Avoid adding custom code directly to your parent theme’s functions.php file, as this will be wiped entirely when you update the theme. | |
| .//code-snippets/change-a-currency-symbol.md | |
| 7:Add this code to your child theme’s `functions.php` file or via a plugin that allows custom functions to be added, such as the [Code Snippets](https://wordpress.org/plugins/code-snippets/) plugin. Avoid adding custom code directly to your parent theme’s functions.php file, as this will be wiped entirely when you update the theme. | |
| .//code-snippets/add-or-modify-states.md | |
| 5:Add this code to your child theme’s `functions.php` file or via a plugin that allows custom functions to be added, such as the [Code Snippets](https://wordpress.org/plugins/code-snippets/) plugin. Avoid adding custom code directly to your parent theme’s functions.php file, as this will be wiped entirely when you update the theme. | |
| .//code-snippets/useful-functions.md | |
| 135:The ` $args` array has an option called ` ex_tax_label` – if true then an `excluding tax` message will be appended. | |
| .//code-snippets/number-of-products-per-row.md | |
| 5:Add code to your child theme’s functions.php file or via a plugin that allows custom functions to be added, such as the [Code snippets](https://wordpress.org/plugins/code-snippets/) plugin. Avoid adding custom code directly to your parent theme’s `functions.php` file as this will be wiped entirely when you update the theme. | |
| 7:Please note that it does not work for all themes because of the way they’re coded. | |
| .//code-snippets/adjust-quantity-input-values.md | |
| 7:Add this code to your child theme’s `functions.php` file or via a plugin that allows custom functions to be added, such as the [Code snippets](https://wordpress.org/plugins/code-snippets/) plugin. Avoid adding custom code directly to your parent theme’s `functions.php` file, as this will be wiped entirely when you update the theme. | |
| .//code-snippets/rename-a-country.md | |
| 6:Add this code to your child theme’s `functions.php` file or via a plugin that allows custom functions to be added, such as the [Code Snippets](https://wordpress.org/plugins/code-snippets/) plugin. Avoid adding custom code directly to your parent theme’s functions.php file, as this will be wiped entirely when you update the theme. | |
| .//code-snippets/customising-checkout-fields.md | |
| 5:If you are unfamiliar with code and resolving potential conflicts, we have an extension that can help: [WooCommerce Checkout Field Editor](https://woo.com/products/woocommerce-checkout-field-editor/). Installing and activating this extension overrides any code below that you try to implement; and you cannot have custom checkout field code in your functions.php file when the extension is activated. | |
| 7:Custom code should be copied into your child theme’s **functions.php** file. | |
| 11:The billing and shipping fields for checkout pull from the countries class `class-wc-countries.php` and the **`get_address_fields`** function. This allows WooCommerce to enable/disable fields based on the user’s location. | |
| 13:Before returning these fields, WooCommerce puts the fields through a *filter*. This allows them to be edited by third-party plugins, themes and your own custom code. | |
| 27:The checkout class adds the loaded fields to its `checkout_fields` array, as well as adding a few other fields like “order notes”. | |
| 68:That means you have **full control** over checkout fields – you only need to know how to access them. | |
| 72:Hooking into the **`woocommerce_checkout_fields`** filter lets you override any field. As an example, let’s change the placeholder on the order_comments fields. Currently, it’s set to: | |
| 119:Here’s a full list of fields in the array passed to `woocommerce_checkout_fields`: | |
| 152:- `type` – type of field (text, textarea, password, select) | |
| 153:- `label` – label for the input field | |
| 154:- `placeholder` – placeholder for the input | |
| 155:- `class` – class for the input | |
| 156:- `required` – true or false, whether or not the field is require | |
| 157:- `clear` – true or false, applies a clear fix to the field/label | |
| 158:- `label_class` – class for the label element | |
| 159:- `options` – for select boxes, array of options (key => value pairs) | |
| 161:In specific cases you need to use the **`woocommerce_default_address_fields`** filter. This filter is applied to all billing and shipping default fields: | |
| 189:If you are adding a field with type ‘select’, as stated above you would define key/value pairs. For example: | |
| 200:Priority in regards to PHP code helps establish when a bit of code — called a function — runs in relation to a page load. It is set inside of each function and is useful when overriding existing code for custom display. | |
| 204:The priority argument is set during the [add_action](https://developer.wordpress.org/reference/functions/add_action/) function, after you establish which hook you’re connecting to and what the name of your custom function will be. | |
| 206:In the example below, blue text is the name of the hook we’re modifying, green text is the name of our custom function, and red is the priority we set. | |
| 214:In this example, the code is set to redirect the “Return to Shop” button found in the cart to a category that lists products for sale at `http://example.url/category/specials/`. | |
| 227:There, we can see the priority is set to 10. This is the typical default for WooCommerce functions and scripts, so that may not be sufficient to override that button’s functionality. | |
| 242:With priority, we can have two functions that are acting on the same hook. Normally this would cause a variety of problems, but since we’ve established one has a higher priority than the other, our site will only load the appropriate function, and we will be taken to the Specials page as intended with the code below. | |
| 268:Adding fields is done in a similar way to overriding fields. For example, let’s add a new field to shipping fields – `shipping_phone`: | |
| 299:It’s alive! | |
| 301:What do we do with the new field? Nothing. Because we defined the field in the `checkout_fields` array, the field is automatically processed and saved to the order post meta (in this case, \_shipping_phone). If you want to add validation rules, see the checkout class where there are additional hooks you can use. | |
| 305:To add a custom field is similar. Let’s add a new field to checkout, after the order notes, by hooking into the following: | |
| 357:Finally, let’s save the new field to order custom fields using the following code: | |
| .//code-snippets/unhook--remove-woocommerce-emails.md | |
| 7:Add this code to your child theme’s `functions.php` file or via a plugin that allows custom functions to be added, such as the [Code snippets](https://wordpress.org/plugins/code-snippets/) plugin. Avoid adding custom code directly to your parent theme’s `functions.php` file, as this will be wiped entirely when you update the theme. | |
| .//tutorials/adding-actions-and-filters.md | |
| 7:Often, when writing new code or revising existing code, there is a desire to add new hooks—but this should always be done with thoughtfulness and care. This document aims to provide high-level guidance on the matter. | |
| 35:For those reasons, we always prefer that—wherever reasonable—an existing hook or alternative approach in preference to adding a new hook. | |
| 48:* Come in pairs (‘before’ and ‘after’) | |
| 50:* The ‘before’ hook will generally always provide callbacks with the arguments array, if there is one | |
| 51:* The ‘after’ hook will generally also provide callbacks with the function’s return value, if there is one | |
| 55:For example, noting that it is the process of fetching the promotions which we view as the “lifecycle event”, and not the function itself: | |
| 95:In the case of global rendering or formatting functions (so-called “template tags”), where it is not readily possible to implement better alternatives, it is permissible to add filters for both the function arguments and the function’s return value. | |
| 118: /* ...Logic to find the featured product for this customer… */ | |
| 168:Filters should not be placed inside templates—only actions. If it is important that a value used within a template be filterable, then the relevant logic should be moved to whichever function or method decides to load the template—the result being passed in as a template variable. | |
| 170:It is also preferred that filter hooks not be placed inside data-store classes, as this can reduce the integrity of those components: since, by design, they are replaceable by custom implementations—the risk of accidentally breaking those custom stores is higher. | |
| .//tutorials/README.md | |
| 7:> ⚠️ **Notice:** This documentation is currently a **work in progress**. While it's open to the public for transparency and collaboration, please be aware that some sections might be incomplete or subject to change. We appreciate your patience and welcome any contributions! | |
| .//tutorials/adding-a-custom-field-to-variable-products.md | |
| 15:To get started, let’s do the steps to [create a skeleton plugin](https://github.com/woocommerce/woocommerce/tree/trunk/packages/js/create-woo-extension). | |
| 31:WordPress has its own class file naming convention which doesn’t work with PSR-4 out of the box. To learn more about Naming Conventions see the [WP Handbook](https://developer.wordpress.org/coding-standards/wordpress-coding-standards/php/#naming-conventions). We will use the standard format of “class-my-classname.php” format, so let’s go to the composer.json file and change the autoload to: | |
| 51:WooCommerce allows us to add our code to these sections through [hooks](https://developer.wordpress.org/plugins/hooks/), which are a standard WordPress method to extend code. In the “Inventory” section we have the following action hooks available to us: | |
| 53:For our Woo extension, we’ll be appending our field right at the end with `woocommerce_product_options_inventory_product_data`. | |
| 57:Let’s get started with creating a new class which will hold the code for the field. Add a new file with the name `class-product-fields.php` to the `/includes/admin/` folder. Within the class, we add our namespace, an abort if anyone tries to call the file directly and a \_\_construct method which calls the `hooks()` method: | |
| 76:Then in Terminal we run `composer dump-autoload -o` to regenerate the class map. Once that’s done, we add the class to our `setup.php` \_\_construct() function like so: | |
| 110:Let’s take a look at the arguments in the array. The ID will be used as meta_key in the database. The Label and Description are shown in the data section, and by setting desc_tip to true, it will be shown as a hover over the info icon. The last argument value ensures that if a value is already stored, then it will be shown. | |
| 126:This function checks if our new field is in the POST array. If yes, we create the product object, update our metadata and save the metadata. The `update_meta_data` function will either update an existing meta field or add a new one. And as we’re inserting into the database, we must [sanitize our field value](https://developer.wordpress.org/apis/security/sanitizing/). | |
| 145:Let’s get started by creating a new file /includes/class-product.php. You may have noticed that this is outside the `/admin/` folder as this code will run in the front. So when we set up the class, we also adjust the namespace accordingly: | |
| 165:If you took a look at the extension setup you may have noticed that `/admin/setup.php` is only called if we’re within WP Admin. So to call our new class we’ll add it directly in `/woo-product-field.php`: | |
| 176:For adding the field to the front we have several options. We could create a theme template, but if we are working with a WooCommerce-compatible theme and don’t need to make any other changes then a quick way is to use hooks. If we look into `/woocommerce/includes/wc-template-hooks.php` we can see all the existing actions for `woocommerce_single_product_summary` which controls the section at the top of the product page: | |
| 186:In our function we output the stock information with the [appropriate escape function](https://developer.wordpress.org/apis/security/escaping/), in this case, I’m suggesting to use `esc_html()` to force plain text. | |
| 200:Fantastic! You have completed this tutorial and have a working WooCommerce extension that adds a new custom field and shows it in the store! 🎉I hope it’s shown you how easily you can extend WooCommerce through hooks and tailor it to your or your client’s shop requirements! | |
| 208:A variable product type has variations as its children. To add a custom field to a variation, we can use the `woocommerce_variation_options_inventory` hook, and to save `woocommerce_save_product_variation` so let’s update our `hooks()` method with the new action hooks like so: | |
| 249:And we now have a new variation field that stores our new stock information. If you cannot see the new field, please make sure to enable “Manage Stock” for the variation by ticking the checkbox in the variation details. | |
| .//theme-development/fixing-outdated-woocommerce-templates.md | |
| 45:### Why don’t you make a button to click and update everything? | |
| .//theme-development/theme-design-ux-guidelines.md | |
| 9:Make sure your theme fits one or more industries currently available in the [WooCommerce themes store](https://woo.com/product-category/themes). It’s important that the theme offers enough originality and distinctiveness in its design, while keeping it familiar, in order to be distinguished from other themes on the WooCommerce theme store. Your theme should avoid copying existing themes on the WooCommerce theme store or other WordPress theme marketplaces. | |
| 73:On activation, themes shouldn’t override the WordPress theme activation flow by taking the user into other pages. | |
| 85:All imagery and text should be appropriate for all ages/family-friendly. The theme author should consider using imagery that is inclusive of ages, nationalities, etc. The theme should refrain from using imagery that looks like ‘stock photography’. | |
| .//theme-development/classic-theme-developer-handbook.md | |
| 15:- Zoom feature enabled – ability to zoom in/out on a product image | |
| 16:- Lightbox feature enabled – product gallery images pop up to examine closer | |
| 17:- Comments enabled, not Reviews – visitors/buyers can leave comments as opposed to product ratings or reviews | |
| 23:There are three possible ways to integrate WooCommerce with a theme. If you are using WooCommerce 3.2 or below (**strongly discouraged**) you will need to use one of these methods to ensure WooCommerce shop and product pages are rendered correctly in your theme. If you are using a version of WooCommerce 3.3 or above you only need to do a theme integration if the automatic one doesn’t meet your needs. | |
| 31:1. **Duplicate page.php:** Duplicate your theme’s `page.php` file, and name it `woocommerce.php`. This path to the file should follow this pattern: `wp-content/themes/YOURTHEME/woocommerce.php`. | |
| 51:This will make it use **WooCommerce’s loop instead**. Save the file. You’re done. | |
| 53:**Note:** When creating `woocommerce.php` in your theme’s folder, you will not be able to override the `woocommerce/archive-product.php` custom template as `woocommerce.php` has priority over `archive-product.php`. This is intended to prevent display issues. | |
| 57:The hook method is more involved, but it is also more flexible. This is similar to the method we use when creating themes. It’s also the method we use to integrate nicely with WordPress default themes. | |
| 59:Insert a few lines in your theme’s `functions.php` file. | |
| 83:Make sure that the markup matches that of your theme. If you’re unsure of which classes or IDs to use, take a look at your theme’s `page.php` for guidance. | |
| 95:Declaring WooCommerce support is straightforward and involves adding one function in your theme’s `functions.php` file. | |
| 141:In versions `3.0`, `3.1`, and `3.2`, the new gallery is off by default and needs to be enabled using a snippet (below) or by using a compatible theme. This is because it’s common for themes to disable the WooCommerce gallery and replace it with their own scripts. | |
| 191:- `woocommerce.css` is the minified stylesheet – it’s the CSS without any of the spaces, indents, etc. This makes the file very fast to load. This file is referenced by the plugin and declares all WooCommerce styles. | |
| 194:The CSS is written to make the default layout compatible with as many themes as possible by using percentage-based widths for all layout styles. It is, however, likely that you’ll want to make your own adjustments. | |
| 215:If you plan to make major changes, or create a theme from scratch, then you may prefer your theme not reference the WooCommerce stylesheet at all. You can tell WooCommerce to not use the default `woocommerce.css` by adding the following code to your theme’s `functions.php` file: | |
| 223:Styling a WooCommerce theme from scratch for the first time is no easy task. There are many different pages and elements that need to be styled, and if you’re new to WooCommerce, you are probably not familiar with many of them. A non-exhaustive list of WooCommerce elements to style can be found [here](https://developer.files.wordpress.com/2017/12/woocommerce-theme-testing-checklist.pdf). | |
| .//theme-development/conditional-tags.md | |
| 7:## What are “conditional tags”? | |
| 11:Because WooCommerce uses custom post types, you can also use many of WordPress’ conditional tags. See [codex.wordpress.org/Conditional_Tags](https://codex.wordpress.org/Conditional_Tags) for a list of the tags included with WordPress. | |
| 36: When the product category page for the ‘shirts’ category is being displayed. | |
| 38: When the product category page for the ‘shirts’ or ‘games’ category is being displayed. | |
| 45: When the product tag page for the ‘shirts’ tag is being displayed. | |
| 47: When the product tag page for the ‘shirts’ or ‘games’ tags is being displayed. | |
| 67: Returns true on the customer’s account pages. | |
| .//style-guide.md | |
| 11:- It’s important to use clear and concise language that is easy to understand. Use active voice and avoid using jargon or technical terms that may be unfamiliar to the user. The tone should be friendly and approachable, and should encourage the user to take action. | |
| 14: Example: “Add an embed block to your page.” | |
| 16:- Use American English for spelling and punctuation styles, or consider using a different word that doesn’t have a different spelling in other English variants. | |
| 19: Example: “Introduction to the launch experience” rather than “Introduction to the Launch Experience.” | |
| 21:- When referring to files or directories, the text formatting eliminates the need to include articles such as “the” and clarifying nouns such as “file” or “directory”. | |
| 22: Example: “files stored in ~~the~~ `/wp-content/uploads/` ~~directory~~” or “edit ~~the~~ `/config/config.yml` ~~file~~ with” | |
| 26:- Our target audience has a range of roles and abilities. When creating a tutorial or how-to guide, it’s important to consider the intended audience. Are they beginners or advanced users? What is their technical background? Understanding the audience can help guide the level of detail and the choice of language used in the guide. | |
| 116:- References to a single directory should have a trailing slash (eg. “/” appended) to the name. | |
| 117: Example: “uploads/“ | |
| 119: Example: “[woocommerce-blocks](https://github.com/woocommerce/woocommerce-blocks)” followed by “woocommerce-blocks” | |
| 121: Example: “Use `dig` to retrieve DNS information.” | |
| 122:- Functions should be styled with “Inline code” formatting and retain upper and lower case formatting as established from their source. | |
| 133:Example: We’ve enhanced the querying functionality in WooCommerce with the introduction of High Performance Order Storage (HPOS). | |
| 143:When creating a how-to guide, it’s important to use a consistent and easy-to-follow format. Here is a suggested template for a software how-to guide: | |
| 159:- “**WordPress Admin dashboard**” should be presented in its complete form the first time it appears in an article, followed by its abbreviated form in parentheses (“WP Admin”). Thereafter the abbreviated form can be used for any reference to the WordPress Admin dashboard within the same article. | |
| 164:Before publishing a tutorial or guide, it’s important to test it thoroughly to ensure that the instructions are accurate and easy to follow. | |
| 170:Articles that cover too many topics in one place can make it difficult for users to find the information they are looking for. “Atomizing” the Docs refers to breaking down extensive articles into a group of smaller related articles. This group of articles often has a main “landing page” with a high-level overview of the group of articles, and the descriptive text provides links to the related articles that a user will find relevant. These groups of articles can be considered an information “molecule” formed by the smaller, atomized articles. | |
| .//extension-development/using-custom-attributes-in-menus.md | |
| 37:2. Rename the template to reflect your attribute – in our example we’d use `taxonomy-pa_size.php` | |
| .//extension-development/handling-deactivation-and-uninstallation.md | |
| 7:There are a number of cleanup tasks you’ll need to handle when a merchant deactivates or uninstalls your extension. This guide provides a brief overview of WooCommerce-specific items you’ll want to make sure you account for when defining your extension’s deactivation and uninstallation logic. | |
| 11:If your extension uses Action Scheduler to queue any background jobs, it’s important to unschedule those actions when your extension is uninstalled or deactivated. | |
| 44:Keep in mind that merchant tasks are managed via a hybrid approach that involves both PHP and JavaScript, so the client-side registration only happens when your extension’s JavaScript runs. | |
| 48:When your extension deactivates and uninstalls, any registration you’ve done with the WooCommerce Navigation will be handled automatically. | |
| .//extension-development/implementing-settings.md | |
| 5:If you’re customizing WooCommerce or adding your own functionality to it you’ll probably need a settings page of some sort. One of the easiest ways to create a settings page is by taking advantage of the [`WC_Integration` class](https://woocommerce.github.io/code-reference/classes/WC-Integration.html 'WC_Integration Class'). Using the Integration class will automatically create a new settings page under **WooCommerce > Settings > Integrations** and it will automatically save, and sanitize your data for you. We’ve created this tutorial so you can see how to create a new integration. | |
| 9:You’ll need at least two files to create an integration so you’ll need to create a directory. | |
| 13:Create your main plugin file to [hook](https://developer.wordpress.org/reference/functions/add_action/ 'WordPress add_action()') into the `plugins_loaded` hook and check if the `WC_Integration` [class exists](https://www.php.net/manual/en/language.oop5.basic.php#language.oop5.basic.extends 'PHP Class Exists'). If it doesn’t then the user most likely doesn’t have WooCommerce activated. After you do that you need to register the integration. Load the integration file (we’ll get to this file in a minute). Use the `woocommerce_integrations` filter to add a new integration to the [array](http://php.net/manual/en/language.types.array.php 'PHP Array'). | |
| 17:Now that we have the framework setup let’s actually implement this Integration class. There already is a `WC_Integration` class so we want to make a [child class](http://php.net/manual/en/keyword.extends.php 'PHP Child Class'). This way it inherits all of the existing methods and data. You’ll need to set an id, a description, and a title for your integration. These will show up on the integration page. You’ll also need to load the settings by calling: `$this->init_form_fields();` & `$this->init_settings();` You’ll also need to save your options by calling the `woocommerce_update_options_integration_{your method id}` hook. Lastly you have to input some settings to save! We’ve included two dummy fields below but we’ll go more into fields in the next section. | |
| 151:## Creating Settings | |
| 153:If you took a look through the last section you’ll see that we added two dummy settings using the `init_form_fields()` method. | |
| 157:WooCommerce includes support for 8 types of settings. | |
| 168:And these settings have attributes which you can use. These affect the way the setting looks and behaves on the settings page. It doesn’t affect the setting itself. The attributes will manifest slightly differently depending on the setting type. A placeholder for example doesn’t work with checkboxes. To see exactly how they work you should look through the [source code](https://github.com/woocommerce/woocommerce/blob/master/includes/abstracts/abstract-wc-settings-api.php#L180 'WC Settings API on GitHub'). Ex. | |
| 180:The built-in settings are great but you may need extra controls to create your settings page. That’s why we included some methods to do this for you. First, define a setting by adding it to the `$this->form_fields` array, entering the kind of form control you want under `type`. You can override the default HTML for your form inputs by creating a method with a name of the format `generate_{ type }_html` which outputs HTML markup. To specify how buttons are rendered, you’d add a method called `generate_button_html`. For textareas, you’d add a `generate_textarea_html` method, and so on. (Check out the `generate_settings_html` method of the `WC_Settings_API` class in the WooCommerce source code to see how WooCommerce uses this.) The below example creates a button that goes to Woo.com. | |
| 248:To create the best user experience you’ll most likely want to validate and sanitize your data. The integration class already performs basic sanitization so that there’s no malicious code present but you could further sanitize by removing unused data. An example of sanitizing data would be integrating with a 3rd party service where all API keys are upper case. You could convert the API key to upper case which will make it a bit more clear for the user. | |
| 252:We'll demonstrate how to sanitize data first because it’s a bit easier to understand. But the one thing you should keep in mind is that sanitizing happens _after_ validation. So if something isn’t validated it won’t get to the sanitization step. | |
| 282:Validation isn’t always necessary but it’s nice to do. If your API keys are always 10 characters long and someone enters one that’s not 10 then you can print out an error message and prevent the user a lot of headache when they assumed they put it in correctly. First set up a `validate_{setting key}_field` method for each field you want to validate. For example, with the `api_key` field you need a `validate_api_key_field()` method. | |
| 296:If you’ve been following along you should have a complete integration example. If you have any problems see our [full integration demo](https://github.com/woogists/woocommerce-integration-demo 'Integration Demo'). | |
| .//extension-development/gdpr-compliance.md | |
| 65:- Maintain an up-to-date privacy policy detailing your plugin’s data handling. | |
| .//extension-development/README.md | |
| 7:> ⚠️ **Notice:** This documentation is currently a **work in progress**. While it's open to the public for transparency and collaboration, please be aware that some sections might be incomplete or subject to change. We appreciate your patience and welcome any contributions! | |
| .//extension-development/tools-for-low-code-development.md | |
| 20:## Step 1 — Using Gutenberg and WooCommerce Store Editing | |
| 31:## Step 2 — Exploring alternative page builders | |
| 42:## Step 3 — Utilizing pre-built components and templates | |
| .//extension-development/adding-a-section-to-a-settings-tab.md | |
| 5:When you’re adding building an extension for WooCommerce that requires settings of some kind, it’s important to ask yourself: **Where do they belong?** If your extension just has a couple of simple settings, do you really need to create a new tab specifically for it? Most likely the answer is no. | |
| 9:Let’s say we had an extension that adds a slider to a single product page. This extension doesn’t have many options, just a couple: | |
| 14:That’s only two options, specifically related to **Products**. We could quite easily just append them onto the core WooCommerce Products Settings (**WooCommerce > Settings > Products**), but that wouldn’t be very user friendly. Users wouldn’t know where to look initially so they’d have to scan all of the Products options and it would be difficult / impossible to link the options directly. Fortunately, as of WooCommerce 2.2.2, there is a new filter in place that allows you add a new **section**, beneath one of the core settings’ tabs. | |
| 20:We’ll go over doing this through individual functions, but you should probably create a Class that stores all of your settings methods. | |
| 44:Make sure you change the **wcslider** parts to suit your extension’s name / text-domain. The important thing about the `woocommerce_get_sections_products` filter, is that the last part **products**, is the tab you’d like to add a section to. So if you want to add a new tab to accounts section, you would hook into the `woocommerce_get_sections_accounts` filter. | |
| 48:Now that you’ve got the tab, you need to filter the output of `woocommerce_get_sections_products` (or similar). You would add the settings like usual using the [**WooCommerce Settings API**](https://github.com/woocommerce/woocommerce/blob/trunk/docs/settings-api/), but check for the current section before adding the settings to the tab’s settings array. For example, let’s add the sample settings we discussed above to the new **wcslider** section we just created: | |
| 131:We’re hooking into the same `woocommerce_get_sections_products` filter, but this time doing a check that the `$current_section` matches our earlier defined custom section (wcslider), before adding in our new settings. | |
| .//extension-development/building-your-first-extension.md | |
| 41:├── README.md | |
| 42:├── my-great-extension.php | |
| 43:├── package.json | |
| 44:├── src | |
| 45:│ ├── index.js | |
| 46:│ └── index.scss | |
| 47:└── webpack.config.js | |
| 50:Here’s a breakdown of what these files are and what purpose they serve: | |
| 53:This file is meant to have a high-level overview of your extension to make it easier for people to use and extend your project. The generator outputs a basic file with some minimal instructions in it to get you started, but you should replace the contents of the file with information specific to your project. It’s important to keep in mind that this file is not the same as the readme.txt file required by WordPress.org plugin directory, which must adhere to specific file standads. | |
| 56:This is your extension’s main PHP file. It functions as the entry point for your extension and is where you’ll likely include code that hooks your extension into WordPress and WooCommerce. You can read more about the purpose of this file in the Getting Started section of the WordPress Plugin Developer Handbook. | |
| 59:This is a manifest file that Node uses for a number of different purposes. It can store configuration settings for tools, lists of dependencies, aliases for common scripts, and even metadata about your extension. The WooCommerce extension generator outputs a package.json file that will bundle many helpful dependencies with your extension, as well as a variety of scripts you can use in conjunction with these dependencies to streamline your workflow and make sure your extension conforms to the same standards as other WordPress plugins and WooCommerce extensions. Here’s an example of what your package.json file might look like initially: | |
| 95:If you used the extension generator to create your extension, you’ll need to complete a few final steps to see it in action. | |
| 97:First, navigate to your extension’s root directory on your development server: | |
| 103:Then install the project’s dependencies. | |
| 115:Once your initial build is complete, you can browse to the administrative area of your local WordPress environment and activate your extension. If everything worked as it should, you should see a message in your browser’s JavaScript console: | |
| .//extension-development/extension-developer-handbook.md | |
| 9:- Adhere to all WordPress plugin coding standards, as well as [best practice guidelines](https://developer.wordpress.org/plugins/plugin-basics/best-practices/) for harmonious existence within WordPress and alongside other WordPress plugins. | |
| 11:- Not do anything malicious, illegal, or dishonest — for example, inserting spam links or executable code via third-party systems if not part of the service or explicitly permitted in the service’s terms of use. | |
| 48:The main plugin file should adopt the name of the plugin, e.g., A plugin with the directory name plugin-name would have its main file named plugin-name.php. | |
| 52:Follow guidelines for [Internationalization for WordPress Developers](https://codex.wordpress.org/I18n_for_WordPress_Developers), the text domain should match your plugin directory name, e.g., A plugin with a directory name of plugin-name would have the text domain plugin-name. Do not use underscores. | |
| 60:WordPress has a [set of guidelines](http://make.wordpress.org/core/handbook/coding-standards/php/) to keep all WordPress code consistent and easy to read. This includes quotes, indentation, brace style, shorthand php tags, yoda conditions, naming conventions, and more. Please review the guidelines. | |
| 68:Consider the permanence of your data. Here’s a quick primer: | |
| 72:- If the data is persistent and always present, consider the wp_options table. | |
| 73:- If the data type is an entity with n units, consider a post type. | |
| 76:Logs should be written to a file using the [WC_Logger](https://woo.com/wc-apidocs/class-WC_Logger.html) class. | |
| 108:To ensure a consistent experience for all WooCommerce users,including finding information on who to contact with queries, the following plugin headers should be in place: | |
| 110:- The Plugin Author isYourName/YourCompany | |
| 111:- The Developer header is YourName/YourCompany, with the Developer URI field listed as `http://yourdomain.com/` | |
| 139:Use the follow headers to declare “required” and “tested up to” versions: | |
| 146:Ensure that the Plugin URI line of the above plugin header is provided. This line should contain the URL of the plugin’s product/sale page or to a dedicated page for the plugin on your website. | |
| 150:Developers should use WordPress actions and filters to allow for modification/customization without requiring users to touch the plugin’s core code base. | |
| 152:If your plugin creates a front-end output, we recommend to having a templating engine in place so users can create custom template files in their theme’s WooCommerce folder to overwrite the plugin’s template files. | |
| 154:For more information, check out Pippin’s post on [Writing Extensible Plugins with Actions and Filters](http://code.tutsplus.com/tutorials/writing-extensible-plugins-with-actions-and-filters--wp-26759). | |
| 158:The use of entire external libraries is typically not suggested as this can open up the product to security vulnerabilities. If an external library is absolutely necessary, developers should be thoughtful about the code used and assume ownership as well as of responsibility for it. Try to only include the strictly necessary part of the library, or use a WordPress-friendly version or opt to build your own version. For example, if needing to use a text editor such as TinyMCE, we recommend using the WordPress-friendly version, TinyMCE Advanced. | |
| 162:With version control, there’s no reason to leave commented-out code; it’s annoying to scroll through and read. Remove it and add it back later if needed. | |
| 166:If you have a function, what does the function do? There should be comments for most if not all functions in your code. Someone/You may want to modify the plugin, and comments are helpful for that. We recommend using [PHP Doc Blocks](http://en.wikipedia.org/wiki/PHPDoc) similar to [WooCommerce](https://github.com/woocommerce/woocommerce/). | |
| 170:[God Objects](http://en.wikipedia.org/wiki/God_object) are objects that know or do too much. The point of object-oriented programming is to take a large problem and break it into smaller parts. When functions do too much, it’s hard to follow their logic, making bugs harder to fix. Instead of having massive functions, break them down into smaller pieces. | |
| 174:Integrate the [Quality Insights Toolkit (QIT)](https://woocommerce.github.io/qit-documentation/) into your development workflow to ensure your extension adheres to WordPress / WooCommerce quality and security standards. The QIT allows the ability to test your extensions against new releases of PHP, WooCommerce, and WordPress, as well as other active extensions, at the same time. The following tests are available today: | |
| 184:Always develop with [WP_DEBUG](http://codex.wordpress.org/Debugging_in_WordPress) mode on, so you can see all PHP warnings sent to the screen. This will flag things like making sure a variable is set before checking the value. | |
| 188:It’s a good practice to separate business logic (i.e., how the plugin works) from [presentation logic](http://en.wikipedia.org/wiki/Presentation_logic) (i.e., how it looks). Two separate pieces of logic are more easily maintained and swapped if necessary. An example is to have two different classes — one for displaying the end results, and one for the admin settings page. | |
| 192:If you provide a service via an API, it’s best to store that information so future queries can be done faster and the load on your service is lessened. [WordPress transients](http://codex.wordpress.org/Transients_API) can be used to store data for a certain amount of time. | |
| 198:- Allow any logging as an ‘opt in’. | |
| 199:- Use the [WC_Logger](https://woo.com/wc-apidocs/class-WC_Logger.html) class. A user can then view logs on their system status page. | |
| 201:If adding logging to your extension, here’s a snippet for presenting a link to the logs, in a way the extension user can easily make use of. | |
| 216:$label .= ' | ' . sprintf( \_\_( '%1$sView Log%2$s', 'your-textdomain-here' ), '<a href\="' . esc_url( $log_url ) . '">', '</a\>' ); | |
| .//extension-development/handling-merchant-onboarding.md | |
| 7:Onboarding is a critical part of the merchant’s user experience. It helps set them up for success and ensures they’re not only using your extension correctly but also getting the most out of it. There are a few especially useful features that you can take advantage of as a developer to help onboard merchants who are using your extension: | |
| 24:To register your task as an extended task list item, you’ll need to hook in to the `woocommerce_get_registered_extended_tasks` filter with a function that appends your task to the array the filter provides. | |
| 38:### Registering the task’s JavaScript | |
| 40:In addition to registering the task name, you’ll also need to register and enqueue the transpiled JavaScript file containing your task component, its configuration, and its event-handlers. A common way to do this is to create a dedicated registration function that hooks into the `admin_enqueue_scripts` action in WordPress. If you do things this way, you can nest the `add_filter` call for `woocommerce_get_registered_extended_tasks` in this function as well. Below is an annotated example of how this registration might look: | |
| 194:In the example above, the extension does a few different things. Let’s break it down: | |
| 198:First, import any functions, components, or other utilities from external dependencies. We’ve kept WooCommerce-related dependencies separate from others for the sake of keeping things tidy. In a real-world extension, you may be importing other local modules. In those cases, we recommend creating a visually separate section for those imports as well. | |
| 210:The `addFilter` function allows us to hook in to JavaScript filters the same way that the traditional PHP call to `add_filter()` does. The `apiFetch` utility allows our extension to query the WordPress REST API without needing to deal with keys or authentication. Finally, the `Card` and `CardBody` are predefined React components that we’ll use as building blocks for our extension’s Task component. | |
| 233:In the example above, the event handler uses `apiFetch` to set the `woocommerce_admin_add_task_example_complete` option’s value to `true` and then updates the component’s state data and redirects the browser to the Admin root. In the case of an error, we’re simply logging it to the console, but you may want to implement your own solution here. | |
| 235:The `markTaskIncomplete` function is more or less an inverse of `markTaskComplete` that toggles the task’s completion status in the opposite direction. | |
| 239:Next, we create a [functional component](https://reactjs.org/docs/components-and-props.html) that returns our task card. The intermixed JavaScript/HTML syntax we’re using here is called JSX. If you’re unfamiliar with it, you can [read more about it in the React docs](https://reactjs.org/docs/introducing-jsx.html). | |
| 266:In the example above, we’re using the `Card` and `CardBody` components to construct our task’s component. The `div` inside the `CardBody` uses a [JavaScript expression](https://developer.mozilla.org/en-US/docs/Web/JavaScript/Guide/Expressions_and_Operators#Expressions) (`{}`) to embed a ternary operator that uses the component’s state to determine whether to display the task as complete or incomplete. | |
| 270:Finally, we’ll set some configuration values for our task and then use the `addFilter` function to append our task to the WooCommerce Admin Onboarding Task List. | |
| 296:In the example above, we’re setting our task’s configuration as we pass it into the filter for simplicity, but in a real-world extension, you might encapsulate this somewhere else for better separation of concerns. Below is a list of properties that the task-list component supports for tasks. | |
| 308:| isDismissable | Boolean | No | Whether the task is dismissable or not. If false the Dismiss button won’t be visible | | |
| 309:| onDismiss | Function | No | Callback method that it’s triggered on dismission | | |
| 329:Store management links use the `@wordpress/icons` package. If your extension isn’t already using it, you’ll need to add it to your extension’s list of dependencies. | |
| 335:The logic that adds your custom link to the store management section will live in a JavaScript file. We’ll register and enqueue that file with WordPress in our PHP file: | |
| 350:The first argument of this call is a handle, the name by which WordPress will refer to the script we’re enqueuing. The second argument is the URL where the script is located. | |
| 352:The third argument is an array of script dependencies. By supplying the `wp-hooks` handle in that array, we’re ensuring that our script will have access to the `addFilter` function we’ll be using to add our link to WooCommerce’s list. | |
| 354:The fourth argument is a priority, which determines the order in which JavaScripts are loaded in WordPress. We’re setting a priority of 10 in our example. It’s important that your script runs before the store management section is rendered. With that in mind, make sure your priority value is lower than 15 to ensure your link is rendered properly. | |
| 384:Admin Notes are meant for displaying insightful information about your WooCommerce store, extensions, activity, and achievements. They’re also useful for displaying information that can help with the day-to-day tasks of managing and optimizing a store. A good general rule is to use Admin Notes for information that is: | |
| 390:With that in mind, you might consider using Admin Notes to celebrate a particular milestone that a merchant has passed, or to provide additional guidance about using a specific feature or flow. Conversely, you shouldn’t use Admin Notes to send repeated messages about the same topic or target all users with a note that is only relevant to a subset of merchants. It’s okay to use Admin Notes for specific promotions, but you shouldn’t abuse the system. Use your best judgement and remember the home screen is meant to highlight a store’s most important actionable tasks. | |
| 517:Let’s break down the example above to examine what each section does. | |
| 521:First, we’re doing some basic namespacing and feature availability checks, along with a safeguard to make sure this file only executes within the WordPress application space. | |
| 540:Next, we define a simple class that will serve as a note provider for our note. To create and manage note objects, we’ll import the `Note` and `NotesTraits` classes from WooCommerce Admin. | |
| 557:#### Configure the note’s details | |
| 559:Once you’ve set your note’s name, you can define and configure your note. The `NoteTraits` class will call `self::get_note()` when performing operations, so you should encapsulate your note’s instantiation and configuration in a static function called `get_note()` that returns a `Note` object. | |
| 568:Inside our `get_note()` function, we’ll handle any logic for collecting data our Note may need to display. Our example note will include information about when the extension was activated, so this bit of code is just for demonstration. You might include other logic here depending on what data your note should contain. | |
| 576:Next, we’ll instantiate a new `Note` object. | |
| 584:Then we’ll use some of the timestamp data we collected above to set the note’s content. | |
| 604:Next, we’ll set the note’s `type` property. Note types are defined as enum-style class constants in the `Note` class. Available note types are _error_, _warning_, _update_, _info_, and _marketing_. When selecting a note type, be aware that the _error_ and _update_ result in the note being shown as a Store Alert, not in the Inbox. It’s best to avoid using these types of notes unless you absolutely need to. | |
| 608:Admin Notes also support a few different layouts. You can specify `banner`, `plain`, or `thumbnail` as the layout. If you’re interested in seeing the different layouts in action, take a look at [this simple plugin](https://gist.github.com/octaedro/864315edaf9c6a2a6de71d297be1ed88) that you can install to experiment with them. | |
| 610:We’ll choose `plain` as our layout, but it’s also the default, so we could leave this property alone and the effect would be the same. | |
| 618:Next, we’ll set the values for our Admin Note’s `name` and `source` properties. As a best practice, you should store your extension’s name (i.e. its slug) in the `source` property of the note. You can use the `name` property to support multiple sub-types of notes. This gives you a handy way of namespacing your notes and managing them at both a high and low level. | |
| 625:Admin Notes can support 0, 1, or 2 actions (buttons). You can use these actions to capture events that trigger asynchronous processes or help the merchant navigate to a particular view to complete a step, or even simply to provide an external link for further information. The `add_action()` function takes up to three arguments. The first is the action name, which can be used for event handling, the second renders as a label for the action’s button, and the third is an optional URL for actions that require navigation. | |
| 644:Our example extension ties these calls to activation and deactivation hooks for the sake of simplicity. While there are many events for which you may want to add Notes to a merchant’s inbox, deleting notes upon deactivation and uninstallation is an important part of managing your extension’s lifecycle. | |
| .//extension-development/class-reference.md | |
| 14:The main class is `woocommerce` which is available globally via the `$woocommerce` variable. This handles the main functions of WooCommerce and init’s other classes, stores site-wide variables, and handles error/success messages. The woocommerce class initializes the following classes when constructed: | |
| 16:- `WC_Query` – stored in `$woocommerce->query` | |
| 17:- `WC_Customer` – stored in `$woocommerce->customer` | |
| 18:- `WC_Shipping` – stored in `$woocommerce->shipping` | |
| 19:- `WC_Payment_Gateways` – stored in `$woocommerce->payment_gateways` | |
| 20:- `WC_Countries` – stored in `$woocommerce->countries` | |
| .//extension-development/how-to-design-a-simple-extension.md | |
| 11:Your extension’s main PHP file is a bootstrapping file. It contains important metadata about your extension that WordPress and WooCommerce use for a number of ecosystem integration processes, and it serves as the primary entry point for your extension’s functionality. While there is not a particular rule enforced around naming this file, using a hyphenated version of the plugin name is a common best practice. (i.e. my-extension.php) | |
| 15:Your extension’s main plugin file should have a header comment that includes a number of important pieces of metadata about your extension. WordPress has a list of header requirements to which all plugins must adhere, but there are additional considerations for WooCommerce extensions: | |
| 22:- The `Plugin URI` field should contain the URL of the extension’s product page in the WooCommerce Marketplace or the extension’s official landing page on your website. | |
| 50:As a best practice, your extension’s PHP files should contain a conditional statement at the top that checks for WordPress’ ABSPATH constant. If this constant is not defined, the script should exit. | |
| 58:Because your main PHP file is the primary point of coupling between your extension and WordPress, you should use it as a hub for managing your extension’s lifecycle. At a very basic level, this means handling: | |
| 64:Starting with these three broad lifecycle areas, you can begin to break your extension’s functionality down further to help maintain a good separation of concerns. | |
| 86:There are numerous ways to organize the code in your extension. You can find a good overview of best practices in the WordPress Plugin Developer Handbook. Regardless of the approach you use for organizing your code, the nature of WordPress’ shared application space makes it imperative that you build with an eye toward interoperability. There are a few common principles that will help you optimize your extension and ensure it is a good neighbor to others: | |
| 89:- Use classes to encapsulate your extension’s functionality. | |
| 94:As mentioned above, encapsulating different parts of your extension’s functionality using classes is an important measure that not only helps with interoperability, but which also makes your code easier to maintain and debug. Your extension may have many different classes, each shouldering some piece of functionality. At a minimum, your extension should define a central class which can handle the setup, initialization and management of a single instance of itself. | |
| 149:Notice that the example class above is designed to be instantiated by calling the static class method `instance()`, which will either return an existing instance of the class or create one and return it. In order to fully protect against unwanted instantiation, it’s also necessary to override the built-in magic methods `__clone()` and `__wakeup()`. You can implement your own error logging here or use something like `_doing_it_wrong()` which handles error logging for you. You can also use WooCommerce’s wrapper function `wc_doing_it_wrong()` here. Just be sure your code checks that the function exists first. | |
| 172:The includes() function above is where you’ll load other class dependencies, typically via an include or require constructs. A common way of managing and loading external dependencies is to use Composer’s autoload feature, but you can also load specific files individually. You can read more about how to autoload external dependencies in the Composer documentation. A basic example of a setup method that uses both Composer and internal inclusion is below. | |
| 188:The `init()` function above is where you should handle any setup for the classes you loaded in the includes() method. This step is where you’ll often perform any initial registration with relevant actions or filters. It’s also where you can register and enqueue your extension’s JavaScripts and stylesheets. | |
| 190:Here’s an example of what your initialization method might look like: | |
| 208:There are many different ways that your core class’ initialization method might look, depending on the way that you choose to architect your extension. The important concept here is that this function serves as a central point for handling any initial registration and setup that your extension requires in order to respond to web requests going forward. | |
| 212:The WordPress activation hook we set up above with register_activation_hook() may seem like a great place to instantiate our extension’s main class, and in some cases it will work. By virtue of being a plugin for a plugin, however, WooCommerce extensions typically require WooCommerce to be loaded in order to function properly, so it’s often best to delay instantiation and initialization until after WordPress has loaded other plugins. | |
| 214:To do that, instead of hooking your instantiation to your extension’s activation hook, use the plugins_loaded action in WordPress to instantiate your extension’s core class and add its singleton to the $GLOBALS array. | |
| 234:Once your extension is active and initialized, the possibilities are wide open. This is where the proverbial magic happens in an extension, and it’s largely up to you to define. While implementing specific functionality is outside the scope of this guide, there are some best practices to keep in mind as you think about how to build out your extension’s functionality. | |
| 254:While it’s certainly possible to completely reverse everything your extension has created when a merchant deactivates it, it’s not advisable nor practical in most cases. Instead, it’s best to reserve that behavior for uninstallation. | |
| 256:For handling uninstallation, it’s best to follow the guidelines in the WordPress Plugin Handbook. | |
| .//extension-development/development-environment.md | |
| 7:Building an extension for WooCommerce is a straightforward process, but there are a several moving parts and a few supporting software tools you’ll want to familiarize yourself with. This guide will walk you through the steps of getting a basic development environment set up for building WooCommerce extensions. | |
| 25:Note: If you’re working on a Windows machine, you may want to take a look at the Building Extensions in Windows Environments section of this guide before proceeding. | |
| 29:In addition to the software listed above, you’ll also want to have some way of setting up a local development server stack. There are a number of different tools available for this, each with a certain set of functionality and limitations. We recommend choosing an option below that fits your preferred workflow best. | |
| 33:[vvv](https://varyingvagrantvagrants.org/) – A highly configurable, cross-platform, and robust environment management tool powered by VirtualBox and Vagrant. This is one the tool that the WooCommerce Core team recommends to contributors. | |
| 35:[wp-env](https://developer.wordpress.org/block-editor/reference-guides/packages/packages-env/) – A command-line utility maintained by the WordPress community that allows you to set up and run custom WordPress environments with Docker and JSON manifests. | |
| 37:[LocalWP](https://localwp.com/) – A cross-platform app that bills itself as a one-click WordPress installation. | |
| 41:[MAMP](https://www.mamp.info/en/mac/) – A local server environment that can be installed on Mac or Windows. | |
| 43:[WAMP](https://www.wampserver.com/en/) – A Windows web development environment that lets you create applications with Apache2, PHP, and MySQL. | |
| 45:[XAMPP](https://www.apachefriends.org/index.html) – An easy-to-install Apache distribution containing MariaDB, PHP, and Perl. It’s available for Windows, Linux, and OS X. | |
| 55:When developing a WooCommerce extension, you’ll usually be doing most of your work within the public_html directory of your local server. For now, take some time to familiarize yourself with a few key paths: | |
| 57:`wp-content/debug.log` – This is the file where WordPress writes the important output such as errors and other messages useful for debugging. | |
| 59:`wp-content/plugins/` – This is the directory on the server where WordPress plugin folders live. | |
| 61:`wp-content/themes/` – This is the directory on the server where WordPress theme folders live. | |
| 65:When developing an extension for WooCommerce, it’s helpful to install a development version of WooCommerce core. | |
| 84:Note: if you don’t have the required version of Node installed, NVM will alert you so you can install it: | |
| 107:Note: In some environments, you may see an out-of-memory error when you try to build WooCommerce. If this happens, you simply need to adjust the memory_limit setting in your environment’s php.ini configuration to a higher value. The process for changing this value varies depending on the environment management tooling you use, so it’s best to consult your tool’s documentation before making any changes. | |
| 129:Note: if you don’t have the required version of Node installed, NVM will alert you so you can install it. | |
| 177:Note: if you don’t have the required version of Node installed, NVM will alert you so you can install it. | |
| 200:Once you have WooCommerce and its sibling extensions installed in your WordPress environment, start up your server, browse to your site and handle any initial setup steps or importing you’d like to do. This is a good time to load sample data and activate themes and plugins. | |
| .//rest-api/getting-started.md | |
| 84:Occasionally servers may not parse the Authorization header correctly (if you see a “Consumer key is missing” error when authenticating over SSL, you have a server issue). | |
| .//rest-api/README.md | |
| 7:> ⚠️ **Notice:** This documentation is currently a **work in progress**. While it's open to the public for transparency and collaboration, please be aware that some sections might be incomplete or subject to change. We appreciate your patience and welcome any contributions! | |
| .//quality-and-best-practices/grammar-punctuation-capitalization.md | |
| 45:- Unordered/Bulleted lists – First word of each entry. | |
| 49:- “ecommerce” (not “eCommerce”) | |
| 50:- email address — `info@woo.com` | |
| 51:- website URL — `developer.woo.com` | |
| 55:Use with discretion. Contractions, such as I’m and there’s, give writing an informal and conversational feel, but may be inappropriate if content is being translated. For example, sometimes the not in don’t is ignored by online translators. | |
| 82:- €995 | |
| 83:- ¥5,000 | |
| 84:- £18.99 | |
| 102:Spell out the word ‘percent.’ Don’t use % symbol unless space is limited, e.g., for use on social media. | |
| 119:- 27°C | |
| 120:- 98°F | |
| 129:Use a hyphen between times to indicate a time period in am or pm. Use ‘to’ if the time period spans am and pm. | |
| 153:Ampersands need only be used when part of an official company/brand name. Should not be substituted for ‘and.’ | |
| 155:- Ben & Jerry’s | |
| 160:An apostrophe makes a word possessive. If a word already ends in s and is singular, add an ‘s. If a word ends in s and is plural, add an apostrophe. | |
| 162:- A teammate borrowed Sam’s bike. | |
| 163:- A teammate borrowed Chris’s bike. | |
| 164:- Employees hid the office managers’ pens. | |
| 166:These are possessives: FAQ’s questions, HE’s weekly rotation. These are plural: FAQs and HEs. | |
| 184:Use a hyphen – without spaces on either side to link words, or indicate a span or range. | |
| 189:Use an em dash — without spaces on either side to indicate an aside. | |
| 191:Use a true em dash, not hyphens – or –. | |
| 193:- Multivariate testing—just one of our new Pro features—can help you grow your business. | |
| 194:- Austin thought Brad was the donut thief, but he was wrong—it was Lain. | |
| 198:Ellipses … can be used to indicate an indefinite ending to a sentence or to show words are omitted when used in brackets […] Use rarely. | |
| 216:- Jake said, “I had the best day ever.” | |
| 226:Periods and commas go within quotation marks. Question marks within quotes follow logic—if the question mark is part of the quotation, it goes within. If you’re asking a question that ends with a quote, it goes outside the quote. | |
| 230:- Who sings, “All These Things That I’ve Done”? | |
| 231:- Brandon Flowers of The Killers said, “I was inspired and on a roll when I wrote, ‘I got soul, but I’m not a soldier.’” | |
| 245:- Nestlé | |
| 249:Refer to a company or product as ‘it (not ‘they’). | |
| 279:Use he/him/his and she/her/her as appropriate. Don’t use “one” as a pronoun. Use they/them/their if gender is unknown or when referring to a group. | |
| 285:- “I love that WooCommerce is free and flexible,” says Brent Jamison. | |
| 296:Spell out all city and state names. Don’t abbreviate city names. | |
| 302:Capitalize the names of websites and web publications. Don’t italicize. | |
| 304:Avoid writing out URLs; omit `http://www` when it’s necessary. | |
| .//quality-and-best-practices/removing-product-product-category-or-shop-from-the-url.md | |
| 14:You will make it harder for WordPress to detect what page you are trying to reach when you type in a product category URL. Also, understand that the standard “Page” in WordPress always has no base text in the URL. For example: | |
| 19:What would happen if we remove that ‘product-category’ part? | |
| .//quality-and-best-practices/performance-optimization.md | |
| 20:## Step 1 — Implement caching | |
| 36:## Step 2 — Optimize images | |
| 45:## Step 3 — Minify and optimize code | |
| 53:## Step 4 — Use a content delivery network (CDN) | |
| 60:## Step 5 — Optimize database | |
| 68:## Step 6 — Choose a high-performance theme and plugins | |
| 75:## Step 7 — Enable GZIP compression | |
| 82:## Step 8 — Monitor and analyze performance | |
| .//quality-and-best-practices/README.md | |
| 7:> ⚠️ **Notice:** This documentation is currently a **work in progress**. While it's open to the public for transparency and collaboration, please be aware that some sections might be incomplete or subject to change. We appreciate your patience and welcome any contributions! | |
| .//quality-and-best-practices/writing-high-quality-testing-instructions.md | |
| 62:- Make sure to describe every detail and **avoid assuming knowledge**, the spectrum of readers might be wide and some people would not know the concepts behind what is being assumed. For example, instead of saying _“Enable the [x] experiment”_, say something like: | |
| 70:- Always try to explain in detail **where the user should head to**, for example instead of saying “Go to the Orders page as admin”, say “Go to [url]” or even “Go to WooCommerce > Orders”. | |
| .//quality-and-best-practices/core-critical-flows.md | |
| 11:- 🛒 [Shopper > Shop](#shopper---shop) | |
| 12:- 🛒 [Shopper > Product](#shopper---product) | |
| 13:- 🛒 [Shopper > Cart](#shopper---cart) | |
| 14:- 🛒 [Shopper > Checkout](#shopper---checkout) | |
| 15:- 🛒 [Shopper > Email](#shopper---email) | |
| 16:- 🛒 [Shopper > My Account](#shopper---my-account) | |
| 20:- 💳 [Merchant > Onboarding](#merchant---onboarding) | |
| 21:- 💳 [Merchant > Dashboard](#merchant---dashboard) | |
| 22:- 💳 [Merchant > Settings](#merchant---settings) | |
| 23:- 💳 [Merchant > Coupons](#merchant---coupons) | |
| 24:- 💳 [Merchant > Marketing](#merchant---marketing) | |
| 25:- 💳 [Merchant > Analytics](#merchant---analytics) | |
| 26:- 💳 [Merchant > Products](#merchant---products) | |
| 27:- 💳 [Merchant > Orders](#merchant---orders) | |
| 28:- 💳 [Merchant > Customers](#merchant---customers) | |
| 29:- 💳 [Merchant > Email](#merchant---email) | |
| 30:- 💳 [Merchant > Plugins](#merchant---plugins) | |
| 31:- 💳 [Merchant > My Subscriptions](#merchant---my-subscriptions) | |
| 32:- 💳 [Merchant > Pages](#merchant---pages) | |
| 33:- 💳 [Merchant > Posts](#merchant---posts) |
Sign up for free
to join this conversation on GitHub.
Already have an account?
Sign in to comment