Skip to content

Instantly share code, notes, and snippets.

@shinmiy
Last active August 28, 2020 10:49
Show Gist options
  • Star 0 You must be signed in to star a gist
  • Fork 0 You must be signed in to fork a gist
  • Save shinmiy/4708c173060900737c8493b260799d4e to your computer and use it in GitHub Desktop.
Save shinmiy/4708c173060900737c8493b260799d4e to your computer and use it in GitHub Desktop.

ML KitとCameraXで言語を認識・識別して翻訳する

About this codelab

  • Last updated 6月 17, 2020
  • Written by carenc

1.はじめに

ML Kitは、AndroidとAndroidアプリにおいてGoogleの機械学習における専門技術を強力かつ使いやすいパッケージで実現できるモバイルSDKです。機械学習がはじめてでも経験者でも、たった数行のコードで必要な機能を実装することができます。はじめるのにニューラルネットワークやモデル最適化についての深い知識も必要ありません。

仕組み

ML Kitを使うと、Mobile VisionTensorFlow Lite といったGoogleのML技術をひとつのSDKにまとまることで、ML技術をアプリで簡単に活用できるようになります。Mobile Visionのオンデバイスモデルが提供するリアルタイム性もTensorFlow Liteのカスタムモデルの柔軟性も、ML Kitを使うとたった数行のコードで利用できるようになります。

このコードラボでは、すでにあるAndroidアプリでカメラからの映像からテキスト認識、テキストの言語の識別と翻訳をリアルタイムで行うための簡単な手順を取り上げます。また、ML Kit APIとCameraXを組み合わせて使う際のベストプラクティスについても取り上げます。

このコードラボで作るもの

このコードラボでは、ML Kitを使ったAndroidアプリを作ります。アプリはML Kitのオンデバイス・テキスト認識APIを使い、リアルタイムで表示されるカメラ映像のテキストを認識します。次にML Kitの言語識別APIを使って認識したテキストの言語を識別します。最後に、ML Kitの翻訳APIを使って認識したテキストを59種類の言語の中から選択したものに翻訳します。

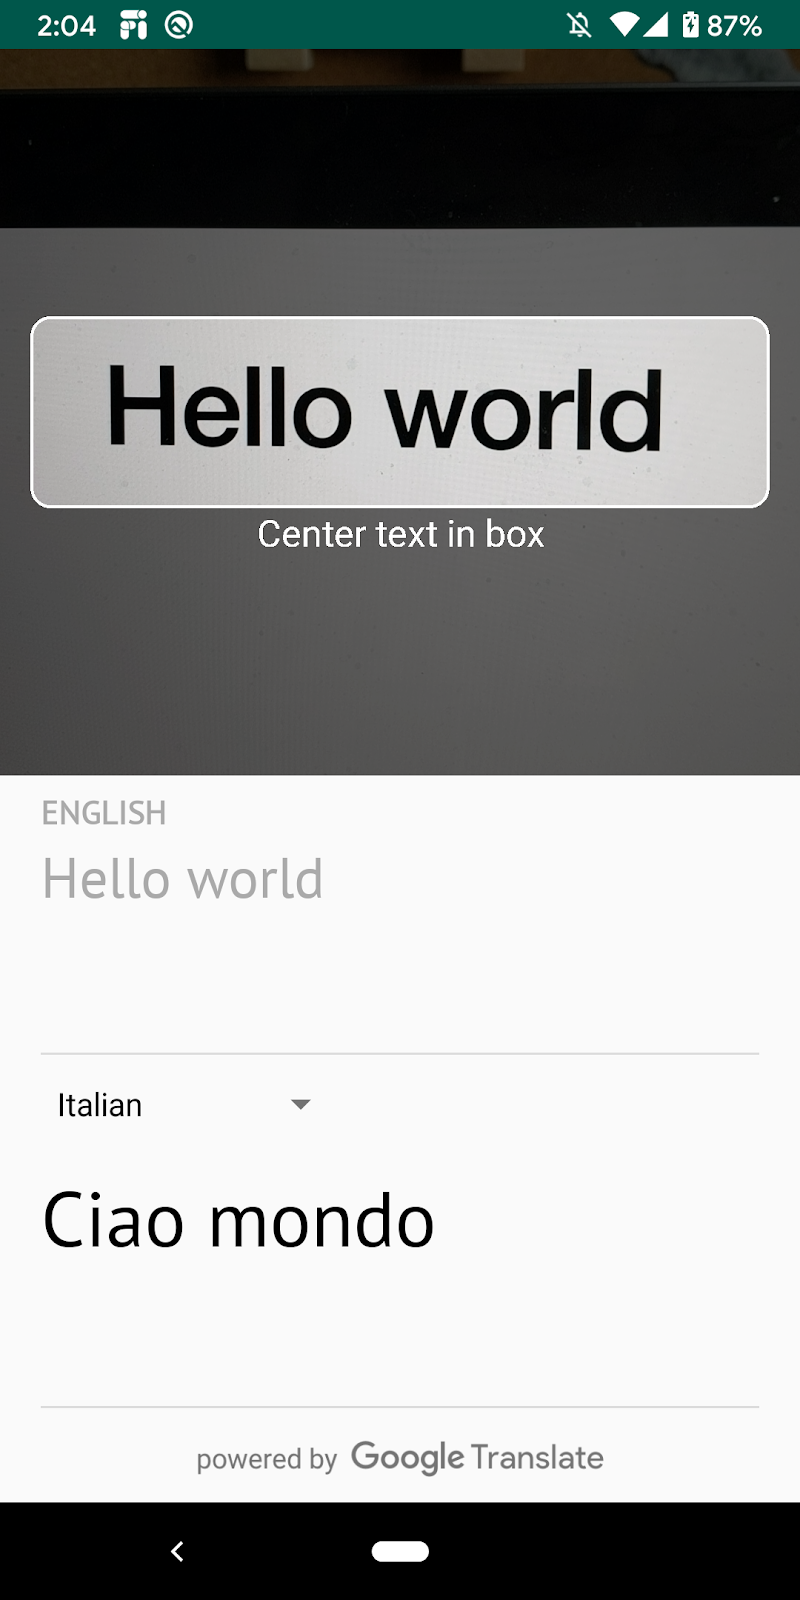
最終的には、以下のような画面が表示されます。

このコードラボで学べること

  • ML Kit SDKを使ってどんなAndroidアプリでも機械学習の機能を簡単に活用する方法
  • ML Kitのテキスト認識API、言語識別API、翻訳APIとそれらの機能
  • ML Kit APIとCameraXライブラリを組み合わせて使う方法

このコードラボに必要なもの

  • 比較的最近のバージョンのAndroid Studio (v4.0+)
  • 物理的なAndroid端末
  • サンプルコード
  • KotlinでのAndroid開発の基礎的な知識

このコードラボはML Kitにフォーカスして進みます。コードラボに関係のないコンセプトやコードはすでに提供・実装されています。

2.セットアップ

コードをダウンロードする

以下のリンクをクリックしてこのコードラボに必要なコードすべてをダウンロードします。ソースコードのダウンロード

ダウンロードしたzipファイルを展開します。必要なファイルすべてが入ったルートフォルダ(mlkit-android)が展開されます。このコードラボでは、translate サブディレクトリ内のリソースのみが必要になりmす。

mlkit-android リポジトリの transalate サブディレクトリには、次のディレクトリが含まれています。

starter -このコードラボを進めるにあたって最初の土台となるコード

3.ML KitとCameraXの依存を確認する

スタータープロジェクトをAndroid Studioにインポートしましょう。app/build.gradleファイルで、必要なML KitとCameraXの依存が含まれていることを確認します。

// CameraX dependencies
def camerax_version = "1.0.0-beta05"
implementation "androidx.camera:camera-core:${camerax_version}"
implementation "androidx.camera:camera-camera2:${camerax_version}"
implementation "androidx.camera:camera-lifecycle:${camerax_version}"
implementation "androidx.camera:camera-view:1.0.0-alpha12"

// ML Kit dependencies
implementation 'com.google.android.gms:play-services-mlkit-text-recognition:16.0.0'
implementation 'com.google.mlkit:language-id:16.0.0'
implementation 'com.google.mlkit:translate:16.0.0'

4.最初にアプリを実行する

Android Studioにプロジェクトを取り込んでML Kitの依存の確認ができたら、アプリを動かしてみましょう!Android Studioエミュレータを起動し(訳注:実際のAndroid端末をつないで?)、Android StudioのツールバーからRunを選択します。

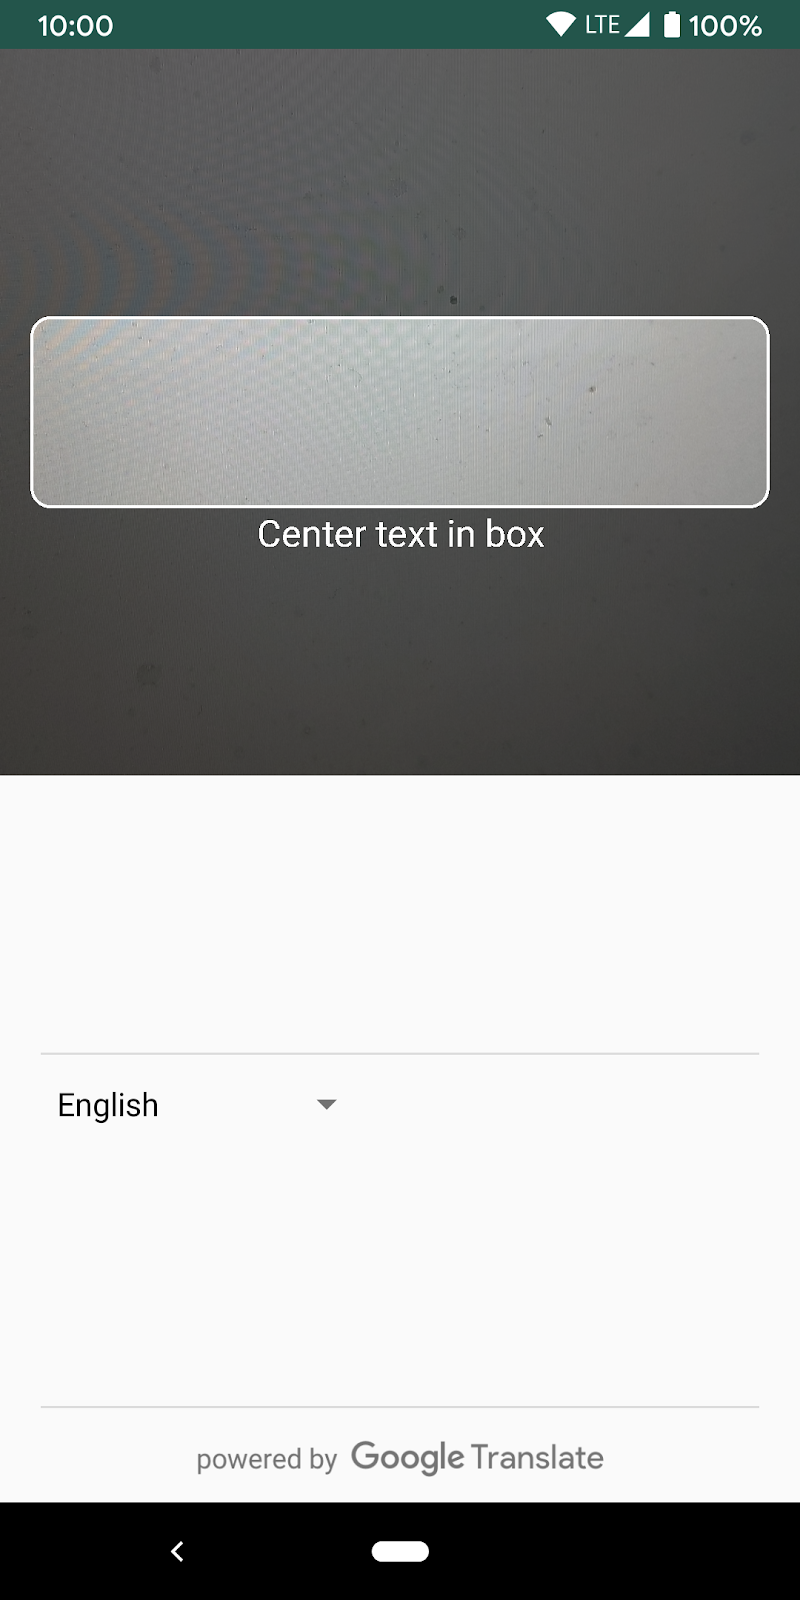
端末でアプリが起動して、カメラを向けた先の映像が表示されるはずです。この時点ではまだテキスト認識機能は実装されていません。

5.テキスト認識機能を追加する

次にカメラ映像からアプリがテキストを認識する機能を追加します。

Ml Kit Text Detectorをインスタンス化する

TextRecognitionをインスタンス化するため、Textanalyzer.ktの先頭のTODOをに次のフィールドを追加します。これは、後の手順で使用するテキスト認識機能を扱う際に参照する方法です。また、不要になったときにdetectorを閉じられるように、detectorをlifecycle observerとして追加します。

TextAnalyzer.kt

private val detector = TextRecognition.getClient()

init {
   lifecycle.addObserver(detector)
}

カメラバッファから生成したVision Imageに対してオンデバイス・テキスト認識機能を使う

CameraXライブラリは画像認識に使えるカメラからの画像ストリームを提供してくれます。TextAnalyzerクラスのrecognizeText()メソッドを置き換えて、ML Kitのテキスト認識機能を画像に適用するようにしましょう。

TextAnalyzer.kt

private fun recognizeText(
   image: InputImage
): Task<Text> {
   // Pass image to an ML Kit Vision API
   return detector.process(image)
       .addOnSuccessListener { text ->
           // Task completed successfully
           result.value = text.text
       }
       .addOnFailureListener { exception ->
           // Task failed with an exception
           Log.e(TAG, "Text recognition error", exception)
           val message = getErrorMessage(exception)
           message?.let {
               Toast.makeText(context, message, Toast.LENGTH_SHORT).show()
           }
       }
}

以下のコードは、上記のメソッドを呼んでテキスト認識を始める方法を示します。analyze()メソッドの最後に追加しましょう。画像の分析が終わったらImageProxy.close()を呼ばなければいけないことに注意してください。カメラからの映像がそれ以上分析できなくなってしまいます。

TextAnalyzer.kt

recognizeText(InputImage.fromBitmap(croppedBitmap, 0)).addOnCompleteListener {
   imageProxy.close()
}

端末でアプリを実行する

Android StudioのツールバーでRunをクリックします。アプリが起動したら、リアルタイムでカメラに表示されたテキストを認識し始めるはずです。カメラで文字を写してみましょう。アプリがテキストを認識してくれない場合は、一度カメラを何もない場所に向けて認識を「リセット」してみましょう。

6.言語識別機能を追加する

ML Kit Language Identifierをインスタンス化する

MainViewModel.ktはmainフォルダーの中にあります。ファイルを開いて、次のフィールドをMainViewModel.ktに追加しましょう。次の手順ではこの参照を使って言語識別機能を扱います。

MainViewModel.kt

private val languageIdentifier = LanguageIdentification.getClient()

また、ここで取得したクライアントが不要になった際に正しくシャットダウンされることも必要です。ViewModelonCleared()メソッドをオーバーライドしましょう。

MainViewModel.kt

override fun onCleared() {
    languageIdentifier.close()
    translators.evictAll()
}

検出されたテキストでデバイス上の言語識別を実行する

ML Kitの言語識別機能を使用して、画像から検出されたテキストの言語を取得します。

: 検出されたテキストは、sourceTextというオブジェクトに格納されます。これは、一定期間新しい値に更新されていない場合にのみobserverに通知するカスタム LiveDataオブジェクトです。ここでは、検出されたテキストのちらつきを減らすために50ms間更新されなかった場合にのみ、言語識別関数を呼び出すのに使用します。この実装の詳細については、SmoothedMutableLiveDataクラスを参照してください。

MainViewModel.ktsourceLangフィールド定義内のTODOを次のコードに置き換えます。このスニペットは言語識別メソッドを呼び出し、未定義(und)でない場合は結果を割り当てます。言語が未定義で返ってくるということは、APIがサポートしている言語の一覧をもとに言語を識別することができなかったことを意味します。

MainViewModel.kt

val sourceLang = Transformations.switchMap(sourceText) { text ->
    val result = MutableLiveData<Language>()
    languageIdentifier.identifyLanguage(text)
        .addOnSuccessListener { languageCode ->
            if (languageCode != "und")
                result.value = Language(languageCode)
        }
    result
}

端末でアプリを実行する

Android StudioのツールバーでRunをクリックします。アプリが起動したら、リアルタイムでカメラに表示されたテキストを認識し始めるはずです。カメラで文字を写してみましょう。

7.翻訳機能の追加

MainViewModel.kttranslate()関数を次のコードに置き換えます。この関数はソース言語の値、ターゲット言語の値、およびソースのテキストを受け取り、翻訳を実行します。選択した言語のモデルがまだダウンロードされていない場合は、downloadModelIfNeeded()を呼んで翻訳を続けます。

MainViewModel.kt

private fun translate(): Task<String> {
   val text = sourceText.value
   val source = sourceLang.value
   val target = targetLang.value
   if (modelDownloading.value != false || translating.value != false) {
       return Tasks.forCanceled()
   }
   if (source == null || target == null || text == null || text.isEmpty()) {
       return Tasks.forResult("")
   }
   val sourceLangCode = TranslateLanguage.fromLanguageTag(source.code)
   val targetLangCode = TranslateLanguage.fromLanguageTag(target.code)
   if (sourceLangCode == null || targetLangCode == null) {
       return Tasks.forCanceled()
   }
   val options = TranslatorOptions.Builder()
       .setSourceLanguage(sourceLangCode)
       .setTargetLanguage(targetLangCode)
       .build()
   val translator = translators[options]
   modelDownloading.setValue(true)

   // Register watchdog to unblock long running downloads
   Handler().postDelayed({ modelDownloading.setValue(false) }, 15000)
   modelDownloadTask = translator.downloadModelIfNeeded().addOnCompleteListener {
       modelDownloading.setValue(false)
   }
   translating.value = true
   return modelDownloadTask.onSuccessTask {
       translator.translate(text)
   }.addOnCompleteListener {
       translating.value = false
   }
}

シミュレータでアプリを実行する

Android StudioのツールバーでRunをクリックします。アプリが起動したら、以下の動画のようにテキスト認識と識別された言語結果、選択した言語に翻訳されたテキストが表示されるはずです。59種類の言語から好きなものを選択できます。

8.おめでとうございます!

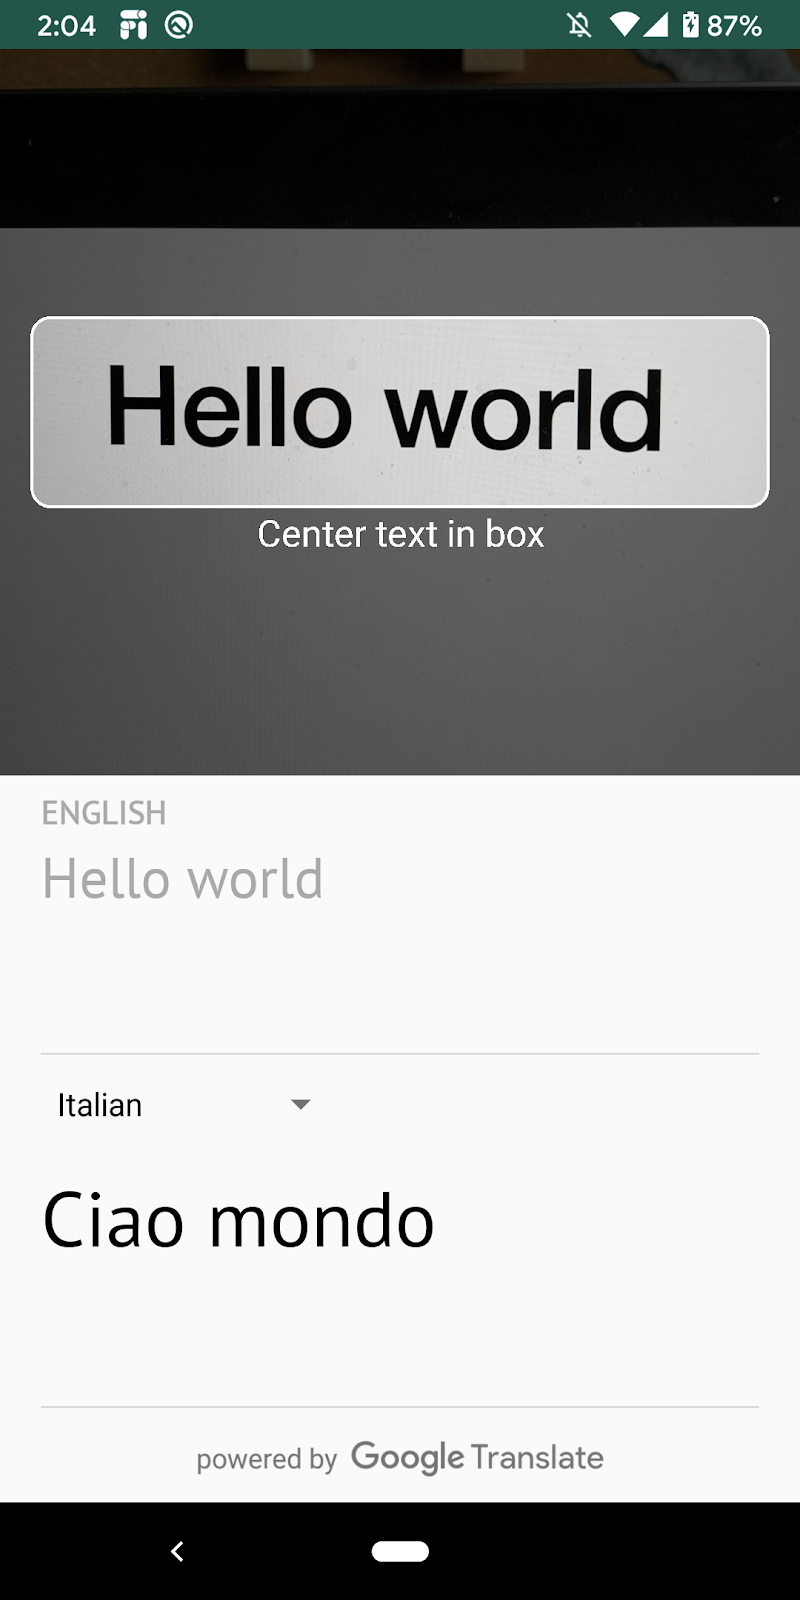
おめでとうございます!ML Kitを使用して、デバイス上のテキスト認識機能、言語識別機能、そして翻訳機能をアプリに追加しました。カメラの映像からテキストとその言語を認識し、選択した言語にリアルタイムで翻訳できるようになりました。

このコードラボで学んだこと

  • AndroidアプリにML Kitを追加する方法
  • ML Kitでデバイス上のテキスト認識機能を使って画像内のテキストを認識する方法
  • ML Kitでデバイス上の言語識別機能を使ってテキストの言語を識別する方法
  • ML Kitでデバイス上の翻訳機能を使って、テキストを動的に59種類の言語に翻訳する方法
  • CameraXをML Kit APIと組み合わせて使う方法

コードラボが終わったら

  • 自分のAndroidアプリでML KitとCameraXを使ってみてください!

参考リンク

Recognize, Identify Language and Translate text with ML Kit and CameraX:Android

About this codelab

  • Last updated 6月 17, 2020
  • Written by carenc

1. Introduction

ML Kit is a mobile SDK that brings Google's machine learning expertise to Android and Android apps in a powerful yet easy-to-use package. Whether you're new or experienced in machine learning, you can easily implement the functionality you need in just a few lines of code. There's no need to have deep knowledge of neural networks or model optimization to get started.

How does it work?

ML Kit makes it easy to apply ML techniques in your apps by bringing Google's ML technologies, such as Mobile Vision, and TensorFlow Lite, together in a single SDK. Whether you need the power of real-time capabilities of Mobile Vision's on-device models, or the flexibility of custom TensorFlow Lite models, ML Kit makes it possible with just a few lines of code.

This codelab will walk you through simple steps to add Text Recognition, Language Identification and Translation from real-time camera feed into your existing Android app. This codelab will also highlight best practices around using CameraX with ML Kit APIs.

What you will build

In this codelab, you're going to build an Android app with ML Kit. Your app will use the ML Kit Text Recognition on-device API to recognize text from real-time camera feed. It'll use ML Kit Language Identification API to identify language of the recognized text. Lastly, your app will translate this text to any chosen language out of 59 options, using the ML Kit Translation API.

In the end, you should see something similar to the image below.

What you'll learn

  • How to use the ML Kit SDK to easily add Machine Learning capabilities to any Android app.
  • ML Kit Text Recognition, Language Identification, Translation APIs and their capabilities.
  • How to use the CameraX library with ML Kit APIs.

What you'll need

  • A recent version of Android Studio (v4.0+)
  • A physical Android device
  • The sample code
  • Basic knowledge of Android development in Kotlin

This codelab is focused on ML Kit. Non-relevant concepts and code blocks are already provided and implemented for you.

2. Getting set up

Download the Code

Click the following link to download all the code for this codelab: Download source code

Unpack the downloaded zip file. This will unpack a root folder (mlkit-android) with all of the resources you will need. For this codelab, you will only need the resources in the translate subdirectory.

The transalate subdirectory in the mlkit-android repository contains the following directory:

starter—Starting code that you build upon in this codelab.

3. Verify the ML Kit and CameraX dependencies

Import the starter project into Android Studio. In the app/build.gradle file, verify that the necessary ML Kit and CameraX dependencies are included:

// CameraX dependencies
def camerax_version = "1.0.0-beta05"
implementation "androidx.camera:camera-core:${camerax_version}"
implementation "androidx.camera:camera-camera2:${camerax_version}"
implementation "androidx.camera:camera-lifecycle:${camerax_version}"
implementation "androidx.camera:camera-view:1.0.0-alpha12"

// ML Kit dependencies
implementation 'com.google.android.gms:play-services-mlkit-text-recognition:16.0.0'
implementation 'com.google.mlkit:language-id:16.0.0'
implementation 'com.google.mlkit:translate:16.0.0'

4. Run the starter app

Now that you have imported the project into Android Studio and checked for the ML Kit dependencies, you are ready to run the app for the first time! Start the Android Studio emulator, and click Run in the Android Studio toolbar.

The app should launch on your device and you can point the camera at various text to see a live feed, but the text recognition functionality has not been implemented yet.

5. Add text recognition

In this step, we will add functionality to your app to recognize text from the video camera.

Instantiate the ML Kit Text Detector

Replace the TODO at the top of TextAnalyzer.kt to instantiate TextRecognition. This is how you get a handle to the text recognizer to use in later steps. We also need to add the detector as a lifecycle observer in order to properly close the detector when it's no longer needed.

TextAnalyzer.kt

private val detector = TextRecognition.getClient()

init {
   lifecycle.addObserver(detector)
}

Run on-device text recognition on a Vision Image ( created with buffer from camera)

The CameraX library provides a stream of images from the camera ready for image analysis. Replace the recognizeText() method in the TextAnalyzer class to use ML Kit text recognition on each image frame.

TextAnalyzer.kt

private fun recognizeText(
   image: InputImage
): Task<Text> {
   // Pass image to an ML Kit Vision API
   return detector.process(image)
       .addOnSuccessListener { text ->
           // Task completed successfully
           result.value = text.text
       }
       .addOnFailureListener { exception ->
           // Task failed with an exception
           Log.e(TAG, "Text recognition error", exception)
           val message = getErrorMessage(exception)
           message?.let {
               Toast.makeText(context, message, Toast.LENGTH_SHORT).show()
           }
       }
}

The following line shows how we call the above method to start performing text recognition. Add the following line at the end of the analyze() method. Note that you have to call imageProxy.close once the analysis is complete on the image, otherwise the live camera feed will not be able to process further images for analysis.

TextAnalyzer.kt

recognizeText(InputImage.fromBitmap(croppedBitmap, 0)).addOnCompleteListener {
   imageProxy.close()
}

Run the app on your device

Now click Run in the Android Studio toolbar. Once the app loads, it should start recognizing text from camera in real-time. Point your camera to any text to confirm. If your app is not recognizing any text, try ‘resetting' the detection by pointing the camera at a blank space before pointing the camera at text.

6. Add language identification

Instantiate the ML Kit Language Identifier

MainViewModel.kt is located in the main folder. Navigate to the file and add the following field to MainViewModel.kt. This is how you get a handle to the language identifier to use in the following step.

MainViewModel.kt

private val languageIdentifier = LanguageIdentification.getClient()

In addition, you also want to be sure that the clients are properly shut down when it's no longer needed. To do this, override the onCleared() method of the ViewModel.

MainViewModel.kt

override fun onCleared() {
    languageIdentifier.close()
    translators.evictAll()
}

Run on-device language identification on the detected text

Use the ML Kit Language Identifier to get the language of the detected text from the image.

Note: The detected text is stored in an object called sourceText. This is a custom LiveData object that only notifies observers only when the new value has not changed for a certain duration. We use this here to only call the language identification function if the detected text has been stable for 50ms to reduce flicker. See the SmoothedMutableLiveData class for information on how this has been implemented.

Replace the TODO in the sourceLang field definition in MainViewModel.kt with the following code. This snippet calls the language identification method and assigns the result if it is not undefined ("und"). An undefined language means that the API was not able to identify the language based on the list of supported languages.

MainViewModel.kt

val sourceLang = Transformations.switchMap(sourceText) { text ->
    val result = MutableLiveData<Language>()
    languageIdentifier.identifyLanguage(text)
        .addOnSuccessListener { languageCode ->
            if (languageCode != "und")
                result.value = Language(languageCode)
        }
    result
}

Run the app on your device

Now click Run in the Android Studio toolbar. Once the app loads, it should start recognizing text from camera and identifying the text's language in real-time. Point your camera to any text to confirm.

7. Add translation

Replace the translate() function in MainViewModel.kt with the following code. This function takes the source language value, target language value, and the source text and performs the translation. Note how if the chosen target language model has not yet been downloaded onto the device, we call downloadModelIfNeeded() to do so, and then proceed with the translation.

MainViewModel.kt

private fun translate(): Task<String> {
   val text = sourceText.value
   val source = sourceLang.value
   val target = targetLang.value
   if (modelDownloading.value != false || translating.value != false) {
       return Tasks.forCanceled()
   }
   if (source == null || target == null || text == null || text.isEmpty()) {
       return Tasks.forResult("")
   }
   val sourceLangCode = TranslateLanguage.fromLanguageTag(source.code)
   val targetLangCode = TranslateLanguage.fromLanguageTag(target.code)
   if (sourceLangCode == null || targetLangCode == null) {
       return Tasks.forCanceled()
   }
   val options = TranslatorOptions.Builder()
       .setSourceLanguage(sourceLangCode)
       .setTargetLanguage(targetLangCode)
       .build()
   val translator = translators[options]
   modelDownloading.setValue(true)

   // Register watchdog to unblock long running downloads
   Handler().postDelayed({ modelDownloading.setValue(false) }, 15000)
   modelDownloadTask = translator.downloadModelIfNeeded().addOnCompleteListener {
       modelDownloading.setValue(false)
   }
   translating.value = true
   return modelDownloadTask.onSuccessTask {
       translator.translate(text)
   }.addOnCompleteListener {
       translating.value = false
   }
}

Run the app on the simulator

Now click Run in the Android Studio toolbar. Once the app loads, it should now look like the moving image below, showing the text recognition and identified language results and the translated text into the chosen language. You can choose any of the 59 languages.

8. Congratulations!

Congratulations, you have just added on-device text recognition, language identification, and translation to your app using ML Kit! Now you can recognize text and its language from the live camera feed and translate this text to a language you choose all in real-time.

What we've covered

  • How to add ML Kit to your Android app
  • How to use on-device text recognition in ML Kit to recognize text in images
  • How to use on-device language identification in ML Kit to identify language of text
  • How to use on-device translation in ML Kit to translate text dynamically to 59 languages
  • How to use CameraX in conjunction with ML Kit APIs

Next Steps

  • Use ML Kit and CameraX in your own Android app!

Learn More

Sign up for free to join this conversation on GitHub. Already have an account? Sign in to comment