TBS Fusion 解析メモ (by @GOROman)
TBS Fusionを解析しているので覚書
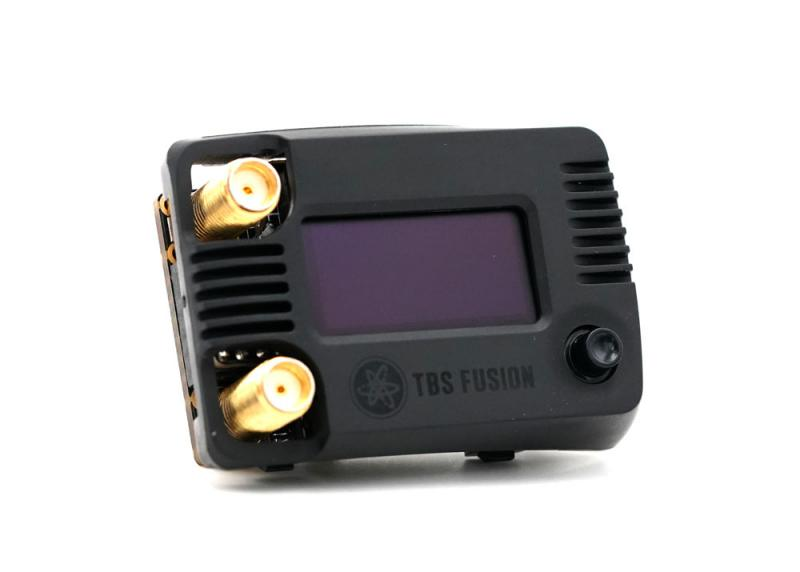
TBS Fusion とは?
FPVドローン用の5.8GHz帯映像レシーバー。主にFPVゴーグルに接続して使う。他のレシーバー同様ダイバーシティアンテナで2系統のアンテナ入力がある。
TBS Fusionは、STM系のメインチップと、主にWIFI(TBS Fusion WIFIとしてWebサーバーになる)用のESP-12Fという2つのSoCを搭載している。ESP-12Fは、ESP8266系なのでESP8266系のプログラムをファームウェアとして焼き込んで使用することが可能。さらに、ELRSのTXモジュールからESP NOW(ESP32/ESP8266などのWIFIを使用して簡易的に通信する仕組み)を使用して、VTX周波数を変更する仕組み「ELRS Backpack」も利用できる。
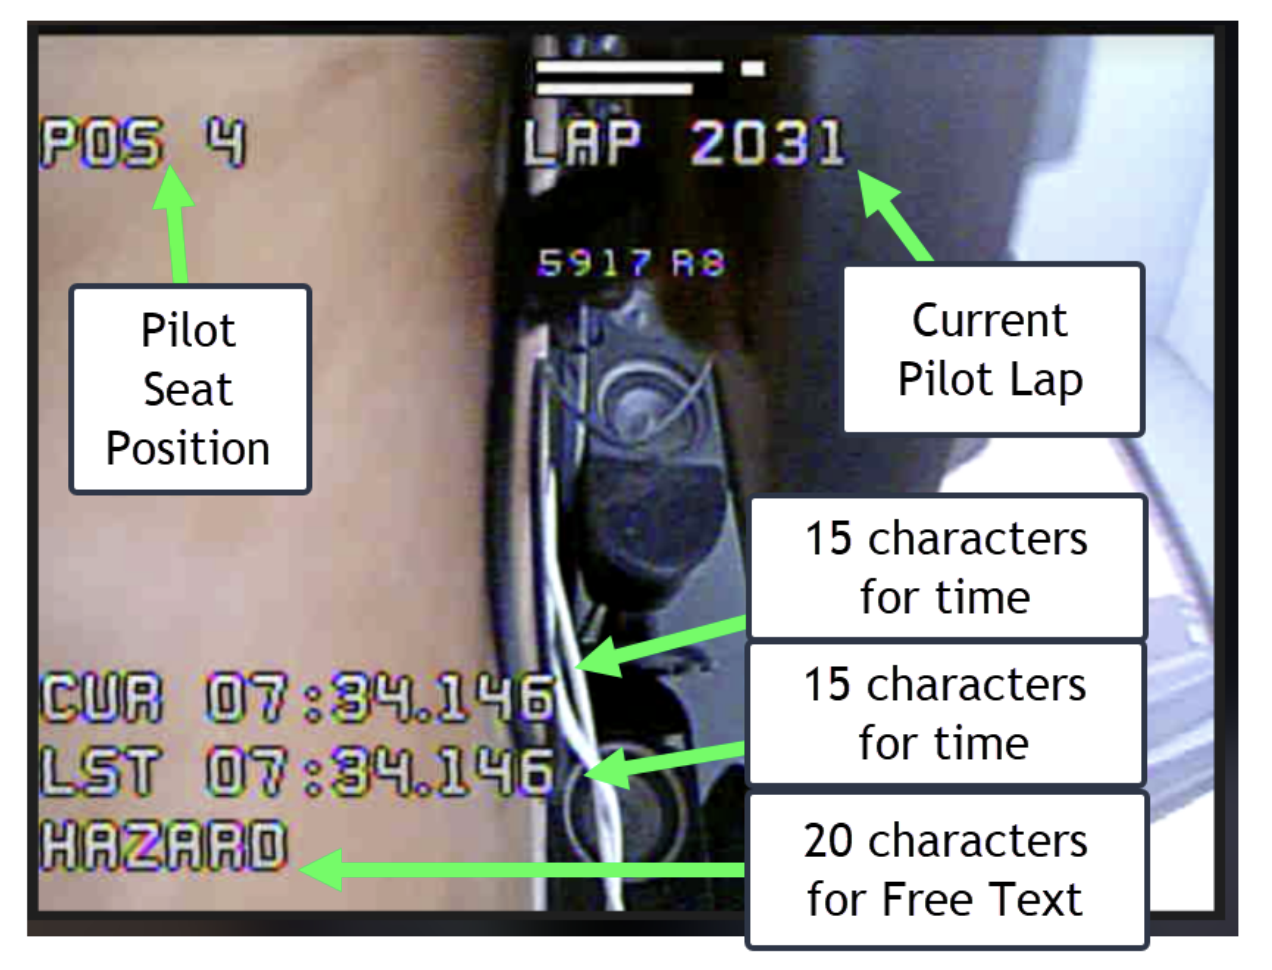
TBS公式から、LAPやタイムなどを外部から送信してHUDに表示する機能のBETA版ファームウェアが提供された。この機能を活用すると、レース中に選手へLAP TIMEや順位をOSDに通知するなどが可能となる。
対応ファームウェア
- TBS Fusion firmware v2.30以降(USBでPCと接続してTBS Agentで更新)
- TBS Cloud WIFI firmware v2.06以降(WIFIで接続して更新) する必要がある。
M5StackなどESP32を搭載したESP NOW対応デバイスを使えば簡単にLAPタイムなどを表示することができる。
また、有効化するには "Settings > CRSF > Fusion WIFI > PRO > ESP NOW" を Enable にする必要あり。
// 構造体
typedef struct struct_message {
  uint8_t Command_Type=0x22;
  uint8_t seat_position; //Used for Position of the Pilot
  uint8_t lap_number; //Used for the Pilot Current Lap
  char val3[16]; //15 characters for the lap time current/split 1 char for ‘/0’ null
  char val4[16]; //15 characters for the lap time current/split 1 char for ‘/0’ null
  char freetext[21];// Free text of 20 character on the bottom of the screen 1 char for ‘/0’ null
} struct_message;
// ESP NOWで送信する
esp_now_send(broadcastAddress, (uint8_t *) &myData, sizeof(myData));ESP NOWの使い方の参考:
- https://lang-ship.com/blog/work/m5stickc-esp-now-1/
- https://randomnerdtutorials.com/esp-now-esp32-arduino-ide/
【重要】 VTX変更を有効化するには、TBS Fusionのメニューから、 Settings > VTX Synch > Follow に予め設定しておく必要がある
ELRS Backpack についてはこちら
ELRS Configurator の Backpack タブから
- Device Category: VRX
- TBS Fusion VRX Backpack
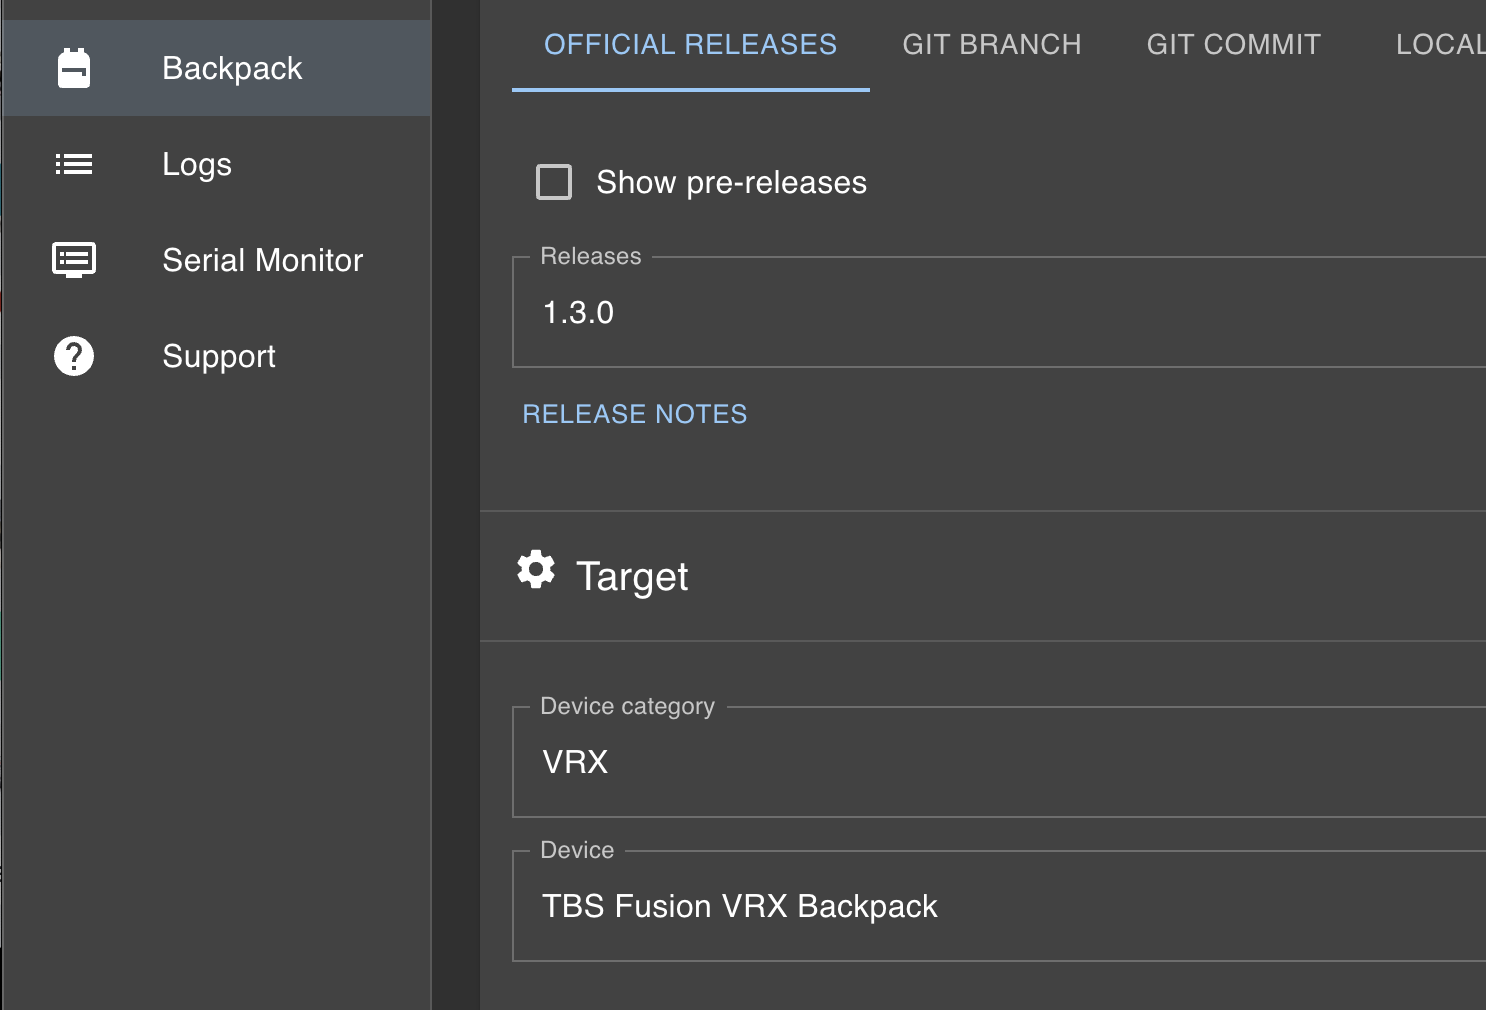
でビルドを行い、UART経由で焼く。ただし、ELRS TX側が対応しているもの(日本で使える)がないので現実的ではない。

元に戻すには、TBS Fusion Cloud WIFIのファームウェアを焼く。
尚、esptool.py でもファームウェアを焼ける
> esptool.py -b 115200 write_flash 0 0x000350xx_0x0206.bin
VTX周波数変更は、ESP-12F側からUARTでCRSFパケットを送ることで変更が可能。独自のファームウェアを作成するなどで対応可能と思われる。 ESP NOWで送るもよし、Webサーバーを起動してスマホ連動させるもよし、ELRSレシーバーを繋いでAUX4などの値を判別しても良い。 WIFIでOTAで戻せるようにしておくと良いと思われる。ELRS Backpackのファームウェアを改造するのを推奨。
- UART速度: 500kbps (N81)
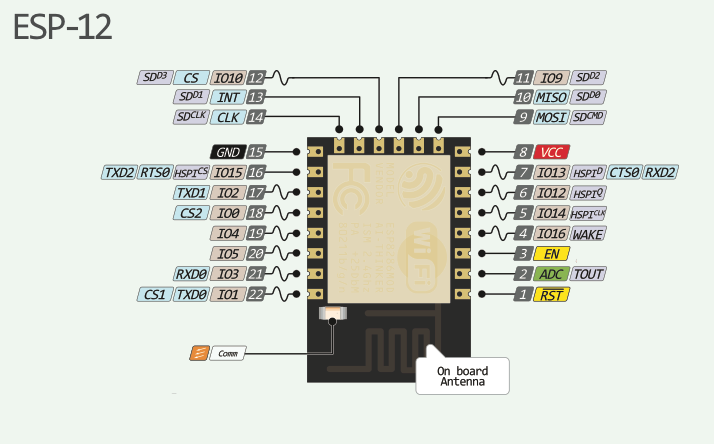
TBS Fusion上(OLEDパネルの下にある)のESP-12FのENピン(Pin.3)をGNDに落とすと、FUSION上のESP-12Fを無効化できる。いつでも元の状態に戻せるメリットがある。ただし、若干の半田付け等が必要。 この状態でUART(TXD0,RXD0)とGNDをArduinoマイコンやM5Stackなどに繋いで、CRSFパケットをUART経由で送ることで各種制御が可能。
| Pin No | Pin Name | Memo |
|---|---|---|
| 3 | EN | GNDに落とすことで無効化 |
| 21 | RXD0 | Arduino などのTXへ繋ぐ |
| 22 | TXD0 | Arduino などのRXへ繋ぐ |
| 15 | GND | Arduino などのGNDへ繋ぐ |
- UART速度: 500kbps (N81)

TBS Crossfire(CRSF) の制御コマンド。
0xC8 から始まるパケットとなっている。
VTX周波数の変更については、以下のソースコードを参照。
    uint16_t f = frequencyTable[index];
    uint8_t buf[12];
    uint8_t pos = 0;

    // 0xC8, 0xA, 0x40, 0x0, 0x0, 0x10, 0xEC, 0xE, 0x16, 0x94, 0x1, 0xBC, 0xC8, 0x04, 0x28, 0x00, 0x0E, 0x7C

    buf[pos++] = 0xC8;      // framing byte
    buf[pos++] = 0x0A;      // len
    buf[pos++] = 0x40;      // some form of device / origin address ?
    buf[pos++] = 0x00;      // some form of device / origin address ?
    buf[pos++] = 0x00;      // some form of device / origin address ?
    buf[pos++] = 0x10;
    buf[pos++] = 0xEC;
    buf[pos++] = 0x0E;
    buf[pos++] = f >> 8;    // freq byte 1
    buf[pos++] = f & 0xFF;  // freq byte 2
    buf[pos++] = 0x01;

    uint8_t crc = crsf_crc.calc(&buf[2], pos - 2); // first 2 bytes not included in CRC
    buf[pos++] = crc;

    for (uint8_t i = 0; i < pos; ++i)
    {
        Serial.write(buf[i]);
    }
パケットの最後に付与するCRCの計算をする必要がある。CRCはペイロード部のみ計算。
参考ソースコード https://github.com/ExpressLRS/Backpack/blob/master/src/fusion.cpp
なお、同様にして、CRSFパケットでOSDのLAPやテキスト表示も行える。
typedef struct struct_message
{
    uint8_t DeviceAddr = 0xC8;
    uint8_t FrameSize = 0x00;
    uint8_t TypeHeader = 0x40; // type  extended header frames (type in range 0x28 to 0x96)

    // Extended fields
    uint8_t DestAddr = 0x00;
    uint8_t OrigAddr = 0x00;
    uint8_t Command_Type = 0x22;
    uint8_t seat_position; // Used for Position of the Pilot
    uint8_t lap_number;    // Used for the Pilot Current Lap
    char val3[16];         // 15 characters for the lap time current/split 1 char for ‘/0’ null
    char val4[16];         // 15 characters for the lap time current/split 1 char for ‘/0’ null
    char freetext[21];     // Free text of 20 character on the bottom of the screen 1 char for ‘/0’ null
    uint8_t crc = 0xff;
} struct_message;

static struct_message OSD;

    OSD.FrameSize = sizeof(OSD) - 2;
    strcpy(OSD.val3, "HELLO");
    sprintf(OSD.freetext, "T:%4d", PackedRCdataOut.ch2);
    OSD.lap_number = 1;
    OSD.seat_position = 2;
    OSD.crc = crsf_crc.calc(&OSD.TypeHeader, OSD.FrameSize - 1);

    _outputPort->write((byte *)&OSD, sizeof(OSD));
【訂正】TBS Fusion の UARTの通信速度 500,000bps(500kbps) 。