- To run a broader array of software than with OS X alone.
- To run faster, by more fully exploiting the hardware, and by running with a smaller memory footprint.
- To more fully customize the user interface.
- Switching user interfaces frequently can undermine your muscle memory and be frustrating.
- Resume from sleeping state does not work correctly under Linux for me. Resume from sleep still works on OS X, but extended sleep (i.e. hibernation) may be broken. So Save before sleep!
-
Make sure your data is backed up. One of the following steps is particularly dangerous, and you should keep a backup anyway. I use Apple's preinstalled Time Machine software, and I recommend it.
-
Gather the following:
- A USB stick with at least 4 GB of space. You can use this both for resizing your OS X partition in Stage II, and for installing Ubuntu in Stage IV.
- Download Apple's Recovery Disk Assistant for use in Stage II. Copy the app onto your system, perhaps into
Applications/Utilities. - Download and unzip the rEFInd bootloader. Save it anywhere you like under OS X for use in Stage III.
- Download the latest Ubuntu 13 Desktop ISO. Save it anywhere you like under OS X for use in Stage IV.
-
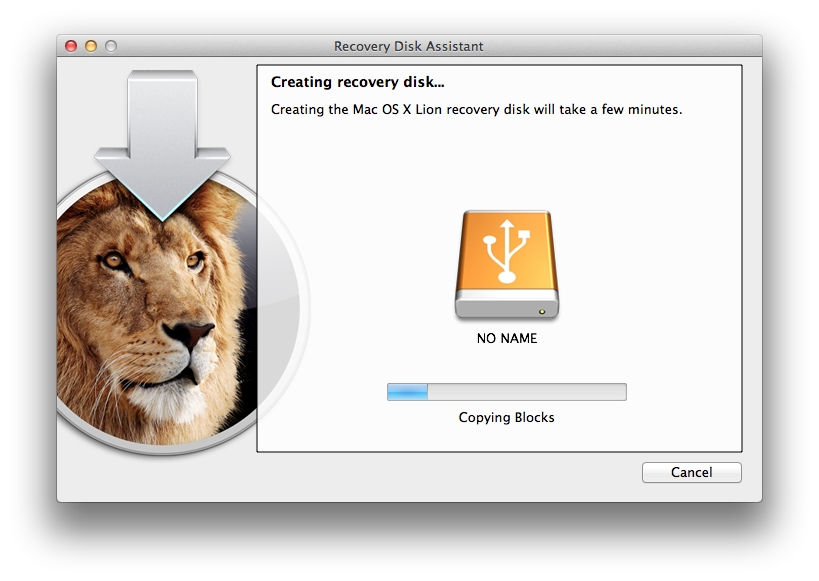
Run the Recovery Disk Assistant, and use it to make your USB stick bootable to the OS X Recovery system. This is required because you can't resize partitions on the disk you booted from. It's pretty self-explanatory, and takes a minute or two.
-
With the USB stick inserted, reboot your Mac with the Option key held down. You'll see two options for booting to OS X Recovery - one represents the recovery partition on your laptop's internal drive, and one represents the recovery partition on the USB stick.
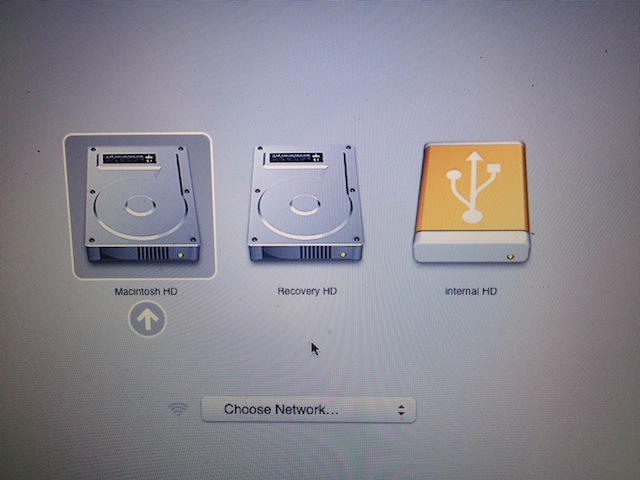
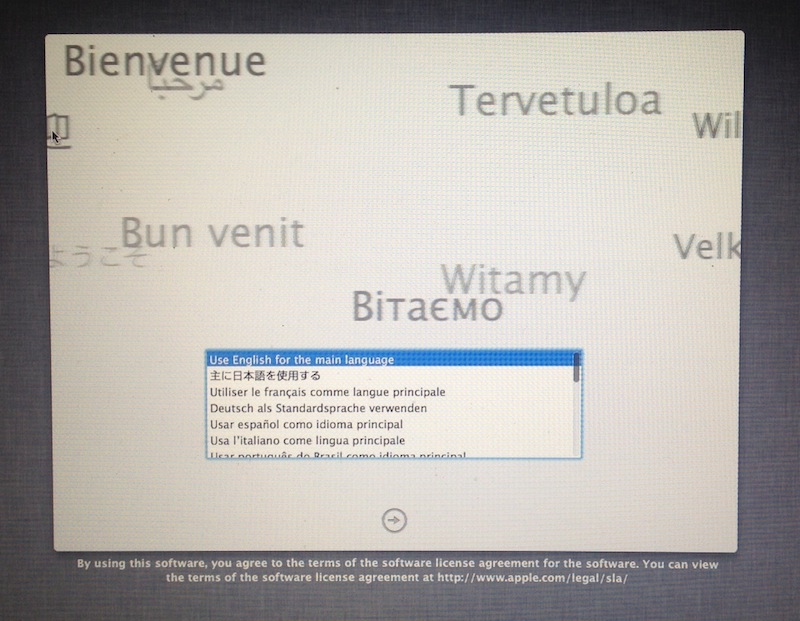
See the USB icon on the right? Boot from that one! You should eventually be presented with the OS X Recovery Welcome Screen:
-
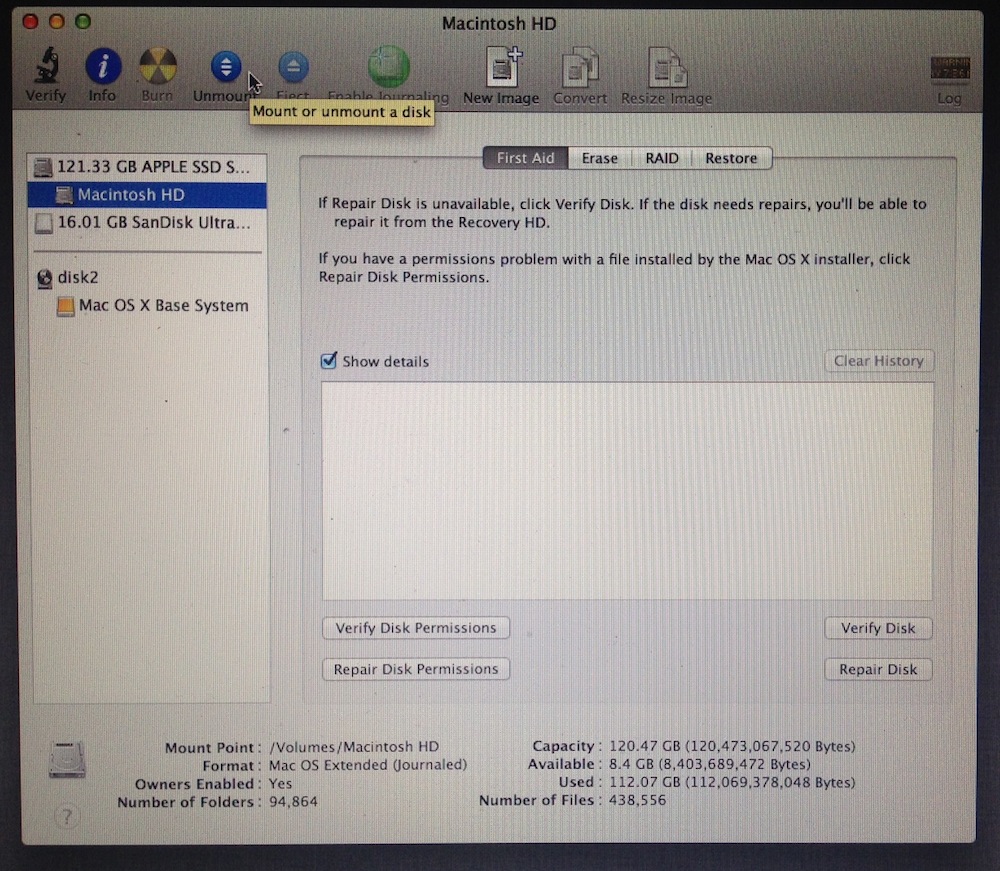
Now unmount your
Macintosh HDby selecting it from the device list on the left, and clicking the blueUnmountbutton. -
Next, select the device itself from the left-hand list (one level above
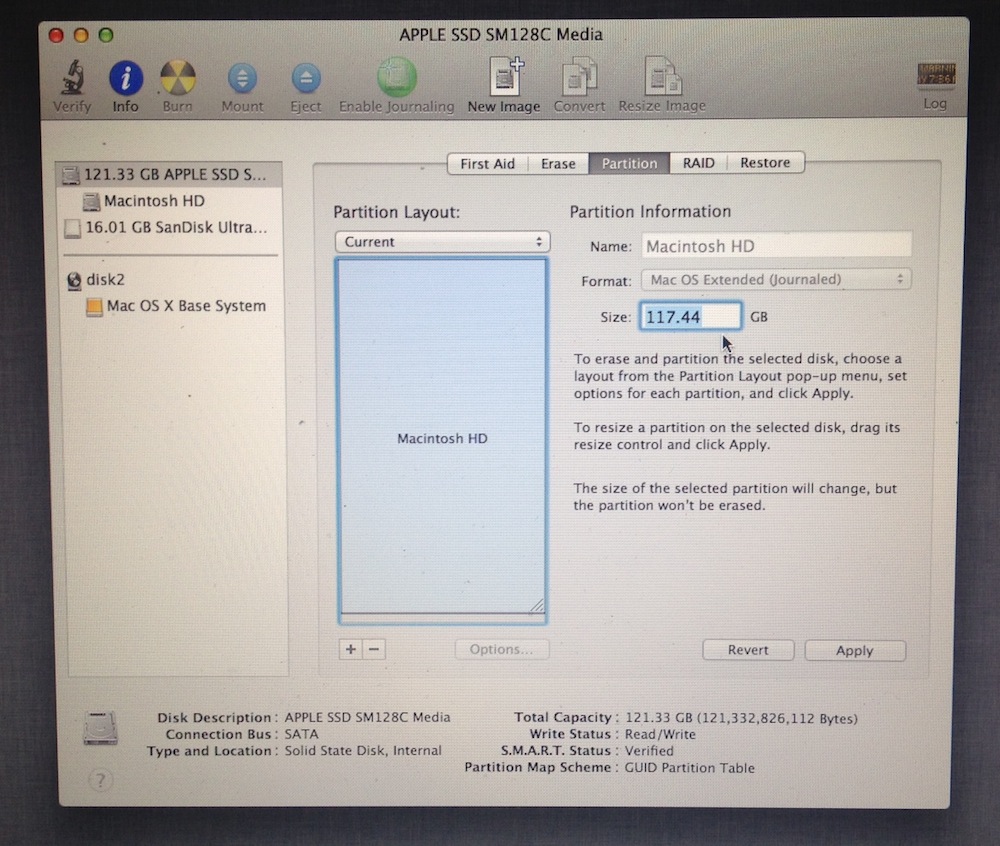
Macintosh HD), and click on thePartitionbutton/tab to show its partition layout. -
Click on the large section that represents your main OS X partition, and reduce its size by typing in a new value. You should shrink it by at least 15 GB or so. I have a big fat SSD, so I gave it 50 GB.
.
-
Click the
Applybutton and wait for the resize to complete. Once it's done, reboot the computer back into OS X.
-
Open a Terminal, and change directories to the location where you unzipped rEFInd. Run its installer script, making sure to add the ext4 filesystem drivers that will allow auto-discovery of the Linux kernel.
 cd ~/Downloads/refind-bin-0.7.4
 ./install.sh --alldrivers
The script will prompt you for your password, beacuse it needs to act as root. It will install rEFInd into
/EFI/refind. -
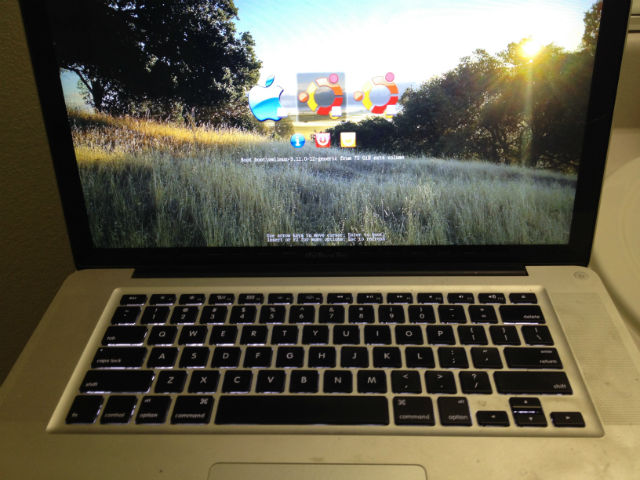
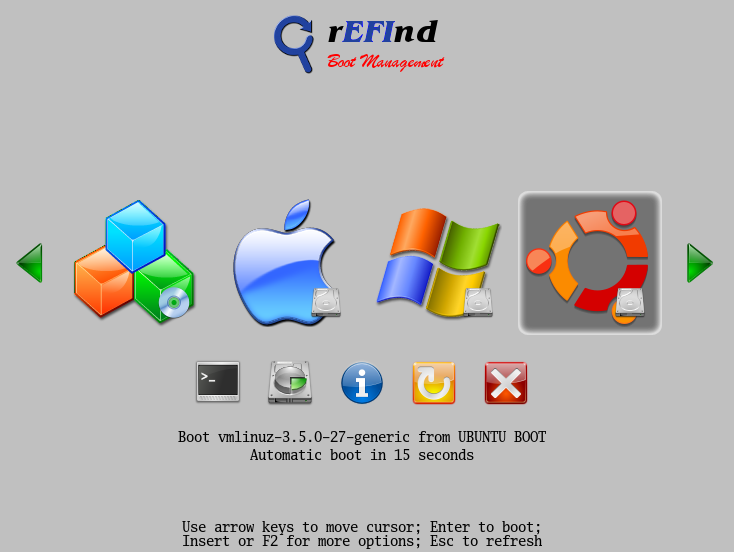
Reboot. You should be greeted with the rEFInd boot screen, which will boot you back into OS X by default. It should look like this, only with fewer icons (for now).
Boot back up to OS X, to make sure all is well.
-
Open Terminal and run the following:
diskutil listThis will produce a list of storage devices attached to your Mac. You may have only your internal disk as
/dev/disk0(and its various partitions), but if you have other disks, you may see more devices. Make sure you understand which is which. -
Now insert the USB stick you'll use to install Ubuntu, and run
disktuil listagain. Take careful note of the new device name (/dev/disk1or whatever) -- the one that represents the target USB stick. -
Change to the directory where you downloaded the Ubuntu ISO. Run the following command, but instead of
[N], substitute the correct disk number for the USB from the previous step. (So if your USB stick is/dev/disk2, then substitute the number 2 for[N]):cd ~/Downloads sudo dd if=ubuntu-13.10-desktop-amd64+mac.iso of=/dev/rdisk[N] bs=1m(note that for this command, using
/dev/rdiskmakes the process go slightly faster than just/dev/disk)This command is silent while it runs, and may take some time if you're copying from a hard disk. Be patient. When it's done, OS X will try to mount the disk, unsuccessfully. You may see a dialog reading "The disk you inserted was not readable by this computer" -- this is normal. Go ahead and click
IgnoreorEject, but don't actually pull out the USB stick. -
With the USB stick still inserted, reboot once again. rEFIt should discover the linux kernel on the Ubuntu USB stick, and present a corresponding boot option. Once it boots from the USB stick, go ahead and select
Install Ubuntu. -
The rest of the process is quite strightforward - just make sure you tell the installer to create new partitions from the free space, and don't wipe out your existing partitions!
This will have to wait for a separate blog post. But here's a list of things I got working with zero or minimal configuration:
- Full-res display with OpenGL support, including external displays with a Thunderbolt adaptor. I'm told Retina displays work fine, but I don't have one.
- Audio in and out, both analog and optical-digital;
- Two-finger trackpad scrolling;
- Cisco VPN connections through the built-in networking GUI;
- Google Hangouts, Hipchat (native app), and AdobeConnect;
- Readonly access to the OS X partition, for easy data migration;
- Streaming (non-DRM) video to AppleTVs with the airplay ruby gem;
- A Passenger/Nginx setup that will serve any Rack app located in
~/projects/[app_dir]from URLs likehttp://[app_dir].dev. This uses RBENV to select the correct Ruby, and eliminates both manual service startup, and manual port confuration for wiring the services together.
The following are not (yet) working for me:
- Full range of trackpad gestures. I know how to fix this, but not in a way that won't break when Unity updates itself.
- Streaming of system audio to AppleTV/AirPortExpress with PulseAudio's RAOP driver plugin.