-
-
Save dbkinghorn/c236aea31d76028b2b6ccdf6d3c6f07e to your computer and use it in GitHub Desktop.
| #cloud-config | |
| autoinstall: | |
| version: 1 | |
| refresh-installer: # start with an up-to-date installer | |
| update: yes | |
| interactive-sections: # Install groups listed here will wait for user input | |
| - storage | |
| storage: # should set the interactive default but doesn't seem to work?? | |
| layout: | |
| name: direct | |
| locale: en_US.UTF-8 | |
| keyboard: | |
| layout: us | |
| identity: # This is section you may want to add to interactive-sections (user name and password are ubuntu here) | |
| hostname: puget-000 | |
| password: "$6$exDY1mhS4KUYCE/2$zmn9ToZwTKLhCw.b4/b.ZRTIZM30JZ4QrOQ2aOXJ8yk96xpcCof0kxKwuX1kqLG/ygbJ1f8wxED22bTL4F46P0" | |
| username: ubuntu | |
| ssh: | |
| allow-pw: true | |
| install-server: true | |
| apt: | |
| sources: | |
| ignored1: # This is here to get the yaml formatting right when adding a ppa | |
| source: ppa:graphics-drivers/ppa | |
| packages: | |
| - build-essential | |
| - network-manager | |
| - dkms | |
| - emacs-nox | |
| - ubuntu-desktop-minimal | |
| package_update: true | |
| package_upgrade: true | |
| late-commands: | |
| # Changing from networkd to NetworkManager | |
| # move existing config out of the way | |
| - find /target/etc/netplan/ -name "*.yaml" -exec sh -c 'mv "$1" "$1-orig"' _ {} \; | |
| # Create a new netplan and enable it | |
| - | | |
| cat <<EOF | sudo tee /target/etc/netplan/01-netcfg.yaml | |
| network: | |
| version: 2 | |
| renderer: NetworkManager | |
| EOF | |
| - curtin in-target --target /target netplan generate | |
| - curtin in-target --target /target netplan apply | |
| - curtin in-target --target /target systemctl enable NetworkManager.service | |
| # Write a script that can take care of some post install setup "late-commands" cannot be interactive unfortunately" | |
| # - | | |
| # cat <<EOF | sudo tee /target/etc/finish-install-setup.sh | |
| # #!/usr/bin/env bash | |
| # echo ************************* | |
| # echo **** Finish Setup **** | |
| # echo ************************* | |
| # echo 'Enter the hostname for this system: ' | |
| # read NEW_HOSTNAME | |
| # hostnamectl set-hostname \${NEW_HOSTNAME} | |
| # echo | |
| # echo 'Enter the timezone for this system: ' | |
| # echo 'America/Los_Angeles America/Denver America/Chicago America/New_York' | |
| # read NEW_TIMEZONE | |
| # timedatectl set-timezone \${NEW_TIMEZONE} | |
| # echo ************************* | |
| # echo | |
| # echo ************************* | |
| # echo 'Restarting to finish ...' | |
| # shutdown -r 3 | |
| # EOF | |
| # - curtin in-target --target /target chmod 744 /etc/finish-install-setup.sh | |
| - cp /target/cdrom/extras/Puget_Systems.png /target/usr/share/backgrounds/ | |
| user-data: # Commands here run during first boot (cannot be interactive) | |
| runcmd: | |
| # Install the NVIDIA driver from the ppa we setup earlier | |
| - [apt-get, update] | |
| - [apt-get, dist-upgrade, --yes] | |
| - [apt, autoremove, --yes] | |
| - [apt-get, install, --yes, nvidia-driver-470] #, --no-install-recommends] | |
| - [sudo, -u, ubuntu, dbus-launch, gsettings, set, org.gnome.desktop.background, picture-uri, file:///usr/share/backgrounds/Puget_Systems.png] | |
| # - | | |
| # #!/usr/bin/env bash | |
| # echo '' | |
| # echo '***************************************' | |
| # echo ' To complete install setup please run, ' | |
| # echo ' sudo /etc/finish-install-setup.sh' | |
| # echo '***************************************' | |
| # echo '' |
| #cloud-config | |
| autoinstall: | |
| version: 1 | |
| refresh-installer: # start with an up-to-date installer | |
| update: yes | |
| interactive-sections: # Install groups listed here will wait for user input | |
| - storage | |
| storage: # should set the interactive default but doesn't seem to work?? | |
| layout: | |
| name: direct | |
| locale: en_US.UTF-8 | |
| keyboard: | |
| layout: us | |
| identity: # This is section you may want to add to interactive-sections (user name and password are ubuntu here) | |
| hostname: puget-000 | |
| password: "$6$exDY1mhS4KUYCE/2$zmn9ToZwTKLhCw.b4/b.ZRTIZM30JZ4QrOQ2aOXJ8yk96xpcCof0kxKwuX1kqLG/ygbJ1f8wxED22bTL4F46P0" | |
| username: ubuntu | |
| ssh: | |
| allow-pw: true | |
| install-server: true | |
| apt: | |
| sources: | |
| ignored1: # This is here to get the yaml formatting right when adding a ppa | |
| source: ppa:graphics-drivers/ppa | |
| packages: | |
| - build-essential | |
| - network-manager | |
| - dkms | |
| - emacs-nox | |
| #- ubuntu-desktop-minimal^ | |
| package_update: true | |
| package_upgrade: true | |
| late-commands: | |
| # Changing from networkd to NetworkManager | |
| # move existing config out of the way | |
| - find /target/etc/netplan/ -name "*.yaml" -exec sh -c 'mv "$1" "$1-orig"' _ {} \; | |
| # Create a new netplan and enable it | |
| - | | |
| cat <<EOF | sudo tee /target/etc/netplan/01-netcfg.yaml | |
| network: | |
| version: 2 | |
| renderer: NetworkManager | |
| EOF | |
| - curtin in-target --target /target netplan generate | |
| - curtin in-target --target /target netplan apply | |
| - curtin in-target --target /target systemctl enable NetworkManager.service | |
| # Write a script that can take care of some post install setup "late-commands" cannot be interactive unfortunately" | |
| # - | | |
| # cat <<EOF | sudo tee /target/etc/finish-install-setup.sh | |
| # #!/usr/bin/env bash | |
| # echo ************************* | |
| # echo **** Finish Setup **** | |
| # echo ************************* | |
| # echo 'Enter the hostname for this system: ' | |
| # read NEW_HOSTNAME | |
| # hostnamectl set-hostname \${NEW_HOSTNAME} | |
| # echo | |
| # echo 'Enter the timezone for this system: ' | |
| # echo 'America/Los_Angeles America/Denver America/Chicago America/New_York' | |
| # read NEW_TIMEZONE | |
| # timedatectl set-timezone \${NEW_TIMEZONE} | |
| # echo ************************* | |
| # echo | |
| # echo ************************* | |
| # echo 'Restarting to finish ...' | |
| # shutdown -r 3 | |
| # EOF | |
| # - curtin in-target --target /target chmod 744 /etc/finish-install-setup.sh | |
| - ls -l > /target/root/ls.out | |
| - pwd > /target/root/pwd.out | |
| - mount > /target/root/mount.out | |
| - touch afile | |
| - cp afile /target/root/ | |
| - ls -l / > /target/root/ls-root.out | |
| - ls -l /target > /target/root/ls-target.out | |
| - ls -l /target/cdrom > /target/root/ls-target-cdrom.out | |
| user-data: # Commands here run during first boot (cannot be interactive) | |
| runcmd: | |
| # Install the NVIDIA driver from the ppa we setup earlier | |
| - [apt-get, install, --yes, nvidia-driver-470, --no-install-recommends] | |
| - | | |
| #!/usr/bin/env bash | |
| echo '' | |
| echo '***************************************' | |
| echo ' To complete install setup please run, ' | |
| echo ' sudo /etc/finish-install-setup.sh' | |
| echo '***************************************' | |
| echo '' |
I ran through the procedure this morning and created ISO bootable from MBR and UEFI using the new install image Ubuntu server 22.04.2
Everything worked fine. Main thing is to be very careful about formating files. YAML is very picky!
My testing is in a comment on
https://www.pugetsystems.com/labs/hpc/ubuntu-22-04-server-autoinstall-iso/
When you do this in bare-metal be sure that you have tried a manual install on that hardware. If there is anything broken with a manual install then the auto-install will also be broken. Some times you need to pass kernel flags on the grub line in order to install. If you have to do that then you would need to add those kernel flags to the grub.cfg stanza. And add them to /etc/defaults/grub too ...
I ran through the procedure this morning and created ISO bootable from MBR and UEFI using the new install image Ubuntu server 22.04.2
Everything worked fine. Main thing is to be very careful about formating files. YAML is very picky!
My testing is in a comment on https://www.pugetsystems.com/labs/hpc/ubuntu-22-04-server-autoinstall-iso/
When you do this in bare-metal be sure that you have tried a manual install on that hardware. If there is anything broken with a manual install then the auto-install will also be broken. Some times you need to pass kernel flags on the grub line in order to install. If you have to do that then you would need to add those kernel flags to the grub.cfg stanza. And add them to /etc/defaults/grub too ...
@dbkinghorn Thank you so much
May i know the which kernel flags i need to send to grub.cfg. Please ping here
If you can manually install then you don't need any. But, as an example, on AMD WRX80 Tr Pro motherboards you sometimes need to include
amd_iommu=on iommu=pt
It's fairly common to need to use "nomodeset" if you have an install that just goes to a black screen.
If you can manually install then you don't need any. But, as an example, on AMD WRX80 Tr Pro motherboards you sometimes need to include amd_iommu=on iommu=pt
It's fairly common to need to use "nomodeset" if you have an install that just goes to a black screen.
Hi @dbkinghorn @zero-pytagoras sorry to disturb you. I need your help
In my baremetal server i checked it was not working both manual and autoinstall. I am getting this error
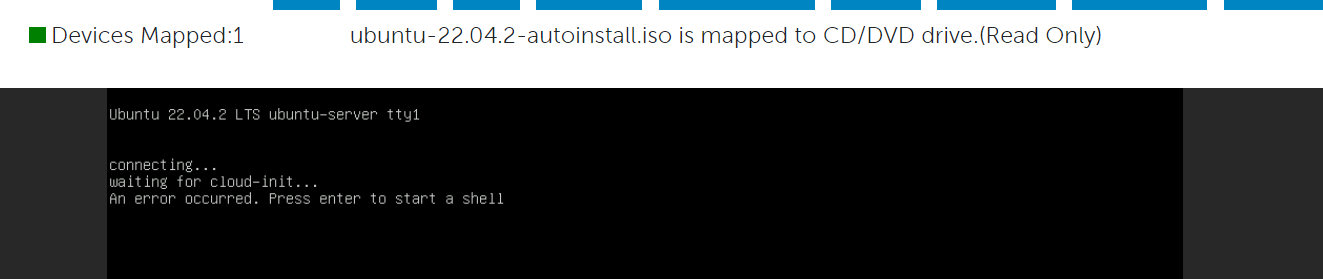
Next i am trying edit the kernel flags & can you please check in the below image in grub file

In boot mode i am pressing the e edit and next to edit /etc/defaults/grub i am using ctrl + c
Next in command line i am running these command to GRUB_CMDLINE_LINUX="amd_iommu=on iommu=pt"
I am sharing the user-data file

@dbkinghorn Thanks in advance
running yamllint is a great idea! It is very easy to have a file error that is not even be noticeable.
Also, I highly recommend using a very simple user-data file for testing. Maybe just up to the point of creating an account. Try to simplify and then add on once you get a basic auto install working.
It does look like you are installing to an AMD Tr Pro motherboard! That error you see when doing the manual install is related to iommu.
If doing the manual install and adding those kernel flags using "e" editing during boot works. Then what you have in the grub.cfg file should also work.
If the manual install is still failing then try these 3 kernel flags (I added an extra one that is sometimes needed on those motherboards)
amd-iommu=on iommu=pt pci=nommconf
Hi @dbkinghorn
I have tried manual with these commands amd-iommu=on iommu=pt pci=nommconf working
But I tried same with auto install it was not working same error

I have yamllint , cloudint for user-data there were no errors

@dbkinghorn can you please help me to get out this issue. can you please schedule meeting for 10-15 min orelse can you please send the exact iso include kernel flags.
Thanks in advance
Fix your yaml errors and warnings. When you run yamllint it should not return anything. JonSent from my Verizon, Samsung Galaxy smartphone -------- Original message --------From: D Mahaboobabasha @.> Date: 3/8/23 4:42 AM (GMT-05:00) To: bashadude @.> Cc: Comment @.> Subject: Re: dbkinghorn/user-data-server @bashadude commented on this gist.running yamllint is a great idea! It is very easy to have a file error that is not even be noticeable.Also, I highly recommend using a very simple user-data file for testing. Maybe just up to the point of creating an account. Try to simplify and then add on once you get a basic auto install working.It does look like you are installing to an AMD Tr Pro motherboard! That error you see when doing the manual install is related to iommu.If doing the manual install and adding those kernel flags using "e" editing during boot works. Then what you have in the grub.cfg file should also work.If the manual install is still failing then try these 3 kernel flags (I added an extra one that is sometimes needed on those motherboards)amd-iommu=on iommu=pt pci=nommconfHi @dbkinghornI have tried manual with these commands amd-iommu=on iommu=pt pci=nommconf workingBut I tried same with auto install it was not working same errorI have yamllint , cloudint for user-data there were no @. can you please help me to get out this issue. can you please should meeting for 10-15 min orelse can you please send the exact iso include kernel flags.Thanks in advance—Reply to this email directly, view it on GitHub or unsubscribe.You are receiving this email because you commented on the thread.Triage notifications on the go with GitHub Mobile for iOS or Android.
@jnlickey Thank you jnlickey I have cleared all errors and warnings with yamllint
But i check with cloudint it starts with #cloud-config. In yaml it was asking to start with this ---. I am following yamllint. let me try now

Hi @jnlickey @zero-pytagoras @dbkinghorn
I got issue from the storage side. My user-data code below
#cloud-config
autoinstall:
version: 1
refresh-installer: # start with an up-to-date installer
channel: edge
update: yes
interactive-sections: # Install groups listed here will wait for user input
- storage
storage: # should set the interactive default but doesn't seem to work??
layout:
name: lvm
storage:
config:
- ptable: gpt
serial: 362cea7f0bfdbe5002ab3267d0c098d7a
wwn: '0x62cea7f0bfdbe5002ab3267d0c098d7a'
path: /dev/sda
wipe: superblock-recursive
preserve: false
name: ''
grub_device: false
type: disk
id: disk-sda
- device: disk-sda
size: 1127219200
wipe: superblock
flag: boot
number: 1
preserve: false
grub_device: true
offset: 1048576
type: partition
id: partition-0
- fstype: fat32
volume: partition-0
preserve: false
type: format
id: format-0
- device: disk-sda
size: 2147483648
wipe: superblock
number: 2
preserve: false
grub_device: false
offset: 1128267776
type: partition
id: partition-1
- fstype: ext4
volume: partition-1
preserve: false
type: format
id: format-1
- device: disk-sda
size: 955843084288
wipe: superblock
number: 3
preserve: false
grub_device: false
offset: 3275751424
type: partition
id: partition-2
- name: ubuntu-vg
devices:
- partition-2
preserve: false
type: lvm_volgroup
id: lvm_volgroup-0
- name: ubuntu-lv
volgroup: lvm_volgroup-0
size: 107374182400B
wipe: superblock
preserve: false
type: lvm_partition
id: lvm_partition-0
- fstype: ext4
volume: lvm_partition-0
preserve: false
type: format
id: format-2
- path: /
device: format-2
type: mount
id: mount-2
- path: /boot
device: format-1
type: mount
id: mount-1
- path: /boot/efi
device: format-0
type: mount
id: mount-0
updates: security
version: 1
locale: en_US.UTF-8
keyboard:
layout: us
identity: # This is section you may want to add to interactive-sections (user name and password are ubuntu here)
hostname: puget-000
password: "$6$exDY1mhS4KUYCE/2$zmn9ToZwTKLhCw.b4/b.ZRTIZM30JZ4QrOQ2aOXJ8yk96xpcCof0kxKwuX1kqLG/ygbJ1f8wxED22bTL4F46P0"
username: ubuntu
ssh:
allow-pw: true
install-server: true
apt:
sources:
ignored1: # This is here to get the yaml formatting right when adding a ppa
source: ppa:graphics-drivers/ppa
packages:
- build-essential
- network-manager
- dkms
- emacs-nox
#- ubuntu-desktop-minimal^
package_update: true
package_upgrade: true
late-commands:
# Changing from networkd to NetworkManager
# move existing config out of the way
- find /target/etc/netplan/ -name "*.yaml" -exec sh -c 'mv "$1" "$1-orig"' _ {} ;
# Create a new netplan and enable it
- |
cat <<EOF | sudo tee /target/etc/netplan/01-netcfg.yaml
network:
version: 2
renderer: NetworkManager
EOF
- curtin in-target --target /target netplan generate
- curtin in-target --target /target netplan apply
- curtin in-target --target /target systemctl enable NetworkManager.service
# Write a script that can take care of some post install setup "late-commands" cannot be interactive unfortunately"
# - |
# cat <<EOF | sudo tee /target/etc/finish-install-setup.sh
# #!/usr/bin/env bash
# echo *************************
# echo **** Finish Setup ****
# echo *************************
# echo 'Enter the hostname for this system: '
# read NEW_HOSTNAME
# hostnamectl set-hostname ${NEW_HOSTNAME}
# echo
# echo 'Enter the timezone for this system: '
# echo 'America/Los_Angeles America/Denver America/Chicago America/New_York'
# read NEW_TIMEZONE
# timedatectl set-timezone ${NEW_TIMEZONE}
# echo *************************
# echo
# echo *************************
# echo 'Restarting to finish ...'
# shutdown -r 3
# EOF
# - curtin in-target --target /target chmod 744 /etc/finish-install-setup.sh
- ls -l > /target/root/ls.out
- pwd > /target/root/pwd.out
- mount > /target/root/mount.out
- touch afile
- cp afile /target/root/
- ls -l / > /target/root/ls-root.out
- ls -l /target > /target/root/ls-target.out
- ls -l /target/cdrom > /target/root/ls-target-cdrom.out
- sed -i 's/ENABLED=1/ENABLED=0/' /target/etc/default/motd-news
- ln -fs /dev/null /target/etc/systemd/system/connman.service
- ln -fs /dev/null /target/etc/systemd/system/display-manager.service
- ln -fs /dev/null /target/etc/systemd/system/motd-news.service
- ln -fs /dev/null /target/etc/systemd/system/motd-news.timer
- ln -fs /dev/null /target/etc/systemd/system/plymouth-quit-wait.service
- ln -fs /dev/null /target/etc/systemd/system/plymouth-start.service
- ln -fs /dev/null /target/etc/systemd/system/systemd-resolved.service
- ln -fs /usr/share/zoneinfo/Europe/Kiev /target/etc/localtime
- rm -f /target/etc/resolv.conf
- printf 'nameserver 8.8.8.8\nnameserver 1.1.1.1\noptions timeout:1\noptions attempts:1\noptions rotate\n' > /target/etc/resolv.conf
- rm -f /target/etc/update-motd.d/10-help-text
user-data: # Commands here run during first boot (cannot be interactive)
runcmd:
# Install the NVIDIA driver from the ppa we setup earlier
- [apt-get, install, --yes, nvidia-driver-470, --no-install-recommends]
- |
#!/usr/bin/env bash
echo ''
echo ''
echo ' To complete install setup please run, '
echo ' sudo /etc/finish-install-setup.sh'
echo ''
echo ''
Hi @dbkinghorn I am waiting for your reply can you please help me to debug this in baremetal server in AMD TR pro motherboards
The suggestions I've given are all I know for issues with WRX80 motherboards. If you are still having trouble with a local install then maybe you have a physical hardware problem. I can't really help you diagnose that.
Any ideas, why the write script option in your template is not being executed ?
edit. Probably a typo, one issue is though /etc/hosts file goes not get changed, on changing hostname via hostnamectl ? any ideas ?
Yes. In the write section I have commented out there are interactive sections for reading hostname and timezone. Those hang because there isn't proper terminal i/o at that point.
You can write scripts like that out and I thought it would run properly during the user-data section but there still isn't terminal i/o available.
It seems like there should be some way to do this but I was not able to find it.
...
I wish Canonical would have kept an option to do server installs from the Debian installer! ... or better adopted Kickstart :-)
Thanks for reply, I cross posted because I edited it, and got it working.
but changing hostname, via hostnamectl does not change the hostname in the /etc/hosts, so not sure if need to drop back to interactivite method of entering name password and hostname to get the correct hostname in /etc/hosts
... I don't like to drop back to interactive for all of that but it may be the best (easiest) solution.
When you go to an interactive section, the installer is supposed to populate you defaults with any values you give in the cloud-init file. Like a default user and pw, but I've had trouble getting that to work too!
I found a way, to update /etc/hosts file, I think scripted, but this may all be a waste of time, because of domain join to Active Directory and if the workstation was joined to domain on build and later hostname change, it's going to break domain connection, so may have to also script domain join, and not make part of cloud-init
Hi @dbkinghorn
Nice to meet you.
I have read your blogs but I am totally confused about how to create an autoinstall configuration file and edit it.
I have set up an iPXE boot server and that works. However, I would like to automate the installation of additional software so Ubuntu installs automatically with either autoinstall/preseed. However I am not sure how to add additional software packages to the autoinstall file and where is autoinstall configuration file etc. Finally, I'd like to install salt at the end so it can finish configuring the device with the software I need.
Hi @homaur
as mentioned above - create the user-data file that has apt and packages parts, where you add repositories and packages for you use.
as an example, part of user-data file:
apt:
    sources:
      ignored1:  # This is here to get the yaml formatting right when adding a ppa
        source: ppa:saltstack/salt
  packages:
    - build-essential
    - network-manager
    - dkms
    - salt # <-- here you add the package
Hi @homaur as mentioned above - create the user-data file that has
aptandpackagesparts, where you add repositories and packages for you use. as an example, part of user-data file:apt: sources: ignored1: # This is here to get the yaml formatting right when adding a ppa source: ppa:saltstack/salt packages: - build-essential - network-manager - dkms - salt # <-- here you add the package
Great!
But as I mentioned above, I am not clear on how to create the user-data file and where this file should be located.
I can't find any blogs for how to create the user-data file and where this file is and so on.
There are many blogs with rough explanations. No details.
Please help me how to do that.
Did you understand what I want to do?
I have set up an iPXE boot server and that works. However, I would like to automate the installation of additional software so Ubuntu installs automatically with either autoinstall/preseed. However I am not sure how to add additional software packages to the autoinstall file and where is autoinstall configuration file etc. Finally, I'd like to install salt at the end so it can finish configuring the device with the software I need.
Homaur,Feel free to use my Ubuntu AutoInstaller script. It will help to auto generate the user data file, by setting up the networking information, name, user accounts, etc. However, you'll need to modify either the script or the user-data file for your needs. Here's an example user-data file:https://github.com/jnlickey/Ubuntu_AutoInstaller/blob/main/user-dataJon Lickey, M.I.S Sent from my Verizon, Samsung Galaxy smartphone -------- Original message --------From: Homaur @.> Date: 9/7/23 6:03 AM (GMT-05:00) To: homaur @.> Cc: Comment @.***> Subject: Re: dbkinghorn/user-data-server @homaur commented on this gist.Hi @homaur as mentioned above - create the user-data file that has apt and packages parts, where you add repositories and packages for you use. as an example, part of user-data "notranslate">apt: sources: ignored1: # This is here to get the yaml formatting right when adding a ppa source: ppa:saltstack/salt packages: - build-essential - network-manager - dkms - salt # <-- here you add the package Great!But as I mentioned above, I am not clear on how to create the user-data file and where this file should be located.—Reply to this email directly, view it on GitHub or unsubscribe.You are receiving this email because you commented on the thread.Triage notifications on the go with GitHub Mobile for iOS or Android.
Oh great and Oh very complicated.
I am not sure if you understand what I want or not. Here is my explanation of what I want to do.
I have set up an iPXE boot server and that works. However, I would like to automate the installation of additional software so Ubuntu installs automatically with either autoinstall/preseed. However I am not sure how to add additional software packages to the autoinstall file and where is autoinstall configuration file etc. Finally, I'd like to install salt at the end so it can finish configuring the device with the software I need. Totally, I want to install additional software automatically after Ubuntu has installed. Ubuntu will be installed via PXE net.
Do you understand?
Hi @homaur as mentioned above - create the user-data file that has
aptandpackagesparts, where you add repositories and packages for you use. as an example, part of user-data file:apt: sources: ignored1: # This is here to get the yaml formatting right when adding a ppa source: ppa:saltstack/salt packages: - build-essential - network-manager - dkms - salt # <-- here you add the packageGreat! But as I mentioned above, I am not clear on how to create the user-data file and where this file should be located. I can't find any blogs for how to create the user-data file and where this file is and so on. There are many blogs with rough explanations. No details. Please help me how to do that. Did you understand what I want to do?
I have set up an iPXE boot server and that works. However, I would like to automate the installation of additional software so Ubuntu installs automatically with either autoinstall/preseed. However I am not sure how to add additional software packages to the autoinstall file and where is autoinstall configuration file etc. Finally, I'd like to install salt at the end so it can finish configuring the device with the software I need.
Hi @homaur
In regards to where, It depends - if you wish to use iPXE then it should be located on PXE server , on the path that is shared. For example: /var/www/pxe/user-data folder.
All is left is to take ISO file of ubuntu -> boot -> choose boot from PXE(should be in advanced settings) -> give it pxe address and path to user-data, and it will perform what ever is configured in user-data
In regards to How to create user-data : @jnlickey provided link to github repository with example of user-data and tool to build the file. there is also cloud-init documentation that is used to create the file and also there is youtube tutorial to guide you and another one that might be useful
Hi @homaur as mentioned above - create the user-data file that has
aptandpackagesparts, where you add repositories and packages for you use. as an example, part of user-data file:apt: sources: ignored1: # This is here to get the yaml formatting right when adding a ppa source: ppa:saltstack/salt packages: - build-essential - network-manager - dkms - salt # <-- here you add the packageGreat! But as I mentioned above, I am not clear on how to create the user-data file and where this file should be located. I can't find any blogs for how to create the user-data file and where this file is and so on. There are many blogs with rough explanations. No details. Please help me how to do that. Did you understand what I want to do?
I have set up an iPXE boot server and that works. However, I would like to automate the installation of additional software so Ubuntu installs automatically with either autoinstall/preseed. However I am not sure how to add additional software packages to the autoinstall file and where is autoinstall configuration file etc. Finally, I'd like to install salt at the end so it can finish configuring the device with the software I need.Hi @homaur In regards to where, It depends - if you wish to use iPXE then it should be located on PXE server , on the path that is share. For example:
/var/www/pxe/user-datafolder. All is left is to take ISO file of ubuntu -> boot -> choose boot from PXE(should be in advanced settings) -> give it pxe address and path to user-data, and it will perform what ever is configured in user-data In regards to How to create user-data : @jnlickey provided link to github repository with example of user-data and tool to build the file. there is also cloud-init documentation that is used to create the file and also there is youtube tutorial to guide you and another one that might be useful
Oh so, for example, autoinstall configuration file will be located in /var/www/pxe/user-data folder in iPXE server, right?
Hi @homaur as mentioned above - create the user-data file that has
aptandpackagesparts, where you add repositories and packages for you use. as an example, part of user-data file:apt: sources: ignored1: # This is here to get the yaml formatting right when adding a ppa source: ppa:saltstack/salt packages: - build-essential - network-manager - dkms - salt # <-- here you add the packageGreat! But as I mentioned above, I am not clear on how to create the user-data file and where this file should be located. I can't find any blogs for how to create the user-data file and where this file is and so on. There are many blogs with rough explanations. No details. Please help me how to do that. Did you understand what I want to do?
I have set up an iPXE boot server and that works. However, I would like to automate the installation of additional software so Ubuntu installs automatically with either autoinstall/preseed. However I am not sure how to add additional software packages to the autoinstall file and where is autoinstall configuration file etc. Finally, I'd like to install salt at the end so it can finish configuring the device with the software I need.Hi @homaur In regards to where, It depends - if you wish to use iPXE then it should be located on PXE server , on the path that is share. For example:
/var/www/pxe/user-datafolder. All is left is to take ISO file of ubuntu -> boot -> choose boot from PXE(should be in advanced settings) -> give it pxe address and path to user-data, and it will perform what ever is configured in user-data In regards to How to create user-data : @jnlickey provided link to github repository with example of user-data and tool to build the file. there is also cloud-init documentation that is used to create the file and also there is youtube tutorial to guide you and another one that might be usefulOh so, for example, autoinstall configuration file will be located in /var/www/pxe/user-data folder in iPXE server, right?
Yes - indeed ...
Ah!!! Great!!!
Thank you for your kind reply.
I will try with your suggestion and let you know.
I really appreciate it.
Thank you again!!!
Hello there,
I am currently building an autoinstall ISO using Ubuntu 22.04.3 LTS live server. A blog post by @dbkinghorn has been immensely helpful in this process. However, I have encountered an issue with the autoinstall script I created, specifically with regard to enabling autologin for the new user.
The purpose of this autoinstall is to run docker engine. I am in need of suggestions or assistance to resolve this issue. Below is my 'user-data' configuration:
#cloud-config
autoinstall:
  version: 1
  storage:
    layout:
      name: direct
  partitions:
    - name: primary
      number: 1
      size: 100%
      type: ext4
      wipe: superblock
  preserve_layout: false
  overwrite: true
  filesystems:
    - device: /dev/disk/by-id/*
      format: ext4
      label: ubuntu
  locale: en_US.UTF-8
  keyboard:
    layout: us
  identity:
    hostname: ubuntu_machine
    password: $6$NpdhCKROExJxGAP9$uJ/hKo9ON7VZ.nwC02p8yKHPFtEWz.aphNk7D1fDI7aUmtrXTN5i/QmDhtbCf0xNQEr/LTphOfdcgovbDwG8l.
    username: ubuntu
  ssh:
    allow-pw: true
    install-server: true
  apt:
    primary:
      - arches: [default]
        uri: http://us.archive.ubuntu.com/ubuntu/
  packages:
    - build-essential
    - network-manager
    - dkms
    - vim
    - git
    - docker.io
    - nodejs
    - npm
    - sqlite

  package_update: true
  package_upgrade: true
  late-commands:
    # Changing from networkd to NetworkManager
    # move existing config out of the way
    - find /target/etc/netplan/ -name "*.yaml"
      -exec sh -c 'mv "$1" "$1-orig"' _ {} \;
    # Create a new netplan and enable it
    - |
      cat <<EOF | sudo tee /target/etc/netplan/01-netcfg.yaml
      network:
        version: 2
        renderer: NetworkManager
      EOF
    - curtin in-target --target /target netplan generate
    - curtin in-target --target /target netplan apply
    - curtin in-target --target /target systemctl enable NetworkManager.service
  users:
    - name: ubuntu
      groups: docker
      shell: /bin/bash
      sudo: ALL=(ALL) NOPASSWD:ALL
  autologin:
    enable: true
    user: root
I have been working on this problem for several weeks and would greatly appreciate any guidance or help. Thank you.
You probably still have a little more experimenting to do. Here are a couple of things to try;
-
You have the user 'ubuntu' already defined with a password (effectively the install root user'.) You might want to try setting up your auto-login user with at different name. (I'm not sure how this is done with a manual install. Maybe you want to do this in the identity section and not assign a password at all??)
-
If you want to have the user 'ubuntu' as the auto login user then you might have better luck in late-commands using curtin in-target --target to do the config change manually with system commands like usermod etc..
I don't have experience using auto login but I hope I'm giving you good advise on things to try. Best wishes --Don
@shubham-kshetre I had a kinda successful but disgusting method go get autologin working.
In late_commands add this:
# Create a service to run above script on bootup
- |
  cat <<EOF | sudo tee /target/etc/systemd/system/setup_autologin.service
  [Unit]
  Description=Configure autologin for user "tester"

  [Service]
  Type=oneshot
  ExecStart=/bin/bash -c "sed -i 's/#  AutomaticLoginEnable = true/AutomaticLoginEnable = true/' /etc/gdm3/custom.conf && sed -i 's/#  AutomaticLogin = user1/AutomaticLogin = tester/' /etc/gdm3/custom.conf && groupadd docker && usermod -aG docker tester && newgrp docker"

  [Install]
  WantedBy=multi-user.target
  EOF
- curtin in-target --target /target chmod 0644 /etc/systemd/system/setup_autologin.service
- curtin in-target --target /target systemctl enable setup_autologin
Basically create a service that will run prior to the desktop loading. Problem is that you have to delete the service file post login.
Hi @dbkinghorn

I am also facing MBR and GPT issues. Can you tell me when you build another iso or ping in this blog. I am waiting for your post. Also i am facing subiquity/Errorreporter/162334394239423.block_probe_fail : written to /var/crash
Thank you so much