Breaking the Cycle: When Spatial Analysis and Transit Data Collide
May 1, 2015 1:30 - 3:00pm
###Introduction
Daniel McGlone, Senior GIS Analyst, Azavea
Tyler Dahlberg, Geospatial Solutions Specialist, Azavea
###Presentation
Bike Theft Analysis
Pedestrian Crash Analysis
###Workshop
###Setup
Chicago Bike Thefts 2001-2012
Chicago Wards
####QGIS A quick introduction to spatial analysis with QGIS
####Software requirements:
- Download QGIS (Get the standalone version)
- Download the data for this workshop here. Note: Dan McGlone and I have already cleaned up and preprocessed this data, so it should work in the tutorials. If you were to download the raw data there would be some extra steps.
If you do want to download the raw bike theft data, here's how to do it:
- Visit the Crimes from 2001-Present data set
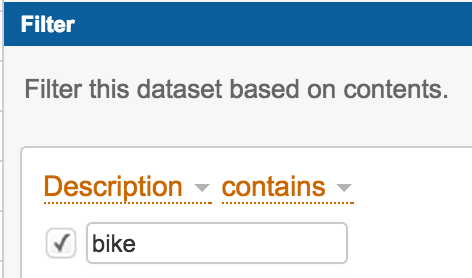
- Filter the data by contains
bike Export the data as CSV or Excel format
- Open QGIS, add the bike theft shapefile in QGIS via Layer > Add Layer > Vector. The browse to the correct location and find thefts_projected.shp.
- Note: We pre-processed the bike theft data and converted it from CSV to Shapefile, and removed some problematic fields that were causing errors.
If you were to add a CSV to QGIS and map it, you'd do it like this:
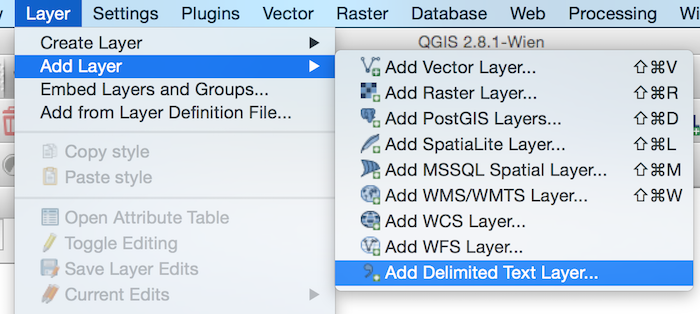
Layer > Add layer > Delimited Text Layer

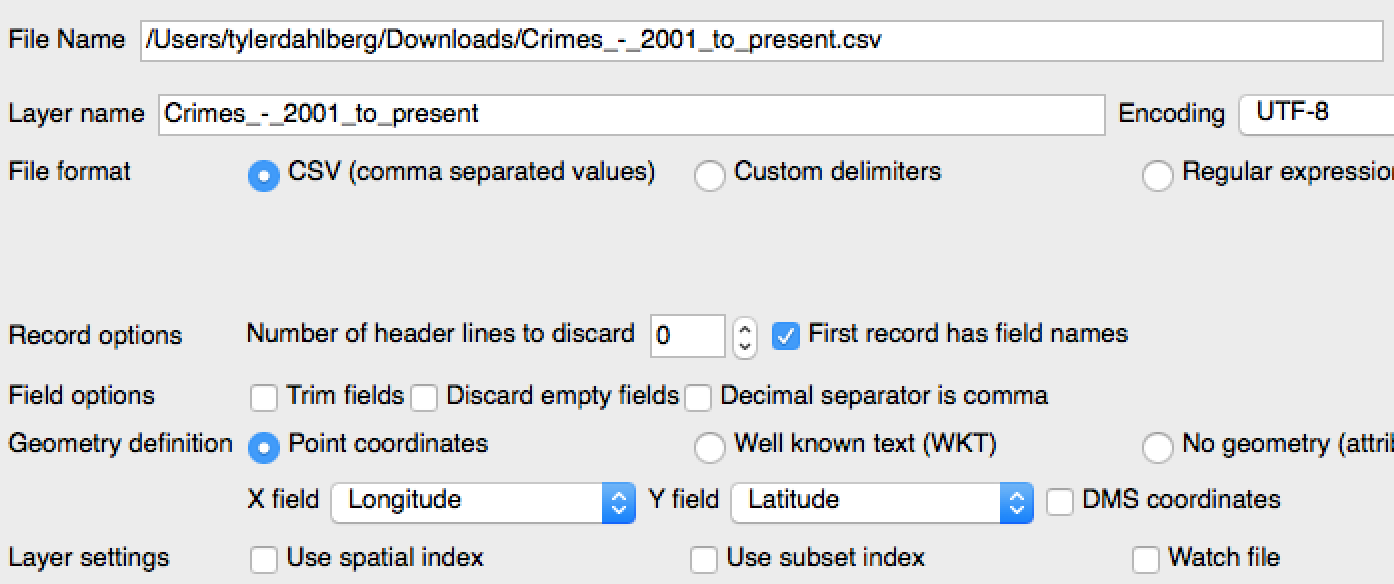
- Set the X and Y fields to the correct settings.
X = Longitude,Y = Latitude
- Add some context! Load in three more shapefiles the same way we did for bike theft. (from the data folder, though download links are included below)
Each shapefile consists of a prefix, with a bunch of different file extensions. So each shapefile might have five different files, but they'll all start witht the same name. Make sure to keep them TOGETHER, or else it will probably break the file.
These layers should all be overlapping now. If they're not, it's probably because each layer is using a different projection (though we made sure that wouldn't happen with the processed data.
If layers overlap: GREAT! If they don't, you have projection problems. If you're having projection problems, that's a whole other can of worms and you'll probably need to consult a GIS friend to figure it out.
Now that we have both points and polygons, let's do some analysis!
- Summarize # of thefts in each geographic boundary
- Points in Polygons
- Click Vector > Analysis > Points in Polygons
- Input Vector layer = your boundary file
- Input Point layer = your incident file Name = whatever you would like the resulting count field to be called Let's "stamp" bike thefts onto Chicago neighborhoods, tracts, and wards.
###Visualize theft with a density map Click Raster > Heatmap
###Labels You can label things!
###Create interactive webmaps! ####Download QGIS2Leaf plugin in QGIS by doing: Plugins > Manage and Install Plugins > find QGIS2leaf in the list of plugins > install
###Let's create an advocacy map!
- Add in thefts_wards.shp
- Add in chicago_council.csv. I used import.io to pull this list from Wikipedia. Make sure to click "No Geometry", and make sure "First Record Has field names" is checked. Hit OK
- Perform a join. Double click thefts_wards > Joins > Green Plus button >
- Check the thefts_wards attribute table by right-clicking. It should hae more fields than before.
- Right-click thefts_wards and save as a new shapefile, thefts_wards_council.shp. This locks in the changes we made.
- Remove the chicago_council.csv
- Add in thefts_projected.shp
- Double click thefts_wards_council and select label. Select "Label this layer with" __name, click buffer below, and "draw text buffer"
- Double click thefts_wards_council again and click Style > Graduated > Field = pntcnt > natural breaks (jenks)
- open QGIS 2 Leaf plugin and use the following settings. Make sure to name your map and choose an export location you can find.
- Find the export location and double click the .HTML file inside.
- MAGIC!
####CartoDB
#####Add Data to CartoDB There's quite a few ways to add data into your CartoDB account, but perhaps the most efficient way is to simply drag and drop the file onto the webpage. For a CSV, text or GeoJSON file, you can drag and drop the file. For an Esri SHP, you must zip the file first before importing it.
#####The Basics Once you've loaded a file, you'll automatically be taken to the Table view. There's also a Map view, which will use a field with geographic data in your table to georeference and draw on the map. Conveniently, the bike theft data we loaded has a field for "latitude" and "longitude", so CartoDB will automatically recognize those fields and georeference them -- making it easy to display the data.
#####Make a Map
Create a new map by adding the two layers we loaded -- select Create Map then Create New Map. Select table_2001_to_2012_chicago_bike_thefts and chicago_wards_2015_wgs84and click Create Map.
#####Styling Data
Configure the styling of the bike theft layer using the styling wizard.
#####Using SQL to Spatially Join Data
Count the number of thefts in each ward. To do so, first add a column to the wards table that will contain the total number of thefts. I'll call the field bike_thefts and make it a number type.
Next, add the total thefts to the new field using this SQL:
UPDATE chicago_wards_2015_wgs84
SET bike_thefts = (
  SELECT COUNT(*)
  FROM table_2001_to_2012_chicago_bike_thefts
  WHERE ST_Intersects(the_geom, chicago_wards_2015_wgs84.the_geom)
)
#####Using SQL to Add Google Street View Image
Google's StreetView API accepts a strucutred URL that has several parameters, but most importantly needs a latitude and longitude field to generate an image of that location. We can fill that URL dynamically from the geometry coordinates in the table.
SQL time:
SELECT *, 'http://maps.googleapis.com/maps/api/streetview?size=300x190&location='||
ST_Y((the_geom))||','||ST_X((the_geom))||'&sensor=false&fov=110' as image
FROM table_2001_to_2012_chicago_bike_thefts
#####Infowindows
Now, style the info window to contain a street view image. In the infowindow tab, select the image header option in the Design drop down and move the image field to the top, toggled on.
Take a look, click on a bike theft and the street view image will be in the infowindow!
####Torque Heatmap
Let's make the map move. Using the date field in the bike theft data, select the Heatmap option in the Map layer wizard. Note: to animate the map, you may need to change the date field to a type date in the attribute table (cartodb imports this field as a string). Set the Time Column to date.
#Tools we recommend ##GIS
##Web Mapping
##Geocoding (getting addresses on a map)
- BatchGeo
- Geocod.io
- Cicero
- Can also be done with ArcGIS and ArcGIS Online
- Geojson.io
##Finding Data
- CensusReporter
- American Fact Finder
- Your friendly local open data portal data.chicago.gov
- Data.gov


We just made a bike theft map! https://bikeindex.org/news/mapping-bike-thefts-at-mapbikewiseorg
I'd be really interested in loading the data from the crime data set, if you were interested in telling me the steps you went through to clean it up before importing.