You signed in with another tab or window. Reload to refresh your session.You signed out in another tab or window. Reload to refresh your session.You switched accounts on another tab or window. Reload to refresh your session.Dismiss alert
This file contains bidirectional Unicode text that may be interpreted or compiled differently than what appears below. To review, open the file in an editor that reveals hidden Unicode characters.
Learn more about bidirectional Unicode characters
PostgreSQL integration & setting up: one effective way
• Database: PostgreSQL
• Programming : Shell (bash), SQL
• Cloud: AWS
• OS : Linux
• Distribution : this gist works on Ubuntu 19.10 eoan (on prem'), Ubuntu 18.04 LTS (AWS)
The following gist is intended to Data Architects and is part of my AWS cloud series.
It will help you start with PostgreSQL on AWS.
Since Postgres is the one of the most advanced SQL or relational databases, you may want to consider it for a professional use.
Please fork it if you find this useful.
How is gist is structured
This gist is structured into 3 parts.
You are invited to take each part one after the other.
Part 1. Deploy PostgresSQL 12 on a Linux system using AWS EC2 (back-end) Part 2. Deploy pgadmin4 on your EC2 instance to administrate your database (front) Part 3. Start with PostgreSQL 12 on back-end (EC2) and check your tasks on pgAdmin4 (front-end)
Few words before we start
PostgreSQL is a free and open-source powerful relational database management system (RDBMS) designed to handle many workloads, from single VMs to datawarehouses. If you are a Data Engineer or Data Architect you may be familiar with ACID properties of relational databases. Please note that PostgreSQL guarantees Atomicity, Consistency, Isolation and Durability of your databases.
If pgAdmin 4 does not launch on your web browser : Way to check if you receive traffic to your EC2 vm
Open a new Terminal window (Ctrl + Alt + T) and ping your EC2 instance's IPV4 public address :
If you receive some packets, this mean your VM is accepting traffic.
Please note that traffic restrictions on AWS may be caused by improper Security Group configuration: your EC2 instance should at least allow inbound traffic on port 22 (SSH) and outbound traffic on Http and Https.
🔴 See output
Useful syntax
Create a user
mydatabase=# CREATE USER zaki WITH SUPERUSER LOGIN PASSWORD 'mypassword';
This file contains bidirectional Unicode text that may be interpreted or compiled differently than what appears below. To review, open the file in an editor that reveals hidden Unicode characters.
Learn more about bidirectional Unicode characters
Part 1. Deploy PostgresSQL 12 on a Linux system using AWS EC2 (back-end)
Log into your AWS console, https://signin.aws.amazon.com/.
In order to enhance the security access of my root account, I have MFA activated on my AWS account. I advise you to do so.
🔴 See hint
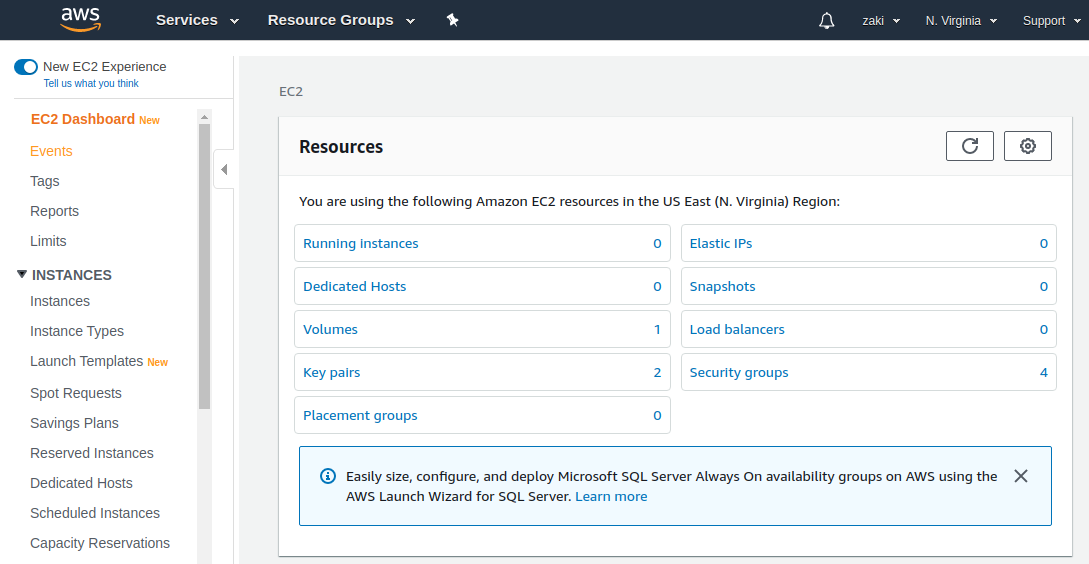
Once logged into your account, click on EC2.
!! Please note that AWS has a new layout interface which is pretty cool !!
Click on Instances > Launch instance
🔴 See hint
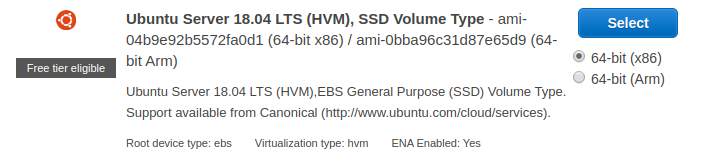
Select Ubuntu Server 18.04 LTS (HVM)
🔴 See hint
| Hint : You can perform installation of PostgreSQL 12 and pgAdmin4 on a Ubuntu 19.10 eoan distribution, which is not currently available on AWS.
Choose a free tier eligible instance for the purposes of your test.
You may consider more robust instances plans if you want your database to support concurrent workloads.
🔴 See hint
Review and Launch > Launch
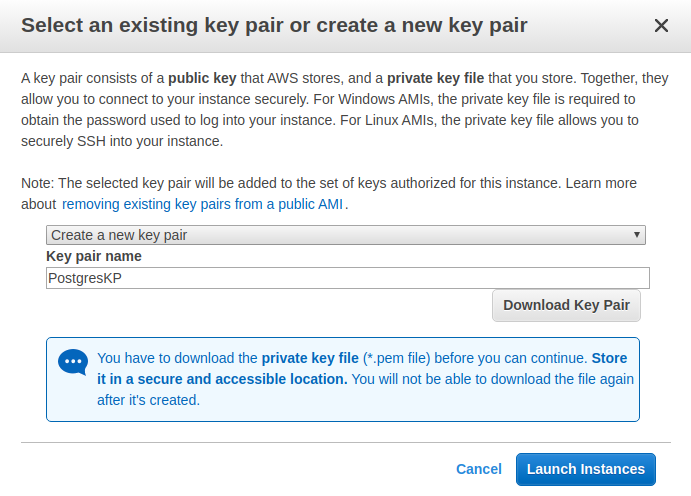
Create a new key pair > Key pair name : PostgresKP > Download key pair
Click on Launch instances > View instances
🔴 See hint
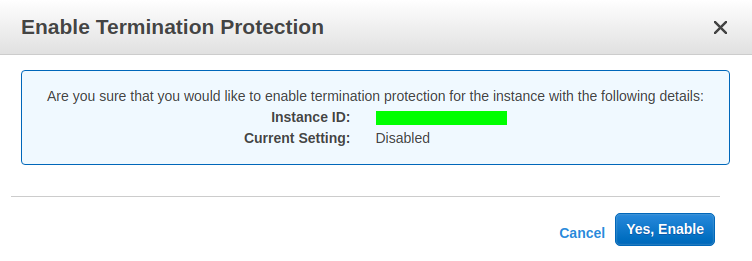
Once your instance is deployed (2/2 checks), go to Actions > Instance settings > Change termination protection
Click on "Yes, enable". This will prevent your EC2 instance to terminate accidentally.
🔴 See hint
Now you are ready to go for some Shell commands.
Connect to your EC2 instance using Open SSH on your Terminal
If you don't have `Open SSH` installed on your `Terminal`, use as follows:
sudoaptupdatesudoaptinstallopenssh-server
We have to remember that we've downloaded an Postgres.pem file earlier. We will now move this file to a newly created directory.
Ctrl+Alt+T# to open a new CLI window<br>$cdDesktop>$mkdirSSH` # Creates an SSH directory to store our Key Pair (credentials)$cdDownloads` > `$sudomv/home/zaki/Downloads/Postgres.pem/home/zaki/Desktop>SSH`
Go to your SSH directory and check that the file persists there :
Important
If you can't connect to your EC2 instance from SSH, feel free to retake another gist I posted months ago where I give you few other hints :
| * [Deploying a Wordpress site using AWS RDS and free tier EC2 instance - Hands-on](https://gist.github.com/isaacarnault/8c701f200699176e06362a1877909665)
Check that everything is setting up correctly and start installing Postgres
$lsb_release-a# this retrives information regarding your EC2 instance (your virtual compute machine)
Now you are ready to deep dive into PostgreSQL installation on AWS.
1. Install PostgreSQL server on your EC2 instance
To install PostgreSQL 12 perform as follows:
$sudosu$wget--quiet-O-https://www.postgresql.org/media/keys/ACCC4CF8.asc|sudoapt-keyadd-# this will import GPG key and add PostgreSQL 12 repository into our Ubuntu EC2 machine$echo"deb http://apt.postgresql.org/pub/repos/apt/ `lsb_release -cs`-pgdg main"|sudotee/etc/apt/sources.list.d/pgdg.list# this will add add repository contents into our Ubuntu Ubuntu EC2 machine$sudoaptupdate$sudoapt-yinstallpostgresql-12postgresql-client-12# this will install the latest available version
Once installation is complete, you can check your PostgreSQL server status.
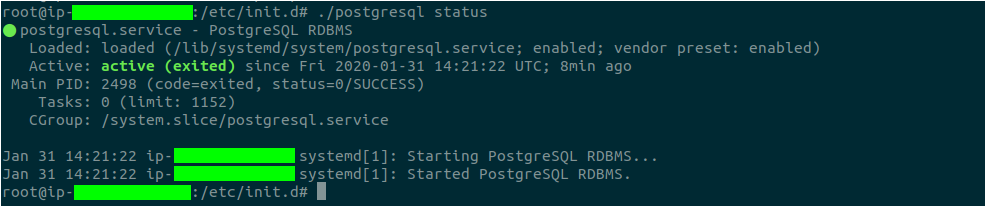
2. Check PostgreSQL service status
$cd$cd/etc/init.d$./postgresqlstatus
If PostgreSQL 12 was correctly installed and is active, you should have this :
🔴 See output
If not, feel free to restart the server.
$./postgresqlrestart$./postgresqlstatus
We can also check all packages installed related to our PostgreSQL server by doing a grep command.
$dpkg-l|greppostgres
🔴 See output
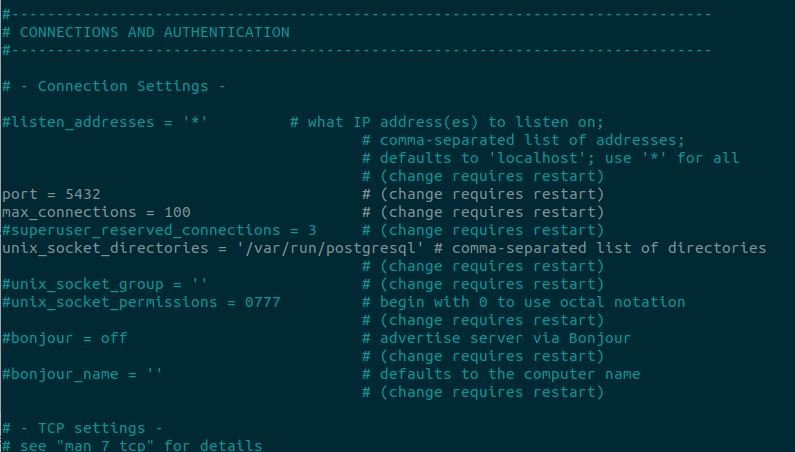
3. Configure PostgreSQL server
$sudonano/etc/postgresql/12/main/postgresql.conf
Search for listen_addresses and replace as follows :
listen_addresses='*'
🔴 See output
Ctrl + S to save the conf file, Ctrl + X to exit.
4. Restart PostgreSQL service
$sudosystemctlrestartpostgresql
After restarting PostgreSQL server, confirm the server is listening on port 5432 using a netstat command:
$sudonetstat-antup|grep5432
🔴 See output
5. Access PotgreSQL
$sudosu-lpostgres$psql
🔴 See output
6. Secure PostgreSQL database
This step is very important because you might encounter restrictions if your database server is not properly set regarding users access.
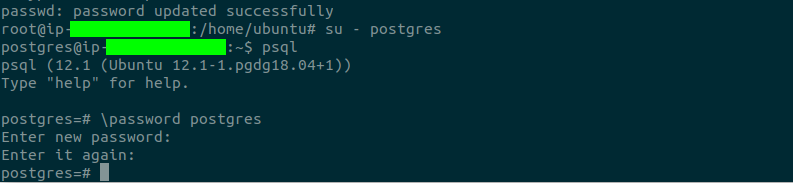
6.1 Set password for Linux user (postgres)
$sudosu$passwdpostgres
🔴 See hint
6.2 Set password for DB administrator (postgres)
su-postgrespsql
🔴 See hint
6.3 Test PostgreSQL connection
🔴 See hint
Now that you've installed PostgreSQL server on your EC2L instance and set both passwords for Linux user and DB administrator, you are ready to take part 2 of this gist.
Part 2. Deploy pgadmin4 on your EC2 instance to administrate your database (front-end)
After completing Part 1, you are now ready to install pgAdmin4 which will help you administrate your database and see jobs performed on your EC2 compute machine.
Log into your EC2 instance in SSH (see Part 1 , 7) and perform as follows :
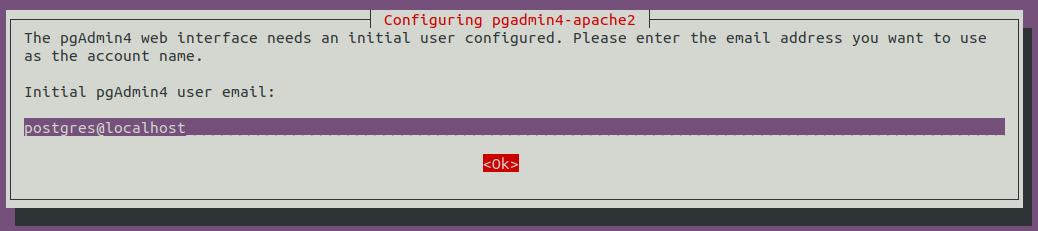
When prompted by your Terminal, leave settings as default and OK.
🔴 See output
Set initial pgAdmin4 password and OK.
🔴 See hint
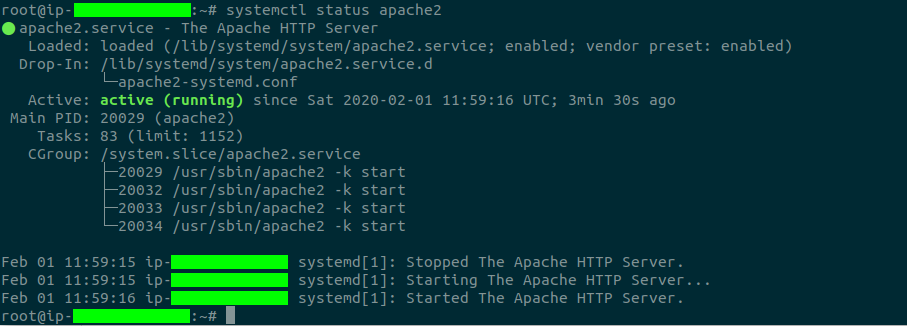
Check if Apache service is started on your EC2 compute machine.
$systemctlstatusapache2
Allow http and https traffic from your EC2 compute machine to the Internet.
See HINTS section part of this gist if you have problems displaying pgAdmin4 viewer on your browser.
sudoufwallowhttpsudoufwallowhttps
🔴 See hint
Open your web browser and enter your IPv4 public address (you can find it on AWS on your EC2 console) and the listening port of pgAdmin4 which is 5432.
| i.e: my-ipv4-address/pgadmin4/browser
| use following login details to log into pgAdmin4 ID: postgres@localhost Pwd: the one you've chosen upon PostgreSQL server configuration
🔵 See application
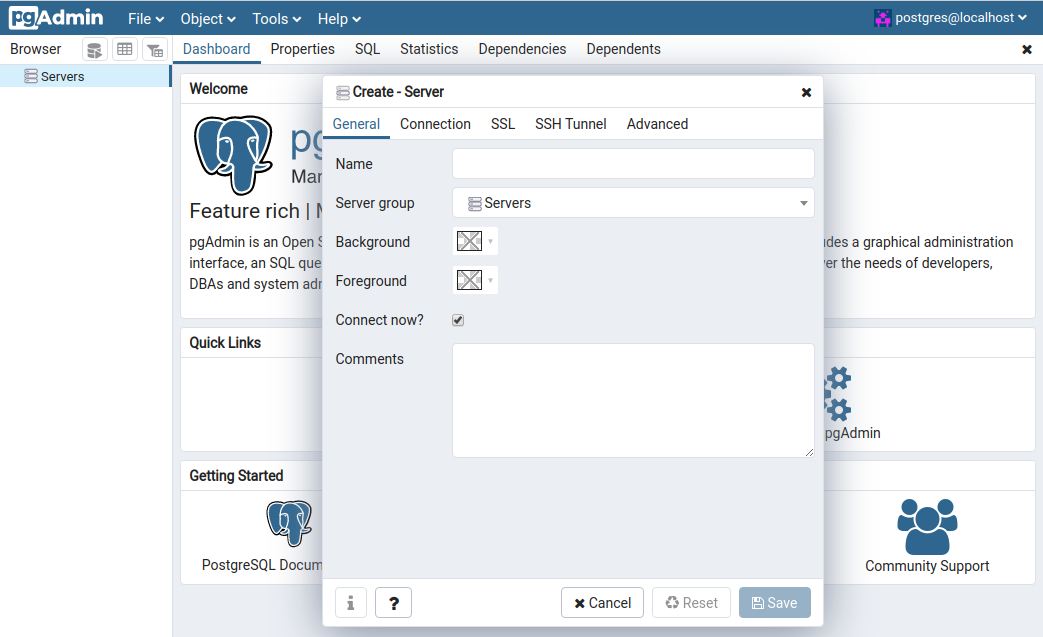
Once logged in, click on Servers > Add New Server
🔵 See application
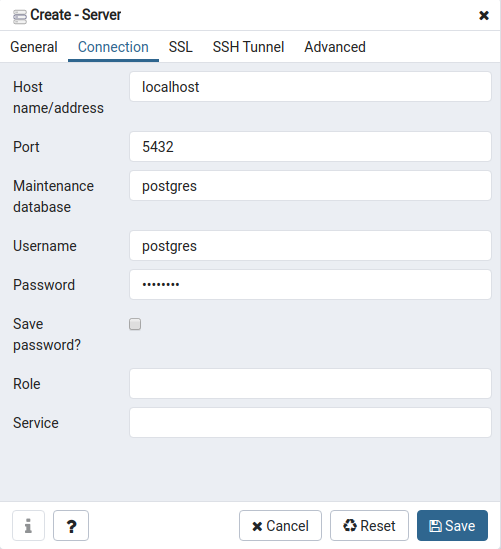
For server configuration set the following fields as follows:
Name : postgres Hostname/address : localhost Username : postgres Password : the one you've chosen upon server configuration
🔵 See setting
Then click on Save.
There you are !
🔵 See application
Your PostgreSQL server is setted correctly on your EC2 instance and accessible via pgAdmin4.
You can now take part 3 of this gist. You'll learn how to create a database, a table on your EC2 compute machine and perform some administration tasks via pgAdmin4.
Learn how to create a database and a table now that you've successfully completed Parts 1 and 2.
Connect to your EC2 compute machine : open terminal and SSH to your EC2 instance
🔴 See output
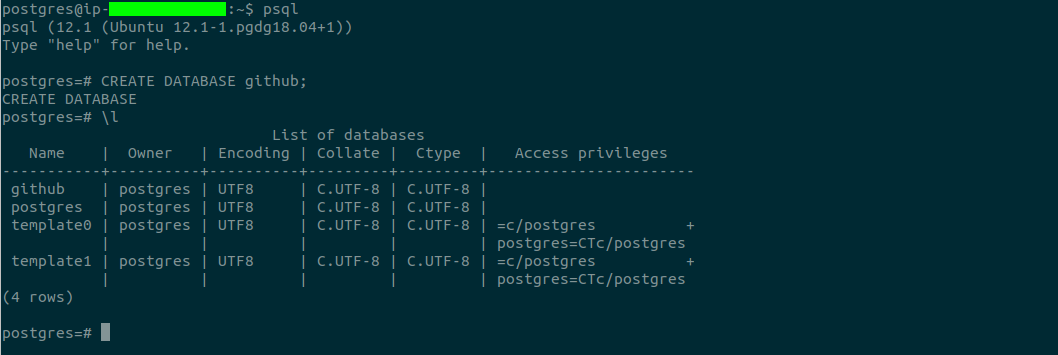
Create new database
$sudosu-lpostgres$psqlpostgres=# CREATE DATABASE github; # creates a database called githubpostgres=# \l # lists all databases on your PostgreSQL server - you have a postgres database by default
🔴 See output
Go to pgAdmin4 and refresh your server : right click to refresh
You should now be able to see your newly database githubcreated.
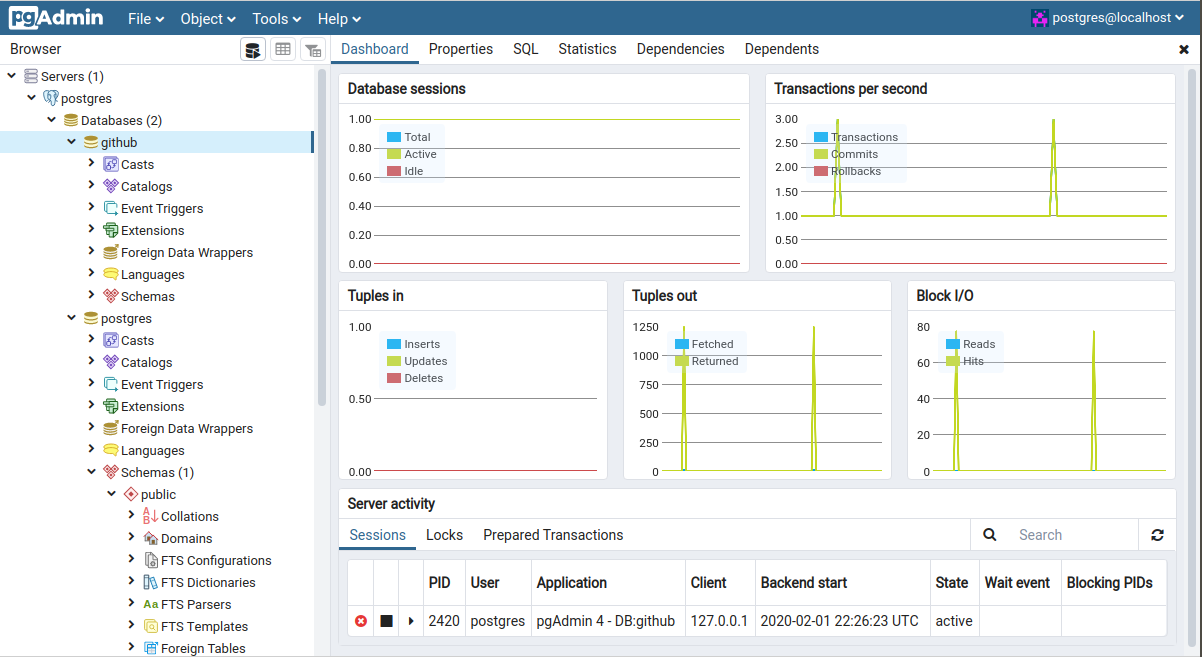
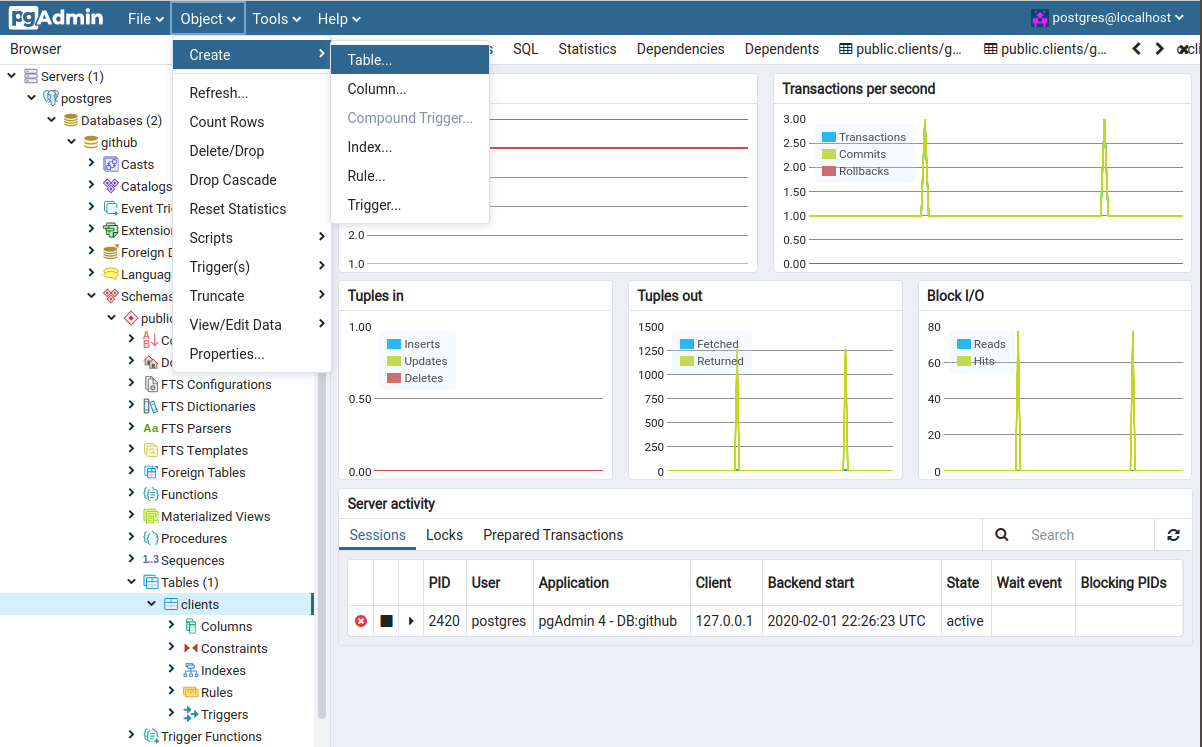
Click on the Dashboard tab to see live charts related to your PostreSQL database server such as:
Transactions per second Tuples in Tuples out Block I/O PID
🔴 See output
Right click on database github > properties, fill the comment section and click on Save.
🔴 See output
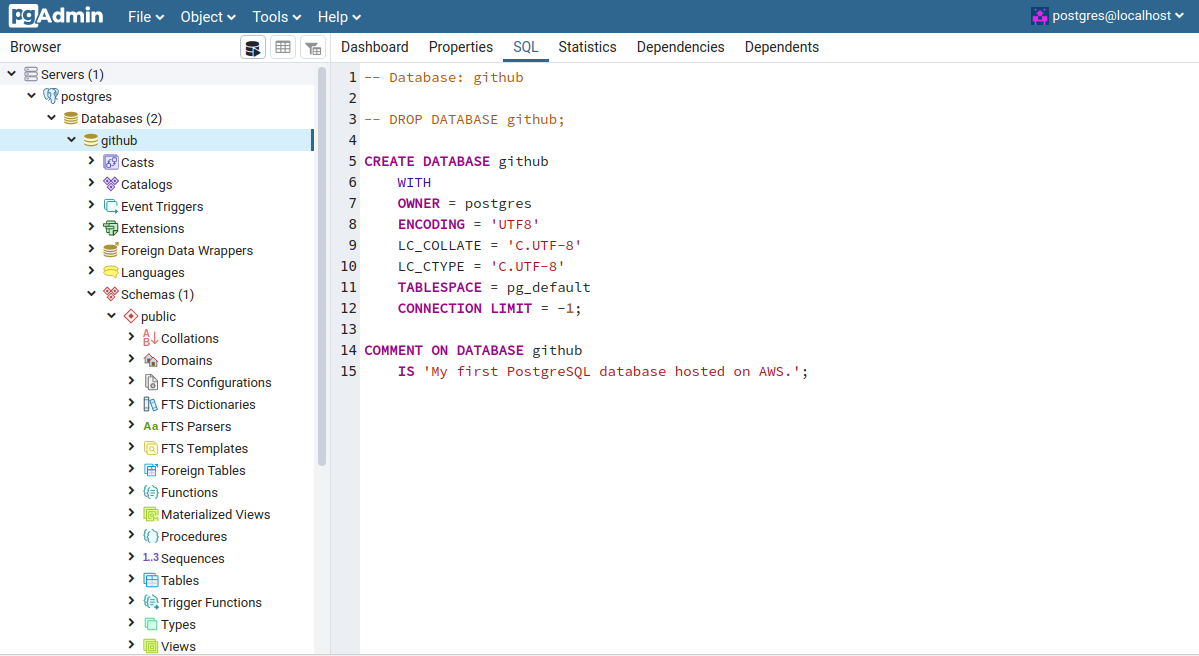
If we click on SQL tab, we'll have the SQL syntax of your database called "github".
🔴 See output
Let's go back to our EC2 instance compute machine to perform some Postgres commands.
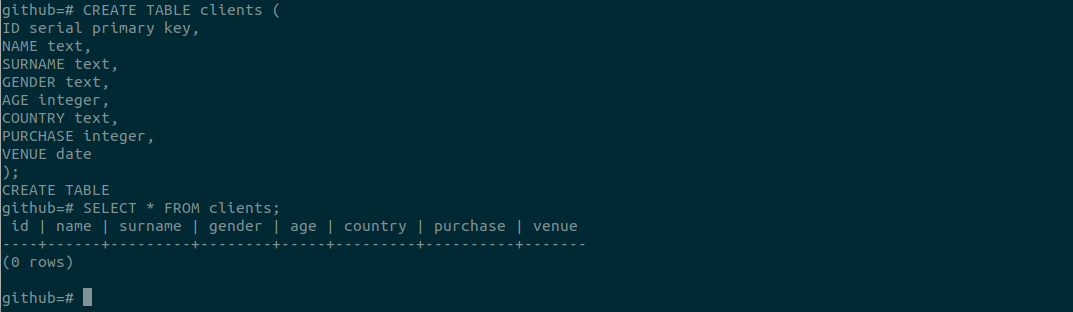
We'll now create our fist table in our github database.
postgres=# \c github # to allow user postgres to connect to the database "github"postgres=# CREATE TABLE clients (IDserialprimarykey,
NAMEtext,
SURNAMEtext,
GENDERtext,
AGEinteger,
COUNTRYtext,
PURCHASEinteger,
VENUEdate
);
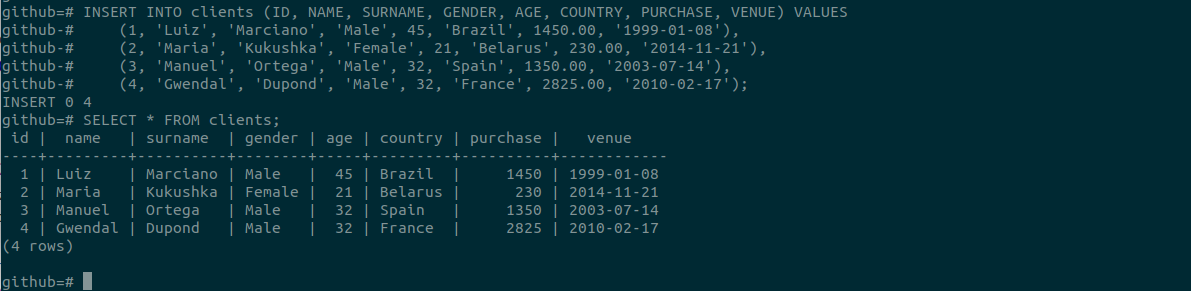
postgres=# SELECT * FROM clients;
🔴 See output
Now we are going to insert multiple data into our clients table in just one SQL query :
Now let's go back to pgadmin4 and refresh our PostgreSQL server.
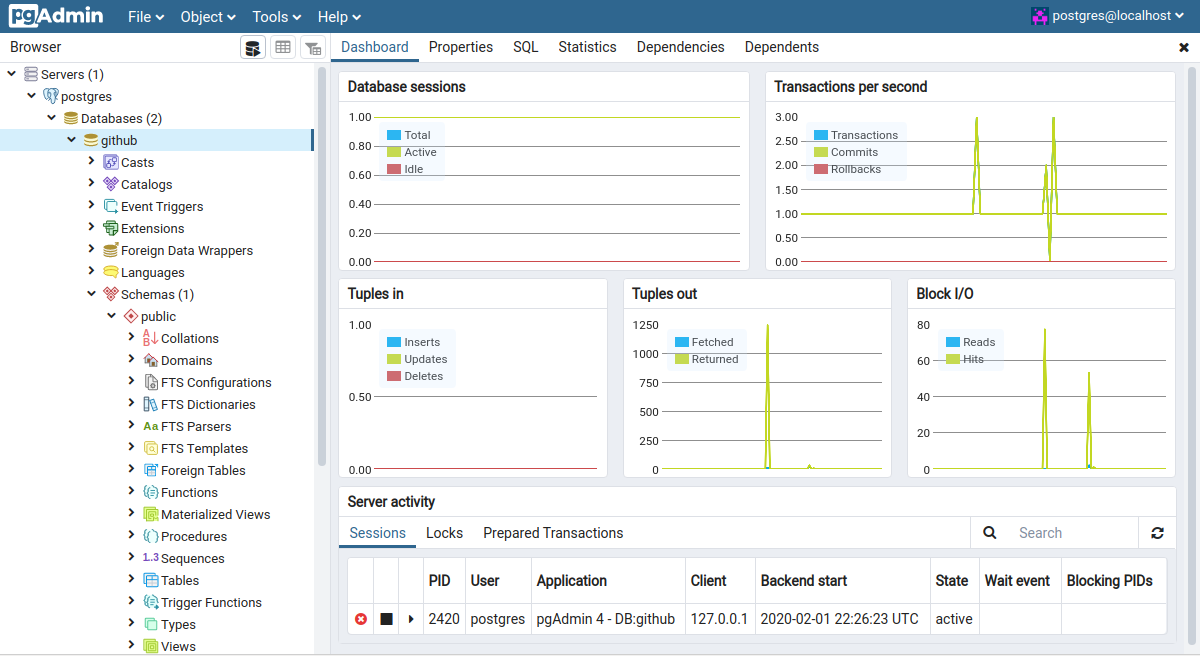
Go to databases > github > schema > tables we can see our clients table.
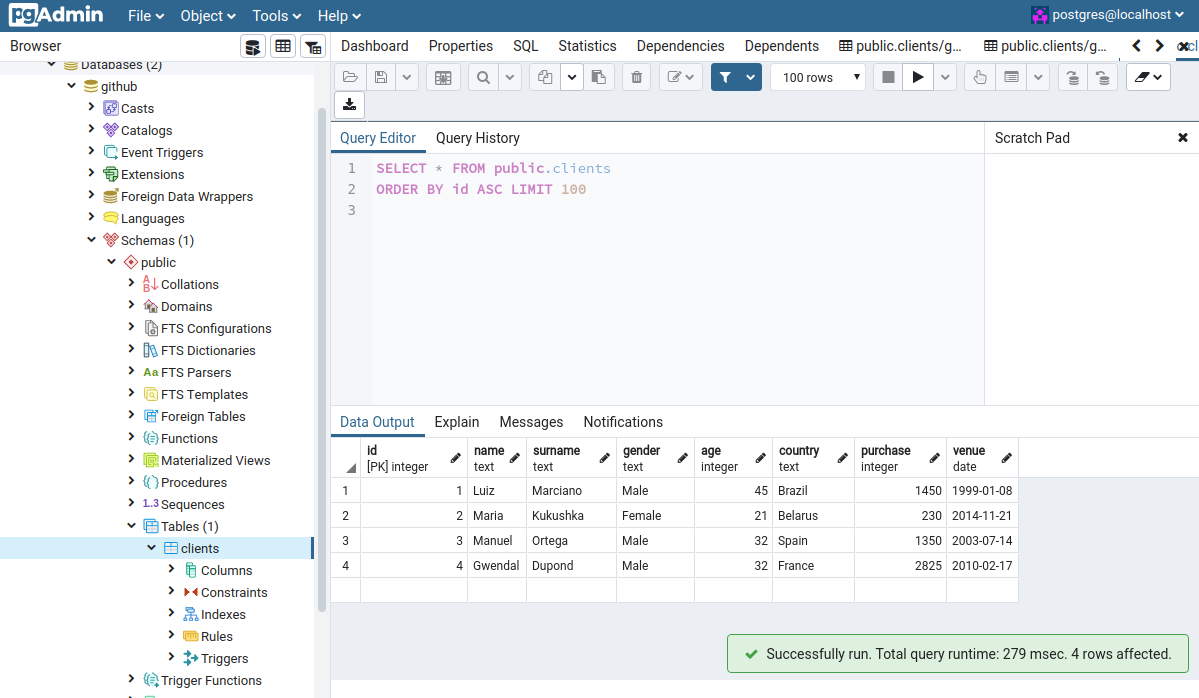
Right click on the table > View/Edit data > First 100 Rows
As we can see, our table clients is shown along with all data inserted using our EC2 compute machine.
🔴 See output
If we click on the Statistics tab, we'll see some useful stats related to the table we've just created.
🔴 See output
If you are not technical and you would like to bypass the Command Line Interface, you can perform the same table creation task using pgAdmin4 available tools above the application.
Now we have an EC2 compute machine and a PostgreSQL database running, as well as one table created... all fully operational and ready for production. Feel free to check the HINTS section of this gist to get other useful commands related to PostgreSQL.
Please fork this gist if you find it useful and for showing support. Many thanks.