Skip to content

Instantly share code, notes, and snippets.

@isaacarnault
Last active November 4, 2022 10:19
Show Gist options
  • Star 0 You must be signed in to star a gist
  • Fork 5 You must be signed in to fork a gist
  • Save isaacarnault/6020ed7a7b177ad8c1ab9a285191669a to your computer and use it in GitHub Desktop.
Save isaacarnault/6020ed7a7b177ad8c1ab9a285191669a to your computer and use it in GitHub Desktop.
AWS VPC using Terraform and Jenkins integration
________ ________ ___ __ ___
|\_____ \|\ __ \|\ \|\ \ |\ \
\|___/ /\ \ \|\ \ \ \/ /|\ \ \
/ / /\ \ __ \ \ ___ \ \ \
/ /_/__\ \ \ \ \ \ \\ \ \ \ \
|\________\ \__\ \__\ \__\\ \__\ \__\
\|_______|\|__|\|__|\|__| \|__|\|__|
ignore Azure, GCP

Prerequisites

Step 1 - Installing Terraform (Linux)

Let's install Terraform

$ sudo su
$ cd
$ wget https://releases.hashicorp.com/terraform/0.13.3/terraform_0.13.3_linux_amd64.zip // download the latest available package
$ unzip terraform_0.13.3_linux_amd64.zip
$ rm -r terraform_0.13.3_linux_amd64.zip
$ mkdir terraform_bin // create a folder named 'terraform'
$ mv terraform downloads
🔵 See output

isaac-arnault-terraform-5.png

Update your path so you can call Terraform binary from anywhere in the machine

$ nano ~/.profile

Add the following code at the end of the codeblock

export PATH="$PATH:~/terraform"
🔴 See hint

isaac-arnault-terraform-6.png

To save the file and get back to the CLI, use Ctrl + s then Ctrl + x.

To update your path to the current session, use :

$ source ~/.profile

Let's check Terraform version to see if it was correctly installed and that we can call it from anywhere on the machine:

$ terraform --version
🔵 See output

isaac-arnault-terraform-7.png

Let's finalize the installation of Terraform
Print a colon-separated list of locations in your PATH.

$ echo $PATH

Move the Terraform binary to one of the listed locations. Here we use the following location: usr/local/bin.

$ mv terraform_bin/terraform /usr/local/bin

Close your Terminal window, relaunch a new window (Ctrl + T)
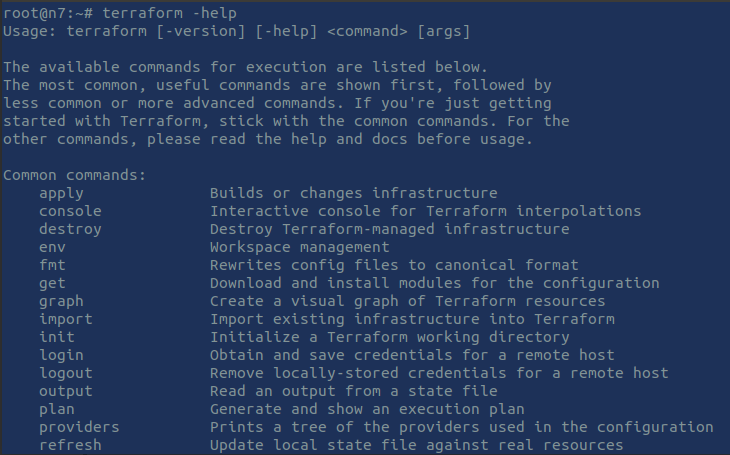
Use the following commands to check if terraform was correctly installed and initialized:

$ sudo su
$ terraform -help
🔴 See hint

isaac-arnault-terraform-8.png

Enable tab completion

If you use either bash or ssh you can enable tab completion for Terraform commands. To enable autocomplete, run the following command and then restart your shell.

$ terraform -install-autocomplete

Here we are! We are ready to use Terraform for our Infrastructure as Code projects on our local machine.

Step 2 - Configure AWS access to Terraform

Log into your AWS account. If you don't have an account, create one: https://portal.aws.amazon.com/billing/signup#/start.
You can access your console after Signing Up to AWS using this link: https://console.aws.amazon.com/console/home.

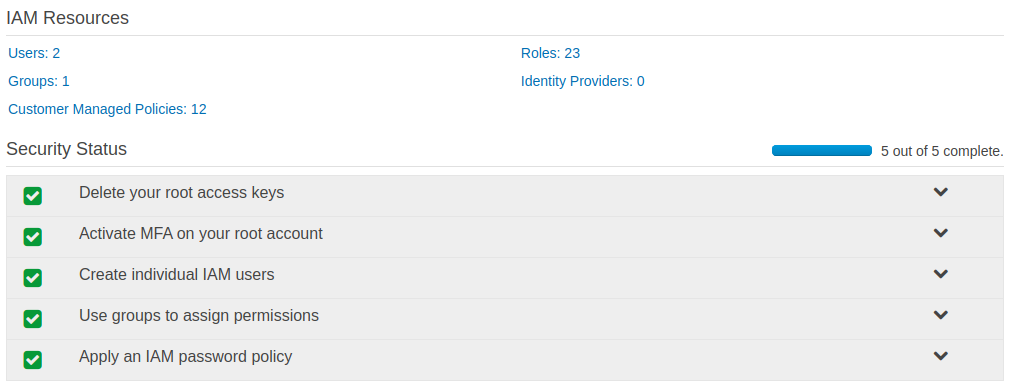
Once logged into your AWS console, go to IAM.
If you are new to AWS, please bypass all user configuration (green ticked marks below) for the sake of simplicity.

🔵 See output

isaac-arnault-aws-1.png

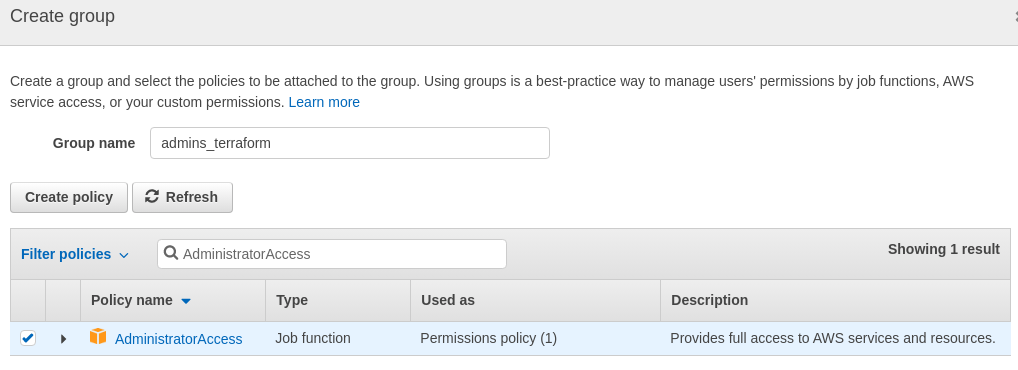
. Click on Users > Add user

. Next: permissions > Create group: call it admins_terraform.

. Filter policies: search for AdministratorAccess in the search bar.

. Select the AdministratorAccess policy and click on 'Create group'.

🔵 See output

isaac-arnault-aws-3.png

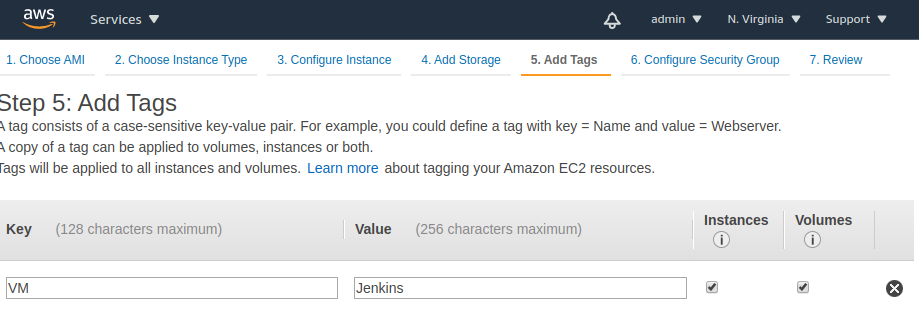
. Next: tags. Use as key: resources and as Value: terraform

. Next: review > create user > download the .csv file which contains security credentials for the user ' terraform_user'

Access key ID and a Secret access key were provided to you by AWS.

Be sure to keep these values in a secure location; you will use them in the next step.

You can keep this window opened and open a new AWS console window from your browser.


Important Follow `AWS` security best practices by deleting this user and the group created after completing this gist, since all security parameters for this user weren't fulfilled for the sake of simplicity.

Step 3 - Install AWS CLI

$ sudo apt-get update $ sudo apt install awscli Once completed, check the installed version

$ aws --version

🔵 See output

isaac-arnault-terraform1.png

Let's configure our 'AWS ClI'.

$ aws configure

When prompted, enter 'AWS Access Key ID' provided upon user creation.
Do the same for 'Secret Access Key'.
Default region name: 'us-east-1'
Default output format: JSON

Step 4 - Install Atom and create Terraform's project workspace

We will use 'Atom' as our editor for building our Terraform project.

  1. Update the packages list and install the dependencies
$ sudo apt update
$ sudo apt install software-properties-common apt-transport-https wget
  1. import the Atom Editor GPG key
$ wget -q https://packagecloud.io/AtomEditor/atom/gpgkey -O- | sudo apt-key add -
  1. enable the Atom APT repository
$ sudo add-apt-repository "deb [arch=amd64] https://packagecloud.io/AtomEditor/atom/any/ any main"
  1. Install the latest version of Atom
$ sudo apt install atom

Once installed, Atom's icon should appear within your local applications.

🔵 See output

isaac-arnaul-terraform-2.jpg

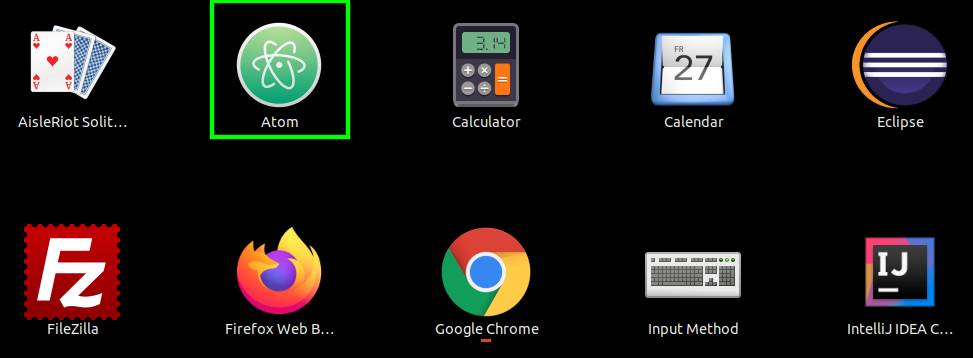
Open the folder and launch Atom from this folder.

$ cd terraform
$ atom .
🔵 See output

isaac-arnault-terraform-5.jpg

The application should instantiate automatically and reffering to the folder terraform.
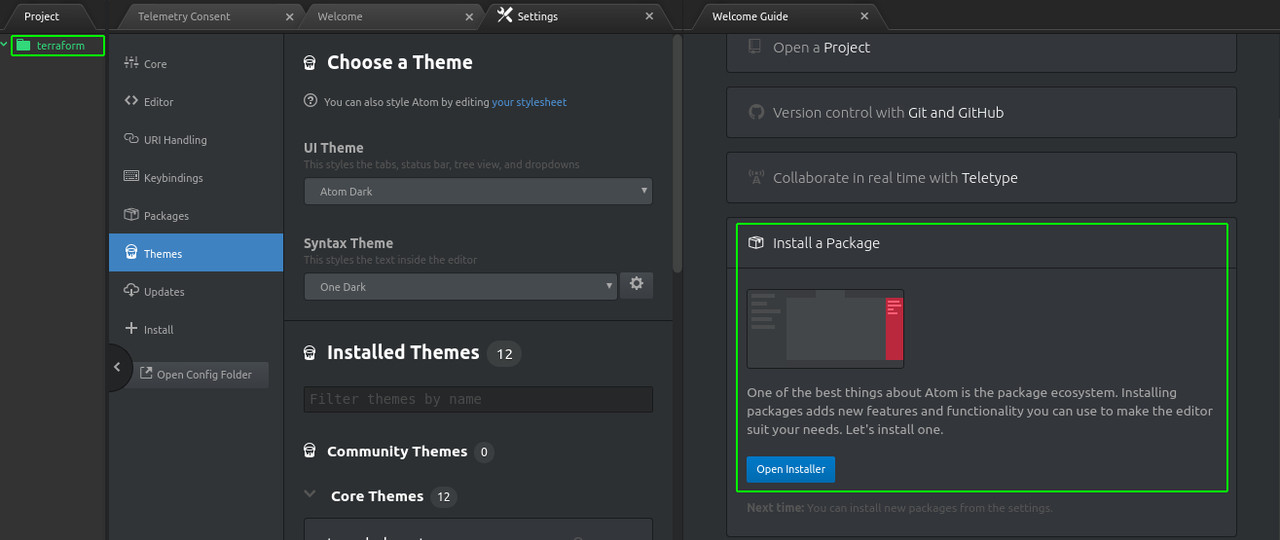
Before we create our workspace, we will install few packages.
Click on 'Install a package' > 'Open installer' and search for 'language-terraform' > Install the package.

🔵 See output

isaac-arnault-terraform-6.jpg

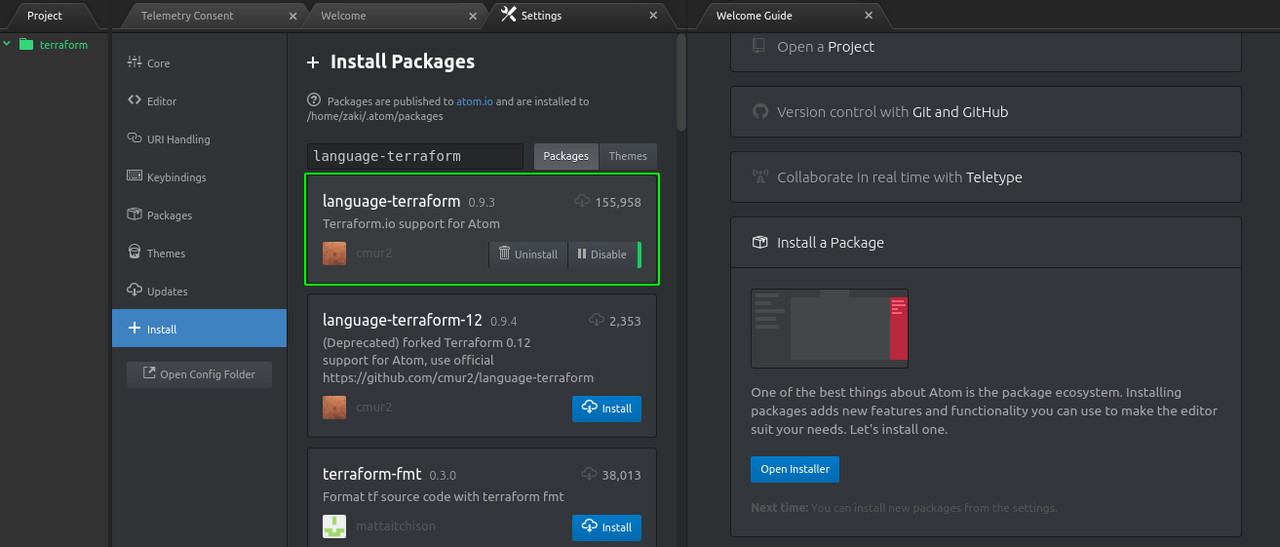
Install also 'terraform-fmt' package.

🔵 See output

isaac-arnault-terraform-7.jpg

If you go to Settings > packages, you'll see your newly installed packages.

Now that all prerequisites have been fulfilled, let's jump onto Create_Terraform_Workspace section of this gist.

isaac-arnault-terraform-jenkins.jpg

• Programming: HCL (Terraform)
• Repository: GitHub
• Cloud: AWS
• CI/CD: Jenkins
• Related gist: https://github.com/isaacarnault/terraform-jenkins/tree/master

Gist writing, testing and debugging : 20 hrs

This gist is part of my Cloud series and is performed on a Linux OS.
It focuses on Terraform and Infrastructure as Code (IaC).
Make sure to get familiar with Terraform before you take this gist. You have two ways to deploy Terraform: either on your local machine, either in a remote virtual machine hosted on a 'Cloud' platform such as AWS.

Throughout this gist, we will be using Terraform installed on our local machine.

We will learn how to deploy a Terraform infrastructure integrating with Jenkins and Ansible.

| Some useful resources
. https://www.terraform.io/docs/cloud/index.html
. https://www.terraform.io/docs/cloud/paid.html


Important The following gist was performed on `Terraform` v.0.13.3.
If you use older versions, you may encounter interpolations warnings upon commands execution.
These warnings shouldn't affect the infrastructure building.

For easy use of this gist:

  1. Open your Shell (ctrl + Alt + T)
  2. Clone this repository on your local machine where you want, could be on your Desktop:
$ cd Desktop
$ git clone https://gist.github.com/isaacarnault/6020ed7a7b177ad8c1ab9a285191669a
}
  1. From the command line, go to the folder where the repository is hosted:

  2. Perform the below commands.

$ terraform init
}
🔵 See output

isaac-arnault-terraform-1.png

$ terraform plan
}
🔵 See output

isaac-arnault-aws-2.png

$ terraform apply -auto-approve
}
🔵 See output

isaac-arnault-terraform4.png


Conclusion In this gist we've got a practical usage of Terraform for deploying a VPC on AWS.
We've learned how to use Terraform with Atom editor for deploying the needed resources. We've also learned how to integrate Jenkins with Terraform to automate this deployment. This other repository that I've uploaded on GitHub contains all files ready for deployment:

Related tags

• AWS
• AWS Console
• Cloud computing
• Terraform
• Jenkins
• Ansible
provider "aws" {
access_key = var.aws_access_key
secret_key = var.aws_secret_key
region = var.aws_region
}

Prerequisites

. Create a new Linux VM on AWS

🔵 See output

isaac-arnault-terraform-1.png

Leave everything as default. I'm here using one tag for my virtual machine.

🔵 See output

isaac-arnault-terraform-2.png

When prompted to choose an existing key pair or to create a new key pair, for the sake of simplicity we will use the existing key pair we've created for our VPC deployment via Terraform.
For production purposes and to ensure more security, you can create a new key pair if you will.
Click on "Launch instances".

Once our instance is up and running, we are ready to install Java first then Jenkins.

isaac-arnault-terraform-2.png

Grab the ipv4 IP adress of your VM and connect to your Shell.

Important AWS has just made easier to connect to your EC2 instances (virtual machines). Just click on "Connect".

🔵 See output

isaac-arnault-terraform-36.jpg

Step 1 - Install Java

Let's install java 1.8.0 jdk by first checking available packages.

🔴 See hint

isaac-arnault-terraform-38.png

What we want to install is the one underlined in blue.

$ sudo su
$ yum install java-1.8.0-openjdk
}

Type "y" when prompted by the Terminal and let's intallation completes.

🔵 See output

isaac-arnault-terraform-33.jpg

Verify that Java was installed on the VM.

java -version
🔵 See output

isaac-arnault-terraform-40.png

Step 2 - Install Jenkins

Open your web browser to www.jenkins.io/download/.

We're going to download Jenkins for CentOS/Fedora/Red Hat

isaac-arnault-terraform-39.png

$ cd /etc/yum
$ mkdir repos.d
$ wget -O /etc/yum.repos.d/jenkins.repo https://pkg.jenkins.io/redhat-stable/jenkins.repo
$ rpm --import http://pkg.jenkins.io/redhat-stable/jenkins.io.key
$ yum install jenkins # type 'y' when prompted by the Terminal
🔵 See output

isaac-arnault-terraform-41-1.jpg

Let's start Jenkins.

$ sudo service jenkins start
$ sudo chkconfig jenkins on
🔵 See output

isaac-arnault-terraform-42.jpg

To launch Jenkins UI, use your IPv4 address and port 8080 (Jenkins default port) on your web browser.
. open your web browser and use as follows: http://my.ip.v4.address:8080/

🔵 See output

isaac-arnault-terraform-43.png

To find initial admin password, go to your VM Terminal and to the specific folder:

$ cat /var/lib/jenkins/secrets/initialAdminPassword

Grab de provided password

🔴 See hint

isaac-arnault-terraform-45.jpg

and paste it onto the the UI form.

isaac-arnault-terraform-44.png

Click on "Install suggested plugins".

🔵 See output

isaac-arnault-terraform-46.png

Create admin credentials, use the credentials you want. This is what I am using:

isaac-arnault-terraform-47.jpg

Follow the next steps provided by the UI until the installation completes.

Now we are ready to use Jenkins!

isaac-arnault-terraform-48.png

Step 3 - Integrate Jenkins with Terraform

In our Jenkins UI, let's go to > Manage Jenkins > Manage Plugins > click on "Available tab" > Search for "Terraform"

🔵 See output

isaac-arnault-terraform-49.png

Select Terraform plugin and click on "Install without restart". A whole list of features should be installed.

🔵 See output

isaac-arnault-terraform-50.png

Click on Manage Jenkins / Global Tool Configuration > Scroll down to Terraform > Add Terraform

Select Terraform version: 0.13.3 for Linux, then ckick on Save. Please note that this could not be the latest available version when you'll read this gist.

🔵 See output

isaac-arnault-terraform-52.png


Important We use this version because we have the same version installed locally once we've installed Terraform, Atom editor in order to deploy our VPC on AWS.
Make sure you select same version that the one installed on your local machine.
On your PC, open your Terminal (Ctrl + Alt + T) and run $ terraform version to get yours. This is mine.
🔵 See output

isaac-arnault-terraform-51.png

Step 5 - Write Jenkinsfile to deploy Terraform infrastructure via Jenkins using pipeline jobs

Prerequisites

  1. Install Git on your Jenkins VM.

$ sudo yum install git -y

🔵 See output

isaac-arnault-terraform-53.png

Once git is installed, proceed as follows:
2. Go back to your Atom editor and open your terraform project.
Overlay your VPC infrastructure folder and create a new file named "Jenkinsfile" and pass this code through it

# 1st version of your script
pipeline{
  agent any
  stages{
    stage('terraform init'){
      steps{
        sh "terraform init"
      }
    }
  }
}
  1. Create a new repository on Github called "terraform-jenkins" and commit your Atom project "terraform_vpc" to that repository.

Once you've all your files in your repository, go to Jenkins > New Item > type "terraform" > select "Pipeline" and "OK".

Go to Pipeline tab, in Pipeline section, select "Pipeline script from SCM" > SCR: Git > Fill the forms with your repository url and Jenkinsfile. Click "Save".

🔵 See output

isaac-arnault-terraform-54.png

Once it's saved, click on "Pipeline syntax". On Steps section, select "tool: Use a tool from a predefined tool installation". > Tool Type: Select "Terraform" > Generate Pipeline Script.

🔵 See output

isaac-arnault-terraform-55.png

Grab the code and go back to Atom on your Jenkinsfile script and update it as follows.

# 2nd version of your script
pipeline{
  agent any
  stages{
    stage('terraform init'){
      steps{
        sh "terraform init"
      }
    }
  }
}
def getTerraformPath(){
  def tfVpc = tool name: 'Terraform-VPC', type: 'terraform'
  return tfVpc
}

Go to Jenkins UI, click on "Declarative Directive Generator", select "Environment" and set Environment Name and Value as follows:

isaac-arnault-terraform-56.png

Then click on Generate Declarative Directive, grab the generated code and update your Jenkinsfile as follows:

# latest version of your script
pipeline{
  agent any
  environment {
  PATH = "${PATH}:${getTerraformPath()}"
}
  stages{
    stage('terraform init'){
      steps{
        sh "terraform init"
      }
    }
  }
}
def getTerraformPath(){
  def tfVpc = tool name: 'Terraform-VPC', type: 'terraform'
  return tfVpc
}

Commit this code to your repository in order to update Jenkinsfile. Now, we are ready to build our Jenkins Pipeline which will trigger VPC deployment on AWS.

Step 6 - Build Jenkins Pipeline and deploy the resources

Go back to Jenkins UI, click on Build Now. As you can see below, job 1 failed on "Init", because we did not update Jenkinsfile so that he can pass this command successfully.

🔵 See output

isaac-arnault-terraform-57.png

On job 2, we've updated the file (make sure to follow Step 5 correctly), then the job completes successfully.

Now, we've integrated Jenkins with Terraform successfully and we wan pass other functions such as terraform apply through our Jenkinsfile and see if it deploys our VPC on AWS which will be the last part of this gist.


Important
Useful commands related to Git
: Once you update your Jenkinsfile, you run sequentially : $ git status $ git add . $ git commit --ammend # do not forget to Ctrl + S once the file opens then Ctrl + X to close it $ git push (url_of_your_repository) or $ git push --force url_of_your_repository
🔴 See hint

isaac-arnault-terraform-58.jpg


These are the steps of our Job 2 which came up successful with our Jenkins pipeline.
🔵 See output

isaac-arnault-terraform-59.png


At this stage of the gist, we know how to init Terraform infrastructure using Jenkins.
In order to run apply command, we need our script to evolve a little bit.
To get final version of this file, see Jenkinsfile.
What you should get with the Jenkinsfile:

isaac-arnault-terraform-61.png

You can verify that all VPC resources were correctly deployed on AWS.

pipeline{
agent any
environment {
PATH = "${PATH}:${getTerraformPath()}"
}
stages{
stage('terraform init'){
steps{
sh "terraform init"
}
}
stage('terraform apply'){
steps{
sh returnStatus: true, script: 'terraform apply -auto-approve'
}
}
}
}
def getTerraformPath(){
def tfVpc = tool name: 'Terraform-VPC', type: 'terraform'
return tfVpc
}
MIT License
Copyright (c) 2020 Isaac Arnault
Permission is hereby granted, free of charge, to any person obtaining a copy
of this software and associated documentation files (the "Software"), to deal
in the Software without restriction, including without limitation the rights
to use, copy, modify, merge, publish, distribute, sublicense, and/or sell
copies of the Software, and to permit persons to whom the Software is
furnished to do so, subject to the following conditions:
The above copyright notice and this permission notice shall be included in all
copies or substantial portions of the Software.
THE SOFTWARE IS PROVIDED "AS IS", WITHOUT WARRANTY OF ANY KIND, EXPRESS OR
IMPLIED, INCLUDING BUT NOT LIMITED TO THE WARRANTIES OF MERCHANTABILITY,
FITNESS FOR A PARTICULAR PURPOSE AND NONINFRINGEMENT. IN NO EVENT SHALL THE
AUTHORS OR COPYRIGHT HOLDERS BE LIABLE FOR ANY CLAIM, DAMAGES OR OTHER
LIABILITY, WHETHER IN AN ACTION OF CONTRACT, TORT OR OTHERWISE, ARISING FROM,
OUT OF OR IN CONNECTION WITH THE SOFTWARE OR THE USE OR OTHER DEALINGS IN THE
SOFTWARE.
/*
Database Servers
*/
resource "aws_security_group" "db" {
name = "vpc_db"
description = "Allow incoming database connections."
ingress { # SQL Server Db
from_port = 1433
to_port = 1433
protocol = "tcp"
security_groups = ["${aws_security_group.web.id}"]
}
ingress { # MySQL Db
from_port = 3306
to_port = 3306
protocol = "tcp"
security_groups = ["${aws_security_group.web.id}"]
}
ingress {
from_port = 22
to_port = 22
protocol = "tcp"
cidr_blocks = ["${var.vpc_cidr}"]
}
ingress {
from_port = -1
to_port = -1
protocol = "icmp"
cidr_blocks = ["${var.vpc_cidr}"]
}
egress {
from_port = 80
to_port = 80
protocol = "tcp"
cidr_blocks = ["0.0.0.0/0"]
}
egress {
from_port = 443
to_port = 443
protocol = "tcp"
cidr_blocks = ["0.0.0.0/0"]
}
vpc_id = "${aws_vpc.default.id}"
tags = {
Name = "DBServerSG"
}
}
resource "aws_instance" "db-1" {
ami = "${lookup(var.amis, var.aws_region)}"
availability_zone = "us-east-1a"
instance_type = "m1.small"
key_name = "${var.aws_key_name}"
vpc_security_group_ids = ["${aws_security_group.db.id}"]
subnet_id = "${aws_subnet.us-east-1a-private.id}"
source_dest_check = false
tags = {
Name = "DB Server 1"
}
}
/*
Web Servers
*/
resource "aws_security_group" "web" {
name = "vpc_web"
description = "Allow incoming HTTP connections."
ingress {
from_port = 80
to_port = 80
protocol = "tcp"
cidr_blocks = ["0.0.0.0/0"]
}
ingress {
from_port = 443
to_port = 443
protocol = "tcp"
cidr_blocks = ["0.0.0.0/0"]
}
ingress {
from_port = -1
to_port = -1
protocol = "icmp"
cidr_blocks = ["0.0.0.0/0"]
}
egress { # SQL Server
from_port = 1433
to_port = 1433
protocol = "tcp"
cidr_blocks = ["${var.private_subnet_cidr}"]
}
egress { # MySQL
from_port = 3306
to_port = 3306
protocol = "tcp"
cidr_blocks = ["${var.private_subnet_cidr}"]
}
vpc_id = "${aws_vpc.default.id}"
tags = {
Name = "WebServerSG"
}
}
resource "aws_instance" "web-1" {
ami = "${lookup(var.amis, var.aws_region)}"
availability_zone = "us-east-1a"
instance_type = "m1.small"
key_name = "${var.aws_key_name}"
vpc_security_group_ids = ["${aws_security_group.web.id}"]
subnet_id = "${aws_subnet.us-east-1a-public.id}"
associate_public_ip_address = true
source_dest_check = false
tags = {
Name = "Web Server 1"
}
}
resource "aws_eip" "web-1" {
instance = "${aws_instance.web-1.id}"
vpc = true
}
aws_access_key = ""
aws_secret_key = ""
aws_key_path = ""
aws_key_name = ""
variable "aws_access_key" {}
variable "aws_secret_key" {}
variable "aws_key_path" {}
variable "aws_key_name" {}
variable "aws_region" {
description = "EC2 Region for the VPC"
default = "us-east-1"
}
variable "amis" {
description = "AMIs by region"
default = {
us-east-1 = "ami-0dba2cb6798deb6d8" # ubuntu 14.04 LTS
}
}
variable "vpc_cidr" {
description = "CIDR for the whole VPC"
default = "10.0.0.0/16"
}
variable "public_subnet_cidr" {
description = "CIDR for the Public Subnet"
default = "10.0.0.0/24"
}
variable "private_subnet_cidr" {
description = "CIDR for the Private Subnet"
default = "10.0.1.0/24"
}
resource "aws_vpc" "this" {
cidr_block = var.cidr_block
enable_dns_hostnames = true
enable_dns_support = true
instance_tenancy = "default"
}
data "aws_availability_zones" "available" {
state = "available"
}
locals {
az_names = sort(data.aws_availability_zones.available.names)
}
Sign up for free to join this conversation on GitHub. Already have an account? Sign in to comment