DigitalOcean, a leading cloud infrastructure provider, empowers developers and businesses by offering scalable and cost-effective virtual private servers called droplets. Whether you're an aspiring developer, a small business owner, or simply looking to explore the world of cloud computing, DigitalOcean provides a user-friendly platform to deploy and manage your applications or websites. In this article, we will take you through the step-by-step process of signing up for DigitalOcean and creating your very first droplet.
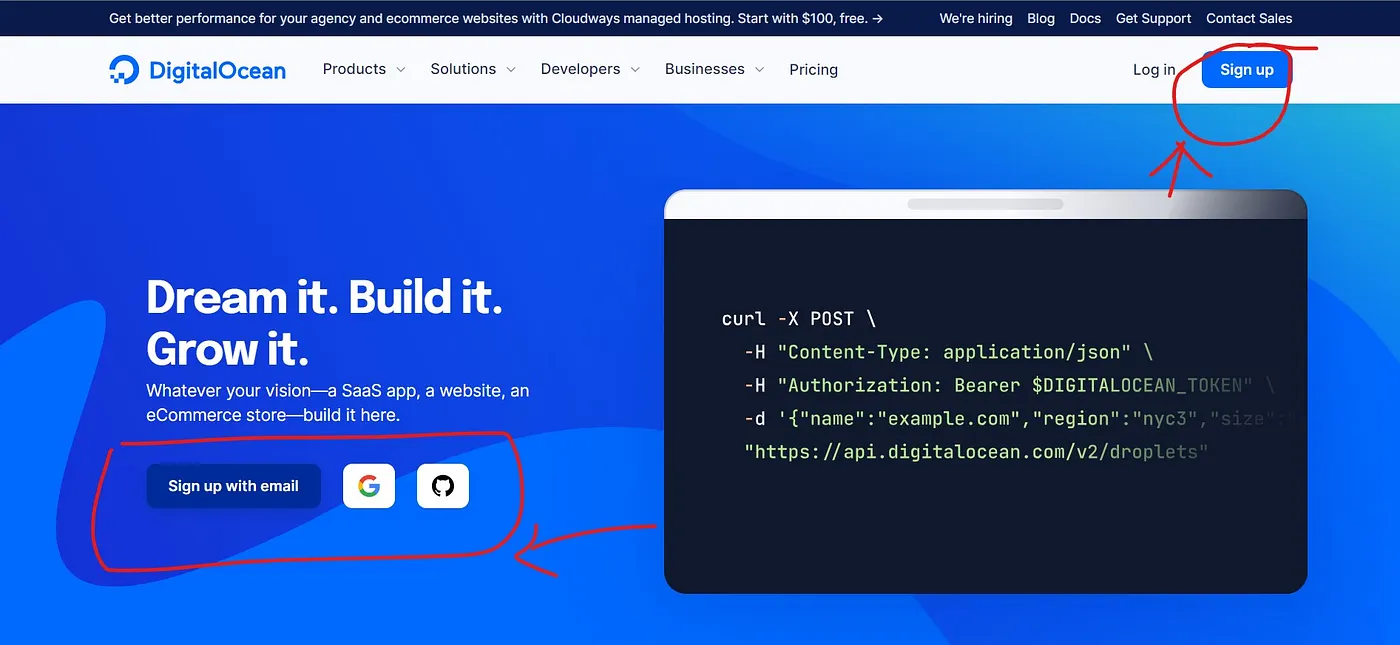
- Head over to the DigitalOcean website by typing "https://www.digitalocean.com" into your preferred web browser. Or you can just click here.
- Click on the "Sign Up" or "Get Started for Free" button displayed prominently on the homepage.
- Fill in the required details, including your email address and a strong password.
- Alternatively, you can expedite the registration process by signing up with your Google account.
- Carefully review and agree to DigitalOcean's terms of service and privacy policy.
- Complete any human verification steps, such as solving a CAPTCHA or confirming your email address.
- After successful registration, log in to your DigitalOcean account using your registered email address and password.
- You will be redirected to the DigitalOcean Control Panel, which serves as your central dashboard for managing your cloud resources.
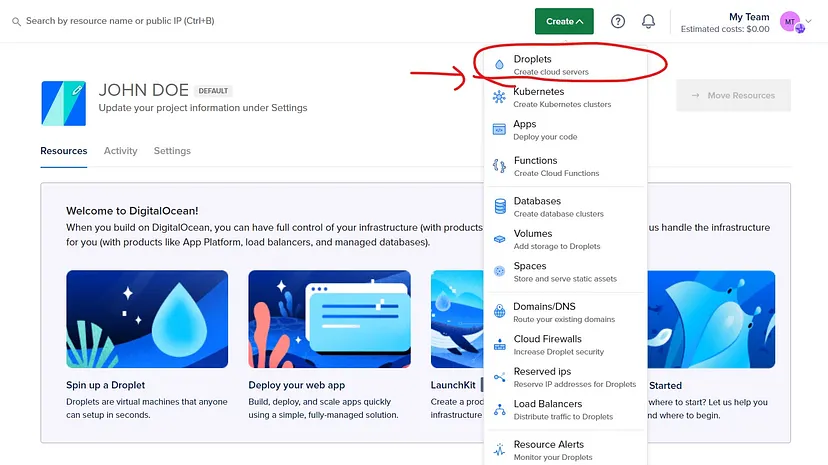
- Within the DigitalOcean Control Panel, locate and click on the "Create" button situated in the top-right corner.
- From the dropdown menu, select "Droplets" as your preferred option.
- Customize your droplet by choosing the appropriate specifications, such as the datacenter region, operating system (e.g., Ubuntu, CentOS, or Debian), and droplet size (CPU, RAM, and storage).
- Optional features like backups, monitoring, and user data scripts can be enabled based on your requirements.
- Provide a distinctive hostname for your droplet to facilitate easy identification.
- If you possess SSH keys, add them to enhance security during access. Alternatively, utilize a password for authentication.
- Review your choices and configurations, and then click on the "Create Droplet" button.
- Upon the completion of the droplet creation process, you will be presented with a summary page containing crucial details about your droplet.
- DigitalOcean will provide you with the droplet's IP address, username, and password/SSH key details necessary for accessing your server.
- Depending on your operating system, utilize SSH clients like PuTTY (Windows) or Terminal (macOS and Linux) to connect to your droplet securely.
- Once connected, you can proceed to install and configure the required software, deploy your applications or websites, and effectively manage your server according to your needs.
DigitalOcean stands as a reliable cloud infrastructure platform that simplifies the creation and management of droplets, enabling swift deployment of applications with ease. By following the step-by-step instructions outlined in this comprehensive guide, you now possess the knowledge required to sign up for DigitalOcean and create your first droplet. Remember to explore DigitalOcean's vast array of documentation and community resources to unlock the full potential of your cloud hosting experience. Embrace the power of the cloud, code with confidence, and witness your projects flourish on DigitalOcean!
1. Use this link to Sign Up.
2. Activate your account by credit card or PayPal.
3. Done! Now you have free $200 credit.