Please ensure all the steps in the document Increase Re-Usability with UI5 Custom Controls - D&D Dashboard (github.com) are completed. You should have an IDE with the below components installed:
- Git
- Basic UI5 and JavaScript knowledge
- NodeJS
- UI5 Tooling
- Easy-ui5 generator
We will be using VS code during the hands-on session. SAP BAS will also work fine.
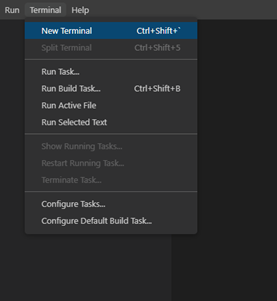
1.Open VSCode and navigate to an empty directory ( Where we will be creating the app).
2.Open a new terminal in VSCode
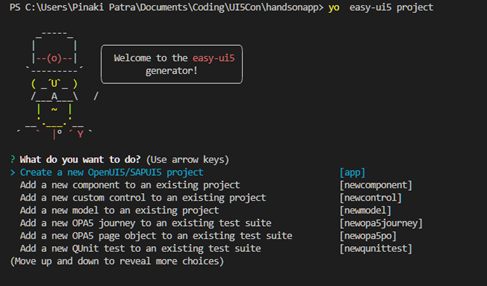
3. We will be using easy-ui5 generator to create a new UI5 application. In the terminal create an empty package (where app will reside) or use project package and enter the below commands:
yo easy-ui5 project
In case the command fails, please refer the step 3 of the instructions in pre-requisites
This will provide us with a guided approach to create our UI5 Application.
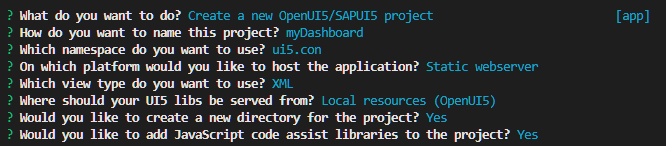
- Enter the options similar to as shown below to create your UI5 Application. You can provide your own name and namespace but you have to ensure related changes in subsequent steps. This will create an application and install the required dependencies. This might take 2-3 minutes depending on your network connection.
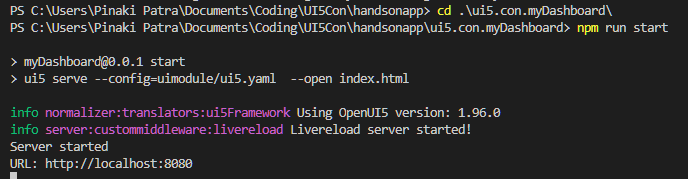
5.Now you should be able to see a new project in your workspace

6.Go to terminal and navigate to your application directory and start local server by using the below commands. You should be able to preview the application at http://localhost:8080 . Navigate to index.html file to view the application
cd .\ui5.con.myDashboard\
npm run start

1.Include dependencies : Ensure you are at the application root and enter the below commands to add dev-dependencies.
- ui5-cc-dndashboard : Include the dashboard Custom Library ui5-cc-dndashboard - npm (npmjs.com)
- ui5-tooling-modules : Use NPM package names for AMD-like dependencies ui5-tooling-modules - npm (npmjs.com)
npm i ui5-cc-dndashboard --save-dev
npm i ui5-tooling-modules@0.3.3 --save-dev
The package.json file should look like below. Include the ui5-tooling-modules as an ui5 dependency.
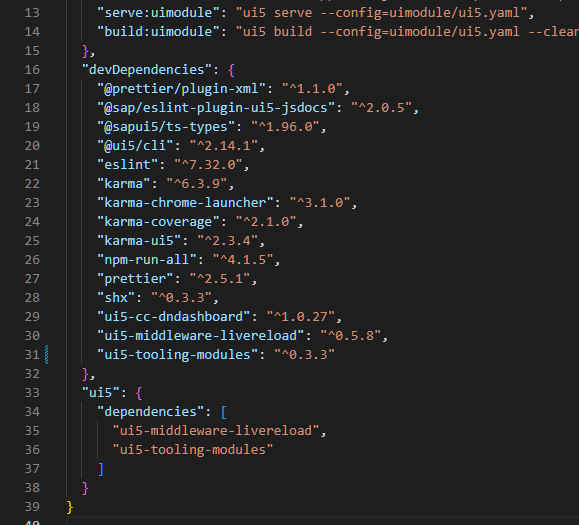
Quick Check : You should be able to see these packages under node_modules

2.Go to uimodule/ui5.yaml file and make the changes below
- Add builder custom task
- Add server custom task
- Change the OpenUI5 version to 1.102.1
- Add themelib_sap_horizon (New Horizon Theme)
The ui5.yaml should look like this
specVersion: "2.2"
metadata:
  name: myDashboard_uimodule
type: application
resources:
  configuration:
    paths:
      webapp: uimodule/webapp
framework:
  name: OpenUI5
  version: 1.102.1
  libraries:
    - name: sap.ui.core
    - name: sap.m
    - name: sap.ui.layout
    - name: themelib_sap_fiori_3
    - name: themelib_sap_horizon

builder:
  customTasks:
  - name: ui5-tooling-modules-task
    afterTask: replaceVersion

server:
  customMiddleware:
    - name: ui5-middleware-livereload
      afterMiddleware: compression
      configuration:
        port: 35729
        path: uimodule/webapp
    - name: ui5-tooling-modules-middleware
      afterMiddleware: compression
The application is located under the package uimodule/webapp. We will make the changes below
1. Go to index.html and change the theme.

2. Add mock data: Create a new folder utils under uimodule/webapp folder. Create a new file, Data.json under utils package. Copy and paste the contents from here. Go manifest and add the following sections Reference
- dataSources
- models
"dataSources": {
	"localData": {
		"uri": "utils/Data.json",
		"type": "JSON"
	}
}
"": {
	"type": "sap.ui.model.json.JSONModel",
	"dataSource": "localData"
}

3.Go to MainView.view.xml and add controls from the custom library.Below are the details of the controls added
dnd:Dashboard: Is the parent dashboard control.dashboardFactory:The factory functions to create aggregations dynamically. This primarily returns control of type ui5-cc-dndashboard.DashboardTile- Added a header with option to toggle edit and randomize color
<mvc:View controllerName="ui5.con.myDashboard.controller.MainView" xmlns:mvc="sap.ui.core.mvc" displayBlock="true" xmlns="sap.m" xmlns:dnd="ui5-cc-dndashboard">
    <Page id="page" title="{i18n>title}">
        <dnd:Dashboard class="sapUiSmallMargin" height="80vh"
            tiles="{
                path:'/tiles',
                factory: '.dashboardFactory'
            }"
        >
            <dnd:header>
                <Toolbar>
                    <Title text="Chart Showcase"/>
                    <ToolbarSpacer/>
                    <Button icon="sap-icon://edit" text="Edit Dashboard" press="editDashboard"/>
                    <Button icon="sap-icon://refresh" text="Randomize Color" press="randomizeColor"/>
                </Toolbar>
            </dnd:header>
        </dnd:Dashboard>
    </Page>
</mvc:View>
4. Create a new file under webapp/controllerExtension/DashboardFactory.js. Here we provide the factory function to create all the dashboard components. You can copy the contents from here.
5.Go to MainView.controller.js and add the factory function to be called from view.
sap.ui.define([
        "./BaseController",
        "ui5/con/myDashboard/controllerExtension/DashboardFactory"
    ],
    /**
     * @param {typeof sap.ui.core.mvc.Controller} Controller
     */
    function (Controller,DashboardFactory) {
        "use strict";

        return Controller.extend("ui5.con.myDashboard.controller.MainView", {
            onInit: function () {},
            dashboardFactory: function (sId, oContext) {
                return DashboardFactory(sId, oContext)
            },
        });
    }
);
5. Add function to edit dashboard and randomize theme color in MainView.controller.js
editDashboard : function(oEvent){
oEvent.getSource().getParent().getParent().setEditable(!oEvent.getSource().getParent().getParent().getEditable())
},
randomizeColor: function () {
var colorArray = ['#FF6633', '#FFB399', '#FF33FF', '#FFFF99', '#00B3E6',
'#E6B333', '#3366E6', '#999966', '#99FF99', '#B34D4D',
'#80B300', '#809900', '#E6B3B3', '#6680B3', '#66991A',
'#FF99E6', '#CCFF1A', '#FF1A66', '#E6331A', '#33FFCC',
'#66994D', '#B366CC', '#4D8000', '#B33300', '#CC80CC',
'#66664D', '#991AFF', '#E666FF', '#4DB3FF', '#1AB399',
'#E666B3', '#33991A', '#CC9999', '#B3B31A', '#00E680',
'#4D8066', '#809980', '#E6FF80', '#1AFF33', '#999933',
'#FF3380', '#CCCC00', '#66E64D', '#4D80CC', '#9900B3',
'#E64D66', '#4DB380', '#FF4D4D', '#99E6E6', '#6666FF'];
const shuffled = colorArray.sort(() => 0.5 - Math.random());
let selected = shuffled.slice(0, 5);
this.getView().getModel().oData.tiles.forEach(e => {
e.measureColour = selected
})
this.getView().getModel().updateBindings()
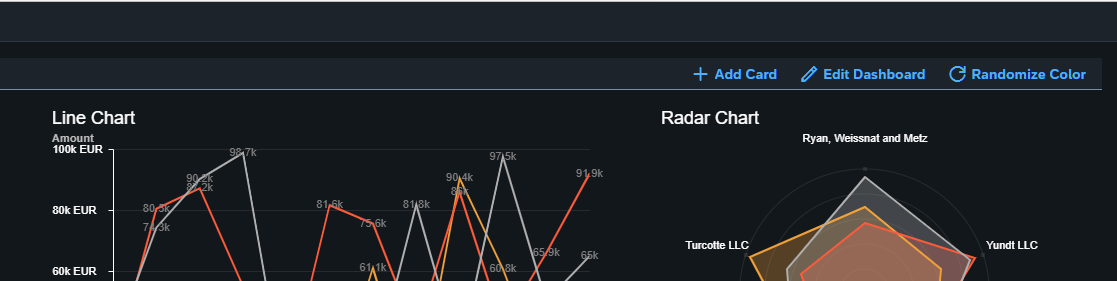
}Restart the local server and head to localhost. For restarting, go to terminal and type Ctrl/Cmd + C and re enter npm run start You should be able to see something like the below image. Try out the
- Edit Dashboard
- Randomize color option you just implemented.

Ensure the following lines are present in package.json
 "build:ui": "run-s  build:uimodule",
 "build:uimodule": "ui5 build --config=uimodule/ui5.yaml --clean-dest --a --dest uimodule/dist --include-task=generateManifestBundle"
Open a terminal and navigate to the project route.Enter the command below to start the build. It might take some time to build the application.
npm run build:ui
Once the build process is completed, you should be able to view the dist package under the uimodule/ package.

Deploy to Cloud Foundry
We will be using Cloud Foundry Command Line Interface (cf CLI) for deploying the application. It will come by default in the SAP Business application studio, but in case you are using VS code, please ensure that cf cli is installed (Instructions).
Add the manifest.yml file to the project's root location
applications:
- name:      UI5ConDashboard
  instances: 1
  memory: 128M
  disk_quota: 256M
  path:      uimodule/dist
  buildpack: https://github.com/cloudfoundry-community/staticfile-buildpack.git
Open a terminal and navigate to the root folder.
Login into your BTP trial by using the command below. It will prompt for username and password.
cf login -a <api endpoint url>
Once you are successfully logged in, execute the command below.
cf push
Head over to your BTP subaccount and access the application.
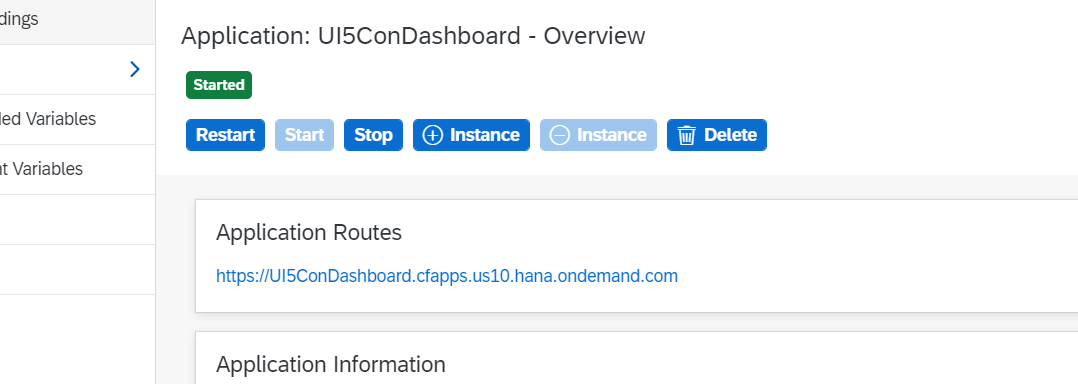
For demo purposes, we are doing a simple html push instead of mta into CF
You can implement your own card type on the dashboard. It can be a standard UI5 control or custom control.
To achieve the same, the below steps need to be followed.
1. Navigate to uimodule\webapp\utils\Data.json
2.Add a new array element inside the tiles property. It should be of the below format.
{
          "cardType":"<your card type>",
          "posx":0,
          "posy":6,
          "width":2,
          "height":5,
          <additional properties required by your control>
        }
pox,posy,width,heightis used to position the elements on the dashboard.
cardTypewill be used in the if condition in the factory function ex. myCustomCard
3. Implement the custom card login inside uimodule\webapp\controllerExtension\DashboardFactory.js. You should already see some sample code inside the file.
4. Save and run the local server. The changes should be visible on the dashboard.
You can also allow users to add cards dynamically.
1.Create a button inside the main view
<Button icon="sap-icon://add" text="Add Card" press="yourFunction"/>
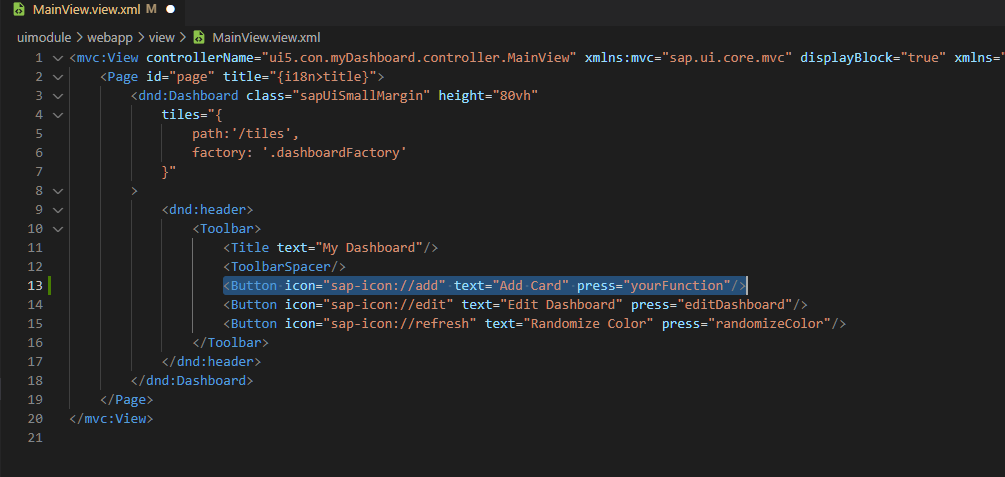
- On press of the button, open a dialog to take the required parameters from the user.
- On confirmation, use the parameters to create a new object and append to the local JSONModel.