Skip to content

Instantly share code, notes, and snippets.

@ta-web-mex
Forked from Jossdz/antd.md
Last active May 7, 2019 21:22
Show Gist options
  • Save ta-web-mex/d8de53e2f537510b97fdbc14286b95ae to your computer and use it in GitHub Desktop.
Save ta-web-mex/d8de53e2f537510b97fdbc14286b95ae to your computer and use it in GitHub Desktop.

React | UI Component Libraries - Antd

Learning goals:

After this lesson you will be able to:

  • Explain what a component library is and how it is different from a style library
  • Add and configure a component library
  • Use and set up a component from the Antd library

In web applications we have worked with styles in two different ways. The first is writing our styles by ourselves from scratch. The second option is opting for a library or framework of styles such as Bootstrap or Bulma, among others. This gives us the ability to focus on the functionality and business logic of our applications. But as our frontend development skills advance, style libraries are being left behind and giving way to UI component libraries.

UI Component Libraries

A component library is a package that contains a series of previously generated React components. Unlike style libraries, which add styles through HTML classes and functionality through jQuery, component libraries are elements with everything they need to work by themselves. UI components contain all the markup (HTML/JSX), styles (CSS) and logic (JS) that they need to look good and work well.

// Styles library/framework code
<button class='btn btn-primary'>Send</button>

// Component library code
<Button primary>Send</Button>

When style libraries needed additional visual properties, such as button types, column sizes, or other properties, we added extra classes. Now React introduces a better way to handle styles based on the props of the components. By doing so, the code is greatly reduced and the markup looks much cleaner.

Antd


Antd is a React UI component library based on an elegant and reliable design system, with a great amount of styled and functional components.

Installation

In your React project:

$ npm install antd

Import the antd.css in the index.js file:

import 'antd/dist/antd.css'

Now you can start using UI components from the Antd library.

Antd components

import { Button, Card } from "antd";

const { Meta } = Card;

const Main = () => (
	<main>
    <h1>React UI Components</h1>
    <Button type='primary'>Components List</Button>
		<Card
			hoverable
			style={{ width: 240 }}
			cover={<img alt="example" src="https://os.alipayobjects.com/rmsportal/QBnOOoLaAfKPirc.png" />}
		>
			<Meta
				title="Europe Street beat"
				description="www.instagram.com"
			/>
		</Card>
  </main>
);

The result should look like this:

Antd Grid

The Antd grid system defines the frame outside the information area based on row and column to ensure that every area can have a stable arrangement.

It uses a 24-grid layout to define the width of each "box", but does not rigidly adhere to the grid layout.

  import {Button, Row, Col} from 'antd'

  const Main = () => (
    <main>
      <Row>
        <Col span={12} style={{background: 'red'}}>Col</Col>
        <Col span={12} style={{background: 'blue'}}>Col</Col>
      </Row>
    </main>
  )
Grid gutter

You can use the gutter property of Row as grid spacing.

  import {Button, Row, Col} from 'antd'

  const Main = () => (
    <main>
      <Row gutter={16}>
        <Col className="gutter-row" span={12}>
          <div
            className="gutter-box"
            style={{background: 'red'}}
          >
            col-6
          </div>
        </Col>
        <Col className="gutter-row" span={12}>
          <div
            className="gutter-box"
            style={{background: 'blue'}}
          >
              col-6
          </div>
        </Col>
      </Row>
    </main>
  )
Antd Layout

Handling the overall layout of a page.

import { Layout, Menu } from "antd";

const {
  Header, Footer, Sider, Content,
} = Layout;

const Main = () => (
	<main>
		<Layout>
      <Header>
        <Menu
          theme="dark"
          mode="horizontal"
          defaultSelectedKeys={['1']}
          style={{ lineHeight: '64px' }}
        >
          <Menu.Item key="1">nav 1</Menu.Item>
          <Menu.Item key="2">nav 2</Menu.Item>
          <Menu.Item key="3">nav 3</Menu.Item>
        </Menu>
      </Header>
      <Content>
        App Content
      </Content>
      <Footer>Footer</Footer>
    </Layout>
	</main>
);

There are a lot of Layouts already created at the Antd layout page

Summary

In this lesson, you learned how to distinguish between a styles library and a component library, and how a library of UI components works. You also learned about Antd and how to install it. It is a library with many incredible component: we saw just a few of them, but the principle for using the others is the same. Try to integrate more Antd components into your next exercises.

Extra Resources

React | Styled Components

Learning goals:

After this lesson you will be able to:

  • Explain what the styled-components library is
  • Understand what styled components are
  • Create your own styles for your components
  • Apply component-only and global styles
  • Reuse components across your app

What is styled-components?

Styled-components its a React and React Native library. Utilising tagged template literals (a recent addition to JavaScript) and the power of CSS, styled-components allows you to write actual CSS code to style your components.

Styled-components allows us to create a component-copy of any primitive HTML tag or element and style it into this new tagged template-literal.

import styled from 'styled-components'

const Button = styled.button``

The Button variable is now a React component!

If you render our lovely component now (just like any other component: <Button />) this is what you get:

I'm a <Button />!

It renders a button! That's not a very nice button, though: we can do better than this. Let's give it a bit of styling and tickle out the hidden beauty within!

  const Button = styled.button`
    background: transparent;
    border-radius: 3px;
    border: 2px solid palevioletred;
    color: palevioletred;
    margin: 0 1em;
    padding: 0.25em 1em;
  `

As you can see, styled-components lets you write actual CSS in your JavaScript. This means you can use all the features of CSS you know and love, including (but by far not limited to) media queries, all pseudo-selectors, nesting, etc.

Button Example

Own selector, nesting and pseudo clases

Let's create a card component:

  const Card = styled.div`
    background: #fff;
    border-radius: 2px;
    display: inline-block;
    height: 300px;
    margin: 1rem;
    width: 300px;
    display: flex;
    flex-direction: column;
    box-shadow: 0 1px 3px rgba(0,0,0,0.12), 0 1px 2px rgba(0,0,0,0.24);
    transition: all 0.3s cubic-bezier(.25,.8,.25,1);
    justify-content: space-around;
    `

and use the Card component:

  <Card>
    <h2>Title</h2>
    <p>Card body</p>
    <nav>
      <button>see more</button>
      <button>eliminate</button>
    </nav>
  </Card>

In order to reach the components under the card we can use nested selectors:

 const Card = styled.div`
    background: #fff;
    border-radius: 2px;
    display: inline-block;
    height: 300px;
    margin: 1rem;
    width: 300px;
    display: flex;
    flex-direction: column;
    box-shadow: 0 1px 3px rgba(0,0,0,0.12), 0 1px 2px rgba(0,0,0,0.24);
    transition: all 0.3s cubic-bezier(.25,.8,.25,1);
    justify-content: space-around;
    nav{
      display: flex;
      justify-content: space-evenly
      button{
        border: none;
        text-decoration: underline;
      }
    }`

This works because our Card component has a nav tag child which has button tags inside it.

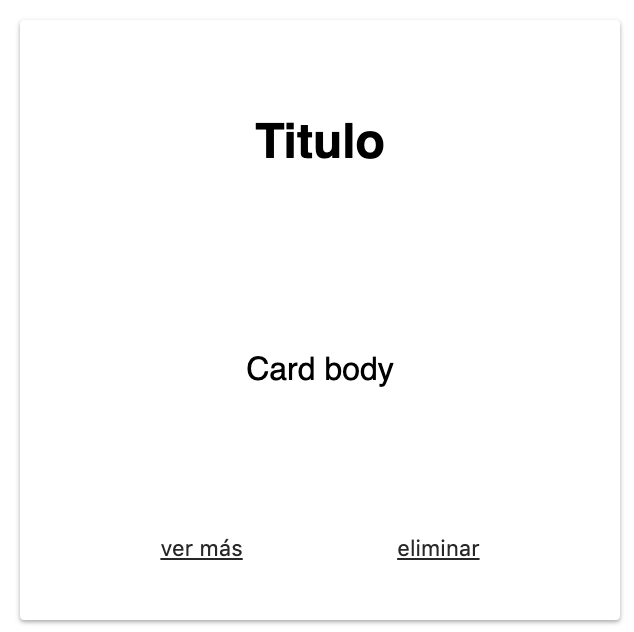
Now our card should look like this:

The only thing we are missing now is the card's 3d-like effect. For this we'll need use the hover pseudo selector. In styled-components you can use the & selector, which means 'this component', followed by the pseudo selector:

&:hover{
    box-shadow: 0 14px 28px rgba(0,0,0,0.25), 0 10px 10px rgba(0,0,0,0.22);
  }

Last but not least, we can always use media queries in our components:

@media (max-width: 600px) {
    width: 100%;
    margin: 0;
  }

Here's the result

Global styling

We are probably going to need to reset or normalize our CSS just as we did before in module 1. We already know that normalizing makes browsers render all elements more consistently and in line with modern standards. This is why we probably want to use global styles.

To create GlobalStyles with styled-components we use the createGlobalStyle function:

import styled, {createGlobalStyle} from 'styled-components'

Just as we defined our copy components for existing HTML tags, we can generate a GlobalStyle component:

const GlobalStyle = createGlobalStyle`
  body {
    background-color: #feeffe;
  }
  html{
    font-size: 16px;
  }
`

The next and last step is to place the GlobalStyle component in our render method:

<GlobalStyle/>

Here's the result

Props in styled-components

Since we are working with components we have the possibility of using props in any styled-component like this:

  <Button type='ghost'></Button>

Styled Button:

  const Button = styled.button`
    border: 1px solid crimson;
    background-color: ${props => props.type==='ghost' ? 'crimson' : 'transparent'}
  `

Summary

Now we know how to create custom styles for React components and harness the power of CSS in JS. It's really important to notice that this is JS and you can easily create your own UI components library by leaving the styled components in their own JS file.

Extra Resources

Sign up for free to join this conversation on GitHub. Already have an account? Sign in to comment