-
-
Save dbkinghorn/c236aea31d76028b2b6ccdf6d3c6f07e to your computer and use it in GitHub Desktop.
| #cloud-config | |
| autoinstall: | |
| version: 1 | |
| refresh-installer: # start with an up-to-date installer | |
| update: yes | |
| interactive-sections: # Install groups listed here will wait for user input | |
| - storage | |
| storage: # should set the interactive default but doesn't seem to work?? | |
| layout: | |
| name: direct | |
| locale: en_US.UTF-8 | |
| keyboard: | |
| layout: us | |
| identity: # This is section you may want to add to interactive-sections (user name and password are ubuntu here) | |
| hostname: puget-000 | |
| password: "$6$exDY1mhS4KUYCE/2$zmn9ToZwTKLhCw.b4/b.ZRTIZM30JZ4QrOQ2aOXJ8yk96xpcCof0kxKwuX1kqLG/ygbJ1f8wxED22bTL4F46P0" | |
| username: ubuntu | |
| ssh: | |
| allow-pw: true | |
| install-server: true | |
| apt: | |
| sources: | |
| ignored1: # This is here to get the yaml formatting right when adding a ppa | |
| source: ppa:graphics-drivers/ppa | |
| packages: | |
| - build-essential | |
| - network-manager | |
| - dkms | |
| - emacs-nox | |
| - ubuntu-desktop-minimal | |
| package_update: true | |
| package_upgrade: true | |
| late-commands: | |
| # Changing from networkd to NetworkManager | |
| # move existing config out of the way | |
| - find /target/etc/netplan/ -name "*.yaml" -exec sh -c 'mv "$1" "$1-orig"' _ {} \; | |
| # Create a new netplan and enable it | |
| - | | |
| cat <<EOF | sudo tee /target/etc/netplan/01-netcfg.yaml | |
| network: | |
| version: 2 | |
| renderer: NetworkManager | |
| EOF | |
| - curtin in-target --target /target netplan generate | |
| - curtin in-target --target /target netplan apply | |
| - curtin in-target --target /target systemctl enable NetworkManager.service | |
| # Write a script that can take care of some post install setup "late-commands" cannot be interactive unfortunately" | |
| # - | | |
| # cat <<EOF | sudo tee /target/etc/finish-install-setup.sh | |
| # #!/usr/bin/env bash | |
| # echo ************************* | |
| # echo **** Finish Setup **** | |
| # echo ************************* | |
| # echo 'Enter the hostname for this system: ' | |
| # read NEW_HOSTNAME | |
| # hostnamectl set-hostname \${NEW_HOSTNAME} | |
| # echo | |
| # echo 'Enter the timezone for this system: ' | |
| # echo 'America/Los_Angeles America/Denver America/Chicago America/New_York' | |
| # read NEW_TIMEZONE | |
| # timedatectl set-timezone \${NEW_TIMEZONE} | |
| # echo ************************* | |
| # echo | |
| # echo ************************* | |
| # echo 'Restarting to finish ...' | |
| # shutdown -r 3 | |
| # EOF | |
| # - curtin in-target --target /target chmod 744 /etc/finish-install-setup.sh | |
| - cp /target/cdrom/extras/Puget_Systems.png /target/usr/share/backgrounds/ | |
| user-data: # Commands here run during first boot (cannot be interactive) | |
| runcmd: | |
| # Install the NVIDIA driver from the ppa we setup earlier | |
| - [apt-get, update] | |
| - [apt-get, dist-upgrade, --yes] | |
| - [apt, autoremove, --yes] | |
| - [apt-get, install, --yes, nvidia-driver-470] #, --no-install-recommends] | |
| - [sudo, -u, ubuntu, dbus-launch, gsettings, set, org.gnome.desktop.background, picture-uri, file:///usr/share/backgrounds/Puget_Systems.png] | |
| # - | | |
| # #!/usr/bin/env bash | |
| # echo '' | |
| # echo '***************************************' | |
| # echo ' To complete install setup please run, ' | |
| # echo ' sudo /etc/finish-install-setup.sh' | |
| # echo '***************************************' | |
| # echo '' |
| #cloud-config | |
| autoinstall: | |
| version: 1 | |
| refresh-installer: # start with an up-to-date installer | |
| update: yes | |
| interactive-sections: # Install groups listed here will wait for user input | |
| - storage | |
| storage: # should set the interactive default but doesn't seem to work?? | |
| layout: | |
| name: direct | |
| locale: en_US.UTF-8 | |
| keyboard: | |
| layout: us | |
| identity: # This is section you may want to add to interactive-sections (user name and password are ubuntu here) | |
| hostname: puget-000 | |
| password: "$6$exDY1mhS4KUYCE/2$zmn9ToZwTKLhCw.b4/b.ZRTIZM30JZ4QrOQ2aOXJ8yk96xpcCof0kxKwuX1kqLG/ygbJ1f8wxED22bTL4F46P0" | |
| username: ubuntu | |
| ssh: | |
| allow-pw: true | |
| install-server: true | |
| apt: | |
| sources: | |
| ignored1: # This is here to get the yaml formatting right when adding a ppa | |
| source: ppa:graphics-drivers/ppa | |
| packages: | |
| - build-essential | |
| - network-manager | |
| - dkms | |
| - emacs-nox | |
| #- ubuntu-desktop-minimal^ | |
| package_update: true | |
| package_upgrade: true | |
| late-commands: | |
| # Changing from networkd to NetworkManager | |
| # move existing config out of the way | |
| - find /target/etc/netplan/ -name "*.yaml" -exec sh -c 'mv "$1" "$1-orig"' _ {} \; | |
| # Create a new netplan and enable it | |
| - | | |
| cat <<EOF | sudo tee /target/etc/netplan/01-netcfg.yaml | |
| network: | |
| version: 2 | |
| renderer: NetworkManager | |
| EOF | |
| - curtin in-target --target /target netplan generate | |
| - curtin in-target --target /target netplan apply | |
| - curtin in-target --target /target systemctl enable NetworkManager.service | |
| # Write a script that can take care of some post install setup "late-commands" cannot be interactive unfortunately" | |
| # - | | |
| # cat <<EOF | sudo tee /target/etc/finish-install-setup.sh | |
| # #!/usr/bin/env bash | |
| # echo ************************* | |
| # echo **** Finish Setup **** | |
| # echo ************************* | |
| # echo 'Enter the hostname for this system: ' | |
| # read NEW_HOSTNAME | |
| # hostnamectl set-hostname \${NEW_HOSTNAME} | |
| # echo | |
| # echo 'Enter the timezone for this system: ' | |
| # echo 'America/Los_Angeles America/Denver America/Chicago America/New_York' | |
| # read NEW_TIMEZONE | |
| # timedatectl set-timezone \${NEW_TIMEZONE} | |
| # echo ************************* | |
| # echo | |
| # echo ************************* | |
| # echo 'Restarting to finish ...' | |
| # shutdown -r 3 | |
| # EOF | |
| # - curtin in-target --target /target chmod 744 /etc/finish-install-setup.sh | |
| - ls -l > /target/root/ls.out | |
| - pwd > /target/root/pwd.out | |
| - mount > /target/root/mount.out | |
| - touch afile | |
| - cp afile /target/root/ | |
| - ls -l / > /target/root/ls-root.out | |
| - ls -l /target > /target/root/ls-target.out | |
| - ls -l /target/cdrom > /target/root/ls-target-cdrom.out | |
| user-data: # Commands here run during first boot (cannot be interactive) | |
| runcmd: | |
| # Install the NVIDIA driver from the ppa we setup earlier | |
| - [apt-get, install, --yes, nvidia-driver-470, --no-install-recommends] | |
| - | | |
| #!/usr/bin/env bash | |
| echo '' | |
| echo '***************************************' | |
| echo ' To complete install setup please run, ' | |
| echo ' sudo /etc/finish-install-setup.sh' | |
| echo '***************************************' | |
| echo '' |
@zero-pytagoras Thanks for the info. My yaml is now working 100%.
@finalls not sure i understand what you are trying to do. who is giving you value of ? in my case i used to run script and to edit with the user-data file itself. kind of editing script from i am running myself
$DISK``early-commands``sed
#cloud-config
autoinstall:
early-commands:
- ROOT_DEV=$(lsblk -x TYPE|grep disk|grep G|awk '{print $1}')
it is my script , but the ROOT_DEV does not worker ? why
because it is yaml - it can not run shell scripts directly.
you need to run it separate file/script and redirect its value to your current user-data file
@zero-pytagoras
I'm also trying to define a path using a script in the early commands. Would you know which user-data file to edit with sed so that it is used in the installation? I've tried some of the files in
/var/lib/cloud/instances/nocloud and /var/lib/cloud/instance
but I've had no luck yet.
the default file to be update needs to /automation, but you could test it on failed run.
the default file to be update needs to
/automation, but you could test it on failed run.
I needed to update the /autoinstall.yaml but thanks a lot for pointing me in the right direction! Works great now!
Thank you so much for this template.
I am trying to build an ISO that compatible with two different environments. One has to enable network in interactive-sections, one without. Can I do it my create different entry in the grub file.
The grub file might look like
menuentry "Manual network config" {
        set gfxpayload=keep
        linux   /casper/hwe-vmlinuz   quiet  autoinstall ds=nocloud\;s=/cdrom/nocloud/ ---
        initrd  /casper/hwe-initrd
}

menuentry "Auto network config" {
        set gfxpayload=keep
        linux   /casper/hwe-vmlinuz   quiet  autoinstall ds=nocloud\;s=/cdrom/nocloud/ ---
        initrd  /casper/hwe-initrd
}
When user choose Manual network config the user-data file would have
interactive-sections:
    - network
Is there a way to make it work? I need to create some param and pass it to user-data file to control how the install works.
what you need is different files for different scenarious. Meaning cloud-config.yaml file needs to be replicatrd and networking section changed per use case, as well as grub file to link the required file.
Thanks, I guess the solution would be two different ISO. Cannot do the fancy stuff.
Not at all. It is possible to setup one iso with all the required things. I am traveling, but should be able to post later this week a solution.
I'll add this even thought it's a late reply ... adding more configs to the ISO is simple.
You are halfway there by making the 2 menu entries. What you want is to use 2 different directories for the differing user-data and meta-data files.
instead of using
s=/cdrom/nocloud/
try
s=/cdrom/manual-net/ for the first menu stanza
and
s=/cdrom/auto-net/ for the second menu stanza
Then add the different user-data files to each of those.
When you make your ISO you will have the menu choice and each will load the appropriate user-data file
Can someone tell me why the following grub.cfg will not work? It should be able to pick-up the user-data file in /cdrom/server. However, instead of booting and running the auto-install it defaults to the Ubuntu walk-through (manual) menu.
if loadfont /boot/grub/font.pf2 ; then
	set gfxmode=auto
	insmod efi_gop
	insmod efi_uga
	insmod gfxterm
	terminal_output gfxterm
fi

set menu_color_normal=white/black
set menu_color_highlight=black/light-gray

set timeout=5

menuentry "Install Ubuntu Server" {
	set gfxpayload=keep
	linux	/casper/vmlinuz   quiet autoinstall ds=nocloud\;s=/cdrom/server/  ---
	initrd	/casper/initrd
}

grub_platform
if [ "$grub_platform" = "efi" ]; then
menuentry 'Boot from next volume' {
	exit 1
}
menuentry 'UEFI Firmware Settings' {
	fwsetup
}
fi

submenu 'Boot and Install with the HWE kernel' {

menuentry "Install Ubuntu Server" {
	set gfxpayload=keep
	linux	/casper/hwe-vmlinuz   quiet  ---
	initrd	/casper/hwe-initrd
}
}
/cdrom/server/user-data file:
#cloud-config
# Helpful sights:
#        https://louwrentius.com/understanding-the-ubuntu-2004-lts-server-autoinstaller.html
#        https://www.edwardssite.com/cloud-init
#        https://ubuntu.com/server/docs/install/autoinstall-referencie#commandlist
#        https://www.convertunits.com/from/bytes/to/MB
#        https://www.pugetsystems.com/labs/hpc/how-to-make-ubuntu-autoinstall-iso-with-cloud-init-2213
autoinstall:
  version: 1
  refresh-installer:
  update: yes
  interactive-sections:
  keyboard: {layout: 'us', variant: ''}
  locale: en_US.UTF-8

  # Identification
  identity:
    hostname: ubuntu-test
    username: ubuntu
    password: <password-hash>
  ssh:
    allow-pw: true
    install-server: true

  # Storage Information
  storage:
    config:
    # Find Disk, Partition Boot/EFI, and wipe clean (268435456 = 256MB, 536870912 = 512MB)
    - {grub_device: true, id: disk-sda, name: '', path: /dev/sda, preserve: false, ptable: gpt, type: disk, wipe: superblock-recursive}
    - {device: disk-sda, flag: bios_grub, grub_device: false, id: partition-0, number: 1, preserve: false, size: 1048576, type: partition}
    - {device: disk-sda, flag: '', grub_device: false, id: partition-1, number: 2, preserve: false, size: 536870912, type: partition, wipe: superblock}
    - {fstype: ext4, id: format-0, preserve: false, type: format, volume: partition-1}
    - {device: disk-sda, flag: '', grub_device: false, id: partition-2, number: 3, preserve: false, size: 134217728, type: partition, wipe: superblock}
    - {fstype: ext4, id: format-1, preserve: false, type: format, volume: partition-2}
    # Create SWAP space and mount it (2147483648 = 2GB)
    - {device: disk-sda, flag: swap, grub_device: false, id: partition-3, number: 4, preserve: false, size: 2147483648, type: partition, wipe: superblock}
    - {fstype: swap, id: format-2, preserve: false, type: format, volume: partition-3}
    - {device: format-2, id: mount-2, path: '', type: mount}
    # Create LVM Group from remaining disk space
    - {device: disk-sda, flag: '', grub_device: false, id: partition-4, number: 5, preserve: false, size: -1, type: partition, wipe: superblock}
    - devices:
      - partition-4
      id: lvm_volgroup-0
      name: vgroot
      preserve: false
      type: lvm_volgroup

    # Create LVM Filesystems
    # /
    - {id: lvm_partition-0, name: FS_root, preserve: false, size: 4290772992B, type: lvm_partition, volgroup: lvm_volgroup-0}
    - {fstype: ext4, id: format-5, preserve: false, type: format, volume: lvm_partition-0}
    # /home
    - {id: lvm_partition-1, name: FS_home, preserve: false, size: 2147483648B, type: lvm_partition, volgroup: lvm_volgroup-0}
    - {fstype: ext4, id: format-6, preserve: false, type: format, volume: lvm_partition-1}
    # /var
    - {id: lvm_partition-2, name: FS_var, preserve: false, size: 2147483648B, type: lvm_partition, volgroup: lvm_volgroup-0}
    - {fstype: ext4, id: format-7, preserve: false, type: format, volume: lvm_partition-2}
    # /opt
    - {id: lvm_partition-4, name: FS_opt, preserve: false, size: 1073741824B, type: lvm_partition, volgroup: lvm_volgroup-0}
    - {fstype: ext4, id: format-8, preserve: false, type: format, volume: lvm_partition-4}
    # /tmp
    - {id: lvm_partition-5, name: FS_tmp, preserve: false, size: 1073741824B, type: lvm_partition, volgroup: lvm_volgroup-0}
    - {fstype: ext4, id: format-9, preserve: false, type: format, volume: lvm_partition-5}
    # /usr
    - {id: lvm_partition-6, name: FS_usr, preserve: false, size: 6242450944B, type: lvm_partition, volgroup: lvm_volgroup-0}
    - {fstype: ext4, id: format-10, preserve: false, type: format, volume: lvm_partition-6}
    # /var/log
    - {id: lvm_partition-3, name: FS_var_log, preserve: false, size: 2147483648B, type: lvm_partition, volgroup: lvm_volgroup-0}
    - {fstype: ext4, id: format-11, preserve: false, type: format, volume: lvm_partition-3}

    # Mount Storage devices
    - {device: format-0, id: mount-0, path: /boot, type: mount}
    - {device: format-1, id: mount-1, path: /boot/efi, type: mount}
    - {device: format-5, id: mount-5, path: /, type: mount}
    - {device: format-6, id: mount-6, path: /home, type: mount}
    - {device: format-7, id: mount-7, path: /var, type: mount}
    - {device: format-8, id: mount-8, path: /opt, type: mount}
    - {device: format-9, id: mount-9, path: /tmp, type: mount}
    - {device: format-10, id: mount-10, path: /usr, type: mount}
    - {device: format-11, id: mount-11, path: /var/log, type: mount}

  # Post-install packages to download and include
  packages:
    - vim
    - curl
    - wget
    - openssh-server
    - perl
    - open-vm-tools

  # Commands to complete after installation
  late-commands:
    - mkdir /tmp/mnt
    - mount /dev/sr0 /tmp/mnt
    - curtin in-target --target=/target -- touch /etc/cloud/cloud-init.disabled
    - mkdir /target/DockerInstall
    - cp /tmp/mnt/daemon.json /target/DockerInstall/daemon.json
    - cp /tmp/mnt/DockerInstall.sh /target/DockerInstall/DockerInstall.sh
    - chmod 777 /target/DockerInstall/DockerInstall.sh
    - echo '@reboot root /usr/bin/sleep 30 && /DockerInstall/DockerInstall.sh' | sudo tee /target/etc/cron.d/docker-install
    - cp /tmp/mnt/01-config.yaml /target/etc/netplan/01-config.yaml
    - cp /tmp/mnt/99-custom-network-test /target/etc/update-motd.d/99-custom-network-test
    - sed -i 's/^#DNS\=/DNS\=/g;s/^#Fall/Fall/g;s/^#Domains\=/Domains\=/g' /target/etc/systemd/resolved.conf
    - sed -i '/^DNS\=/ s/$/192.16.0.53/' /target/etc/systemd/resolved.conf
    - sed -i '/^Fall.*\=/ s/$/192.16.0.54/' /target/etc/systemd/resolved.conf
    - sed -i '/^Domains\=/ s/$/ad.example.com. example.com./' /target/etc/systemd/resolved.conf
    - echo "ansible ALL=(ALL:ALL) NOPASSWD:ALL" > /target/etc/sudoers.d/ansible_admin
    - chmod 0440 /target/etc/sudoers.d/ansible_admin
    - curtin in-target --target=/target -- /usr/sbin/useradd -m -c "Ansible Account" -s /bin/bash -G sudo -p <password> ansible
    - curtin in-target --target=/target -- mkdir /home/ansible/.ssh
    - curtin in-target --target=/target -- chmod 0700 /home/ansible/.ssh
    - curtin in-target --target=/target -- touch /tmp/authorized_keys
    - curtin in-target --target=/target -- install -o ansible -g ansible -m 0600 /tmp/authorized_keys -t /home/ansible/.ssh
    - echo "ssh-rsa <SSH PUBLIC KEY> >> /target/home/ansible/.ssh/authorized_keys
    - curtin in-target --target=/target -- chown -R ansible:ansible /home/ansible/
    - curtin in-target --target=/target -- /usr/sbin/useradd -m -c "Ubuntu Account" -s /bin/bash -p '<password>' Ubuntu
    - curtin in-target --target=/target -- timedatectl set-timezone America/Chicago

  # Process to restart the server after build completes
  user-data:
    timezone: America/Chicago
    disable_root: false
    power_state:
      mode: reboot
      condition: true
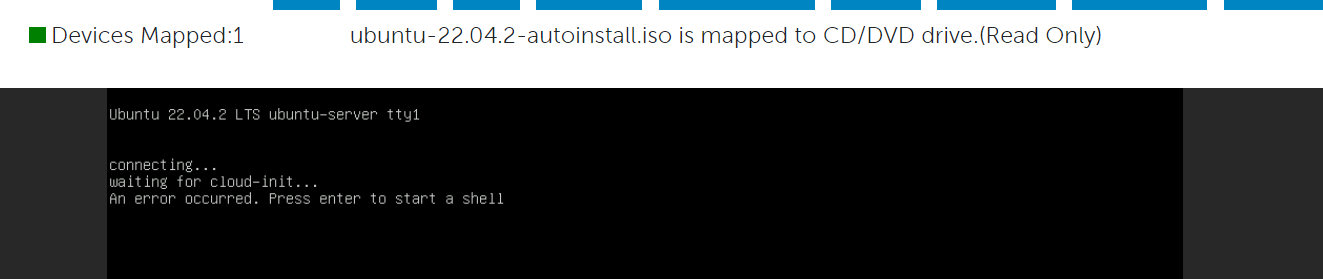
During UEFI boot I get the grub menu prompt for Auto Install, I wait for the timer to expire, and then after cloud init messages appear I get
waiting for cloud-init and then an error occurred appears. I believe this is when the user-data file is trying to be found but, it's not being seen.
I would also like to get this to work with BIOS (non-UEFI) boot. Which currently just goes straight to the default Ubuntu menu for installation starting with languages.
I'm currently trying to follow along with this websites suggestions for UEFI and BIOS boot.
https://utcc.utoronto.ca/~cks/space/blog/linux/Ubuntu2004ISOWithUEFI-2
Hi Jon,
I don't see any obvious errors. A couple of things to try;
Validate your user-data file against the JSON schema
sudo apt-get install cloud-init
cloud-init devel schema --config-file user-data
If there are any errors in the yaml, cloud-init will not start
You might also want to try testing with a very simple user-data file. Maybe just hostname: and identity: Get that working before adding more components to the file.
Debugging this stuff can be a real headache! I hope these suggestions help
I just thought of something ... I've been working with 22.04 (as we exchanged messages I have had it in my head that you were using 22.04 not 20.04!)
20.04 has isolinux (that was removed and everything was moved to GPT and partition images in 22.04)
I think you may still need to add a modified txt.cfg into the isolinux dir. I'm completely sure if you need this but it's worth a try. [This would be more like what I did in the post from last September]
The txt.cfg file would start something like,
default autoinstall-server
label autoinstall-server
menu label ^Autoinstall Server
kernel /casper/vmlinuz
append initrd=/casper/initrd quiet autoinstall ds=nocloud;s=/cdrom/server/ ---
yes - on ubuntu20.04, you still need to fix txt.cfg file for boot to work.
@jon
from what i was able to automate, you either can set bios or gpt but not both at the same time.
Checking the same user-data file as above I get this:
$ cloud-init schema -h
usage: /usr/bin/cloud-init schema [-h] [-c CONFIG_FILE] [--system] [-d DOCS [DOCS ...]] [--annotate]

optional arguments:
  -h, --help            show this help message and exit
  -c CONFIG_FILE, --config-file CONFIG_FILE
                        Path of the cloud-config yaml file to validate
  --system              Validate the system cloud-config userdata
  -d DOCS [DOCS ...], --docs DOCS [DOCS ...]
                        Print schema module docs. Choices: all or space-delimited cc_names.
  --annotate            Annotate existing cloud-config file with errors

$ cloud-init schema --config-file ./server/user-data
Valid cloud-config: user-data
Here's my ./isolinux/txt.cfg file:
$ ls -lah ./isolinux/txt.cfg
-rw-rw-r-- 1 myuser mygroup 627 Jan  4 13:13 ./isolinux/txt.cfg

$ cat ./isolinux/txt.cfg
default autoinstall-server
label autoinstall-server
  menu label ^Autoinstall Server
  kernel /casper/vmlinuz
  append   initrd=/casper/initrd quiet autoinstall fsck.mode=skip ds=nocloud\;s=/cdrom/server/ ---
label live
  menu label ^Install Ubuntu Server
  kernel /casper/vmlinuz
  append   initrd=/casper/initrd quiet  ---
label hwe-live
  menu label ^Install Ubuntu Server with the HWE kernel
  kernel /casper/hwe-vmlinuz
  append   initrd=/casper/hwe-initrd quiet  ---
label memtest
  menu label Test ^memory
  kernel /install/mt86plus
label hd
  menu label ^Boot from first hard disk
  localboot 0x80
Hi @dbkinghorn can you guide me to autoinstall of ubuntu22.04 & also ping me working user data file. please help me out i have tried of so many nothing is not working.
My most recent work on this stuff is;
https://www.pugetsystems.com/labs/hpc/ubuntu-22-04-server-autoinstall-iso/
There should be some helpful info in the comments too.
People have been having trouble with MBR vs GPT partitions. What I have in the post worked when I did it but I haven't revisited it since.
I do have a need to build another ISO. Probably this week. I'll be using my own post as a guide. If I encounter anything that doesn't work right now, I will update the post and add comments.
I do empathize with folks that have trouble! I feel this is needlessly difficult for something that, in my opinion, should be clearly documented and facilitated by the distribution provider. On the other hand, it is open source, so we are all in it together to make things better :-)
My most recent work on this stuff is; https://www.pugetsystems.com/labs/hpc/ubuntu-22-04-server-autoinstall-iso/
There should be some helpful info in the comments too. People have been having trouble with MBR vs GPT partitions. What I have in the post worked when I did it but I haven't revisited it since. I do have a need to build another ISO. Probably this week. I'll be using my own post as a guide. If I encounter anything that doesn't work right now, I will update the post and add comments.
I do empathize with folks that have trouble! I feel this is needlessly difficult for something that, in my opinion, should be clearly documented and facilitated by the distribution provider. On the other hand, it is open source, so we are all in it together to make things better :-)
Hi @dbkinghorn
I am also facing MBR and GPT issues. Can you tell me when you build another iso or ping in this blog. I am waiting for your post. Also i am facing subiquity/Errorreporter/162334394239423.block_probe_fail : written to /var/crash

Thank you so much
I ran through the procedure this morning and created ISO bootable from MBR and UEFI using the new install image Ubuntu server 22.04.2
Everything worked fine. Main thing is to be very careful about formating files. YAML is very picky!
My testing is in a comment on
https://www.pugetsystems.com/labs/hpc/ubuntu-22-04-server-autoinstall-iso/
When you do this in bare-metal be sure that you have tried a manual install on that hardware. If there is anything broken with a manual install then the auto-install will also be broken. Some times you need to pass kernel flags on the grub line in order to install. If you have to do that then you would need to add those kernel flags to the grub.cfg stanza. And add them to /etc/defaults/grub too ...
I ran through the procedure this morning and created ISO bootable from MBR and UEFI using the new install image Ubuntu server 22.04.2
Everything worked fine. Main thing is to be very careful about formating files. YAML is very picky!
My testing is in a comment on https://www.pugetsystems.com/labs/hpc/ubuntu-22-04-server-autoinstall-iso/
When you do this in bare-metal be sure that you have tried a manual install on that hardware. If there is anything broken with a manual install then the auto-install will also be broken. Some times you need to pass kernel flags on the grub line in order to install. If you have to do that then you would need to add those kernel flags to the grub.cfg stanza. And add them to /etc/defaults/grub too ...
@dbkinghorn Thank you so much
May i know the which kernel flags i need to send to grub.cfg. Please ping here
If you can manually install then you don't need any. But, as an example, on AMD WRX80 Tr Pro motherboards you sometimes need to include
amd_iommu=on iommu=pt
It's fairly common to need to use "nomodeset" if you have an install that just goes to a black screen.
If you can manually install then you don't need any. But, as an example, on AMD WRX80 Tr Pro motherboards you sometimes need to include amd_iommu=on iommu=pt
It's fairly common to need to use "nomodeset" if you have an install that just goes to a black screen.
Hi @dbkinghorn @zero-pytagoras sorry to disturb you. I need your help
In my baremetal server i checked it was not working both manual and autoinstall. I am getting this error
Next i am trying edit the kernel flags & can you please check in the below image in grub file

In boot mode i am pressing the e edit and next to edit /etc/defaults/grub i am using ctrl + c
Next in command line i am running these command to GRUB_CMDLINE_LINUX="amd_iommu=on iommu=pt"
I am sharing the user-data file

@dbkinghorn Thanks in advance
running yamllint is a great idea! It is very easy to have a file error that is not even be noticeable.
Also, I highly recommend using a very simple user-data file for testing. Maybe just up to the point of creating an account. Try to simplify and then add on once you get a basic auto install working.
It does look like you are installing to an AMD Tr Pro motherboard! That error you see when doing the manual install is related to iommu.
If doing the manual install and adding those kernel flags using "e" editing during boot works. Then what you have in the grub.cfg file should also work.
If the manual install is still failing then try these 3 kernel flags (I added an extra one that is sometimes needed on those motherboards)
amd-iommu=on iommu=pt pci=nommconf
Hi @dbkinghorn
I have tried manual with these commands amd-iommu=on iommu=pt pci=nommconf working
But I tried same with auto install it was not working same error

I have yamllint , cloudint for user-data there were no errors

@dbkinghorn can you please help me to get out this issue. can you please schedule meeting for 10-15 min orelse can you please send the exact iso include kernel flags.
Thanks in advance
Fix your yaml errors and warnings. When you run yamllint it should not return anything. JonSent from my Verizon, Samsung Galaxy smartphone -------- Original message --------From: D Mahaboobabasha @.> Date: 3/8/23 4:42 AM (GMT-05:00) To: bashadude @.> Cc: Comment @.> Subject: Re: dbkinghorn/user-data-server @bashadude commented on this gist.running yamllint is a great idea! It is very easy to have a file error that is not even be noticeable.Also, I highly recommend using a very simple user-data file for testing. Maybe just up to the point of creating an account. Try to simplify and then add on once you get a basic auto install working.It does look like you are installing to an AMD Tr Pro motherboard! That error you see when doing the manual install is related to iommu.If doing the manual install and adding those kernel flags using "e" editing during boot works. Then what you have in the grub.cfg file should also work.If the manual install is still failing then try these 3 kernel flags (I added an extra one that is sometimes needed on those motherboards)amd-iommu=on iommu=pt pci=nommconfHi @dbkinghornI have tried manual with these commands amd-iommu=on iommu=pt pci=nommconf workingBut I tried same with auto install it was not working same errorI have yamllint , cloudint for user-data there were no @. can you please help me to get out this issue. can you please should meeting for 10-15 min orelse can you please send the exact iso include kernel flags.Thanks in advance—Reply to this email directly, view it on GitHub or unsubscribe.You are receiving this email because you commented on the thread.Triage notifications on the go with GitHub Mobile for iOS or Android.
@jnlickey Thank you jnlickey I have cleared all errors and warnings with yamllint
But i check with cloudint it starts with #cloud-config. In yaml it was asking to start with this ---. I am following yamllint. let me try now
@zero-pytagoras Thanks for the info. My yaml is now working 100%.