The BIQU BX is advertised as "RPi integrated". This statement can understandably cause a lot of confusion as to what it actually means. Some people have an expectation that it means that the pi will not need to connect to the front USB port of the machine. Others may have a different expectation.
The reality is that the integration comes in the form of a very clean mounting solution for the Pi combined with the ability to power and interface with the pi using the machine (touch interface). The USB port on the back of the TFT that connects to the pi does not offer a serial link back to the motherboard. It simply interfaces with a little MCU (CH554G) that translates the I2C signals from the touch controller on the TFT into signals that the pi can understand over USB. If you want the raspberry pi to communicate with the motherboard in order to send and receive commands (hint: you do) then you are still going to need a USB cable running from the pi to the micro USB port on the front of the machine....or are you...???

In order to have an installation free from a front USB cable (as you see in the above image) you'll need nothing more than three dupont jumper wires with a male pin on one end and a female receptacle on the other (although I recommend making/buying at least 4 for reasons that will be explained later). The image below shows an example of the type of wires. They should be about 15cm long but you can use longer ones and tidy them up or shorter ones and join them together.

This is a very simple mod so you should be able to get it done in just a few minutes. It involves hardware and firmware. First, let's handle the hardware. The steps are provided below and then pictures illustrating those steps follow.
- Turn the BX off.
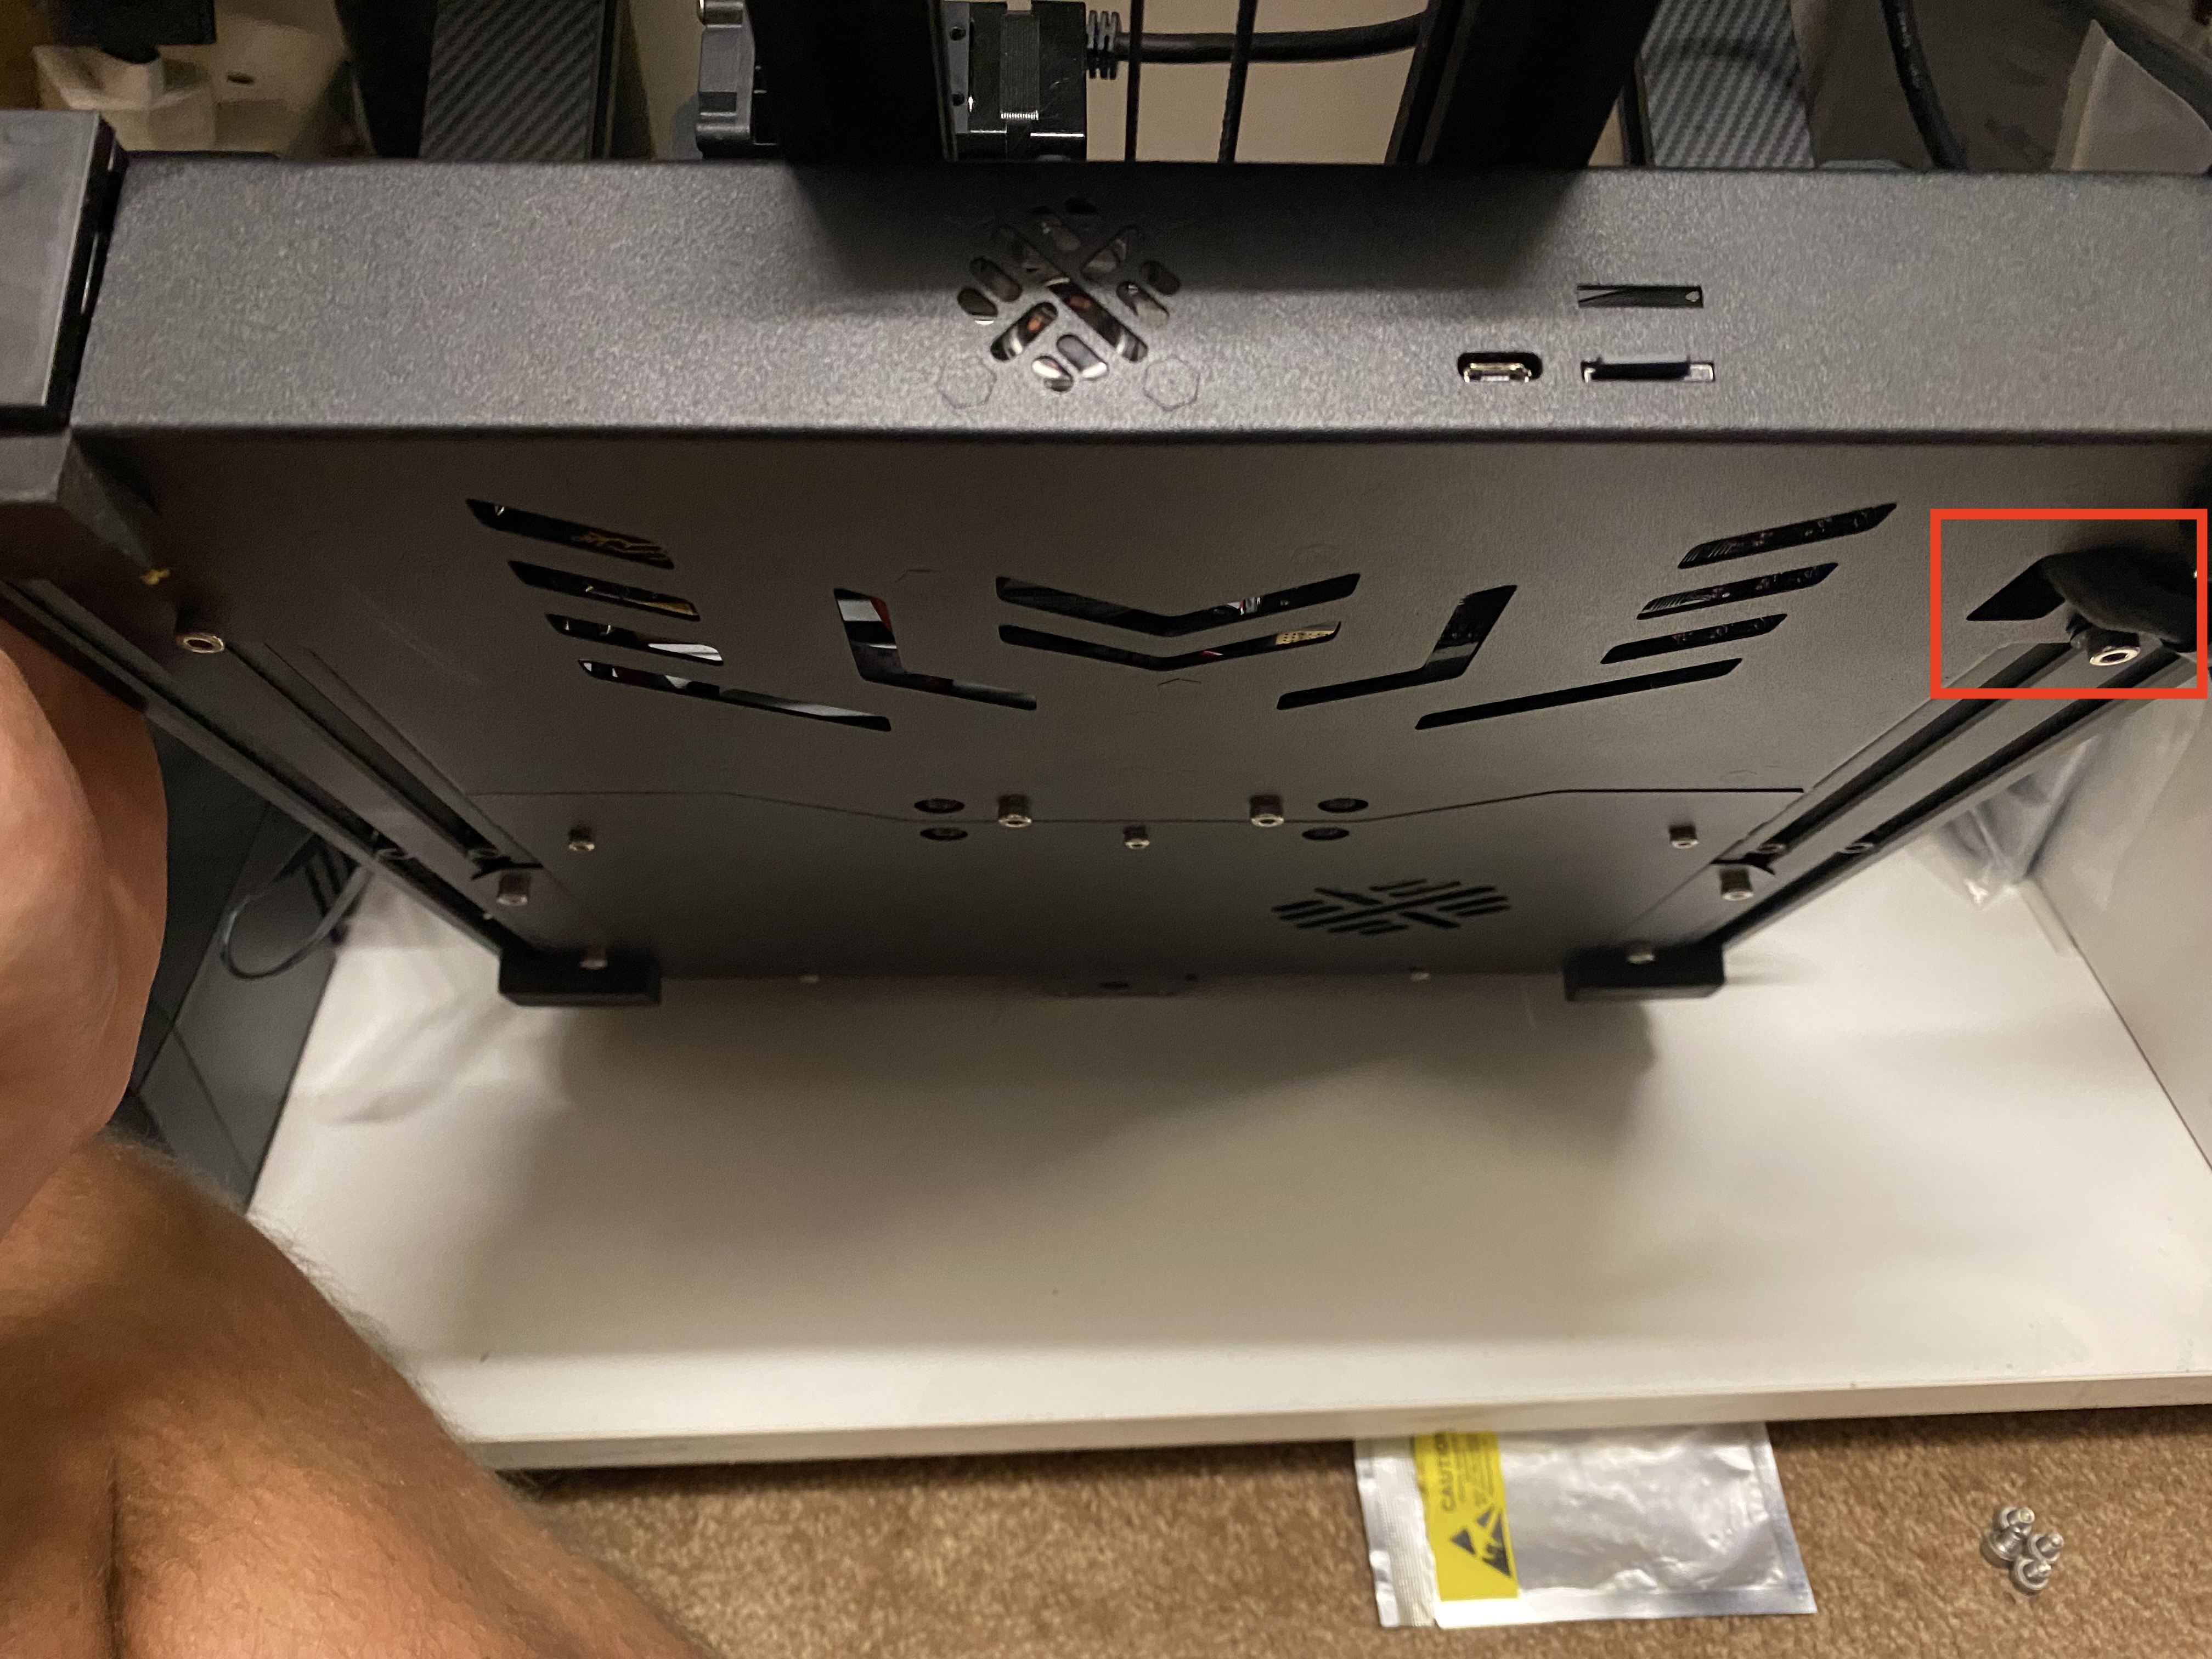
- Lift it up and feed the male ends of your dupont wires into the opening that the LCD cable feeds through. Route them over the top of the motor drivers.
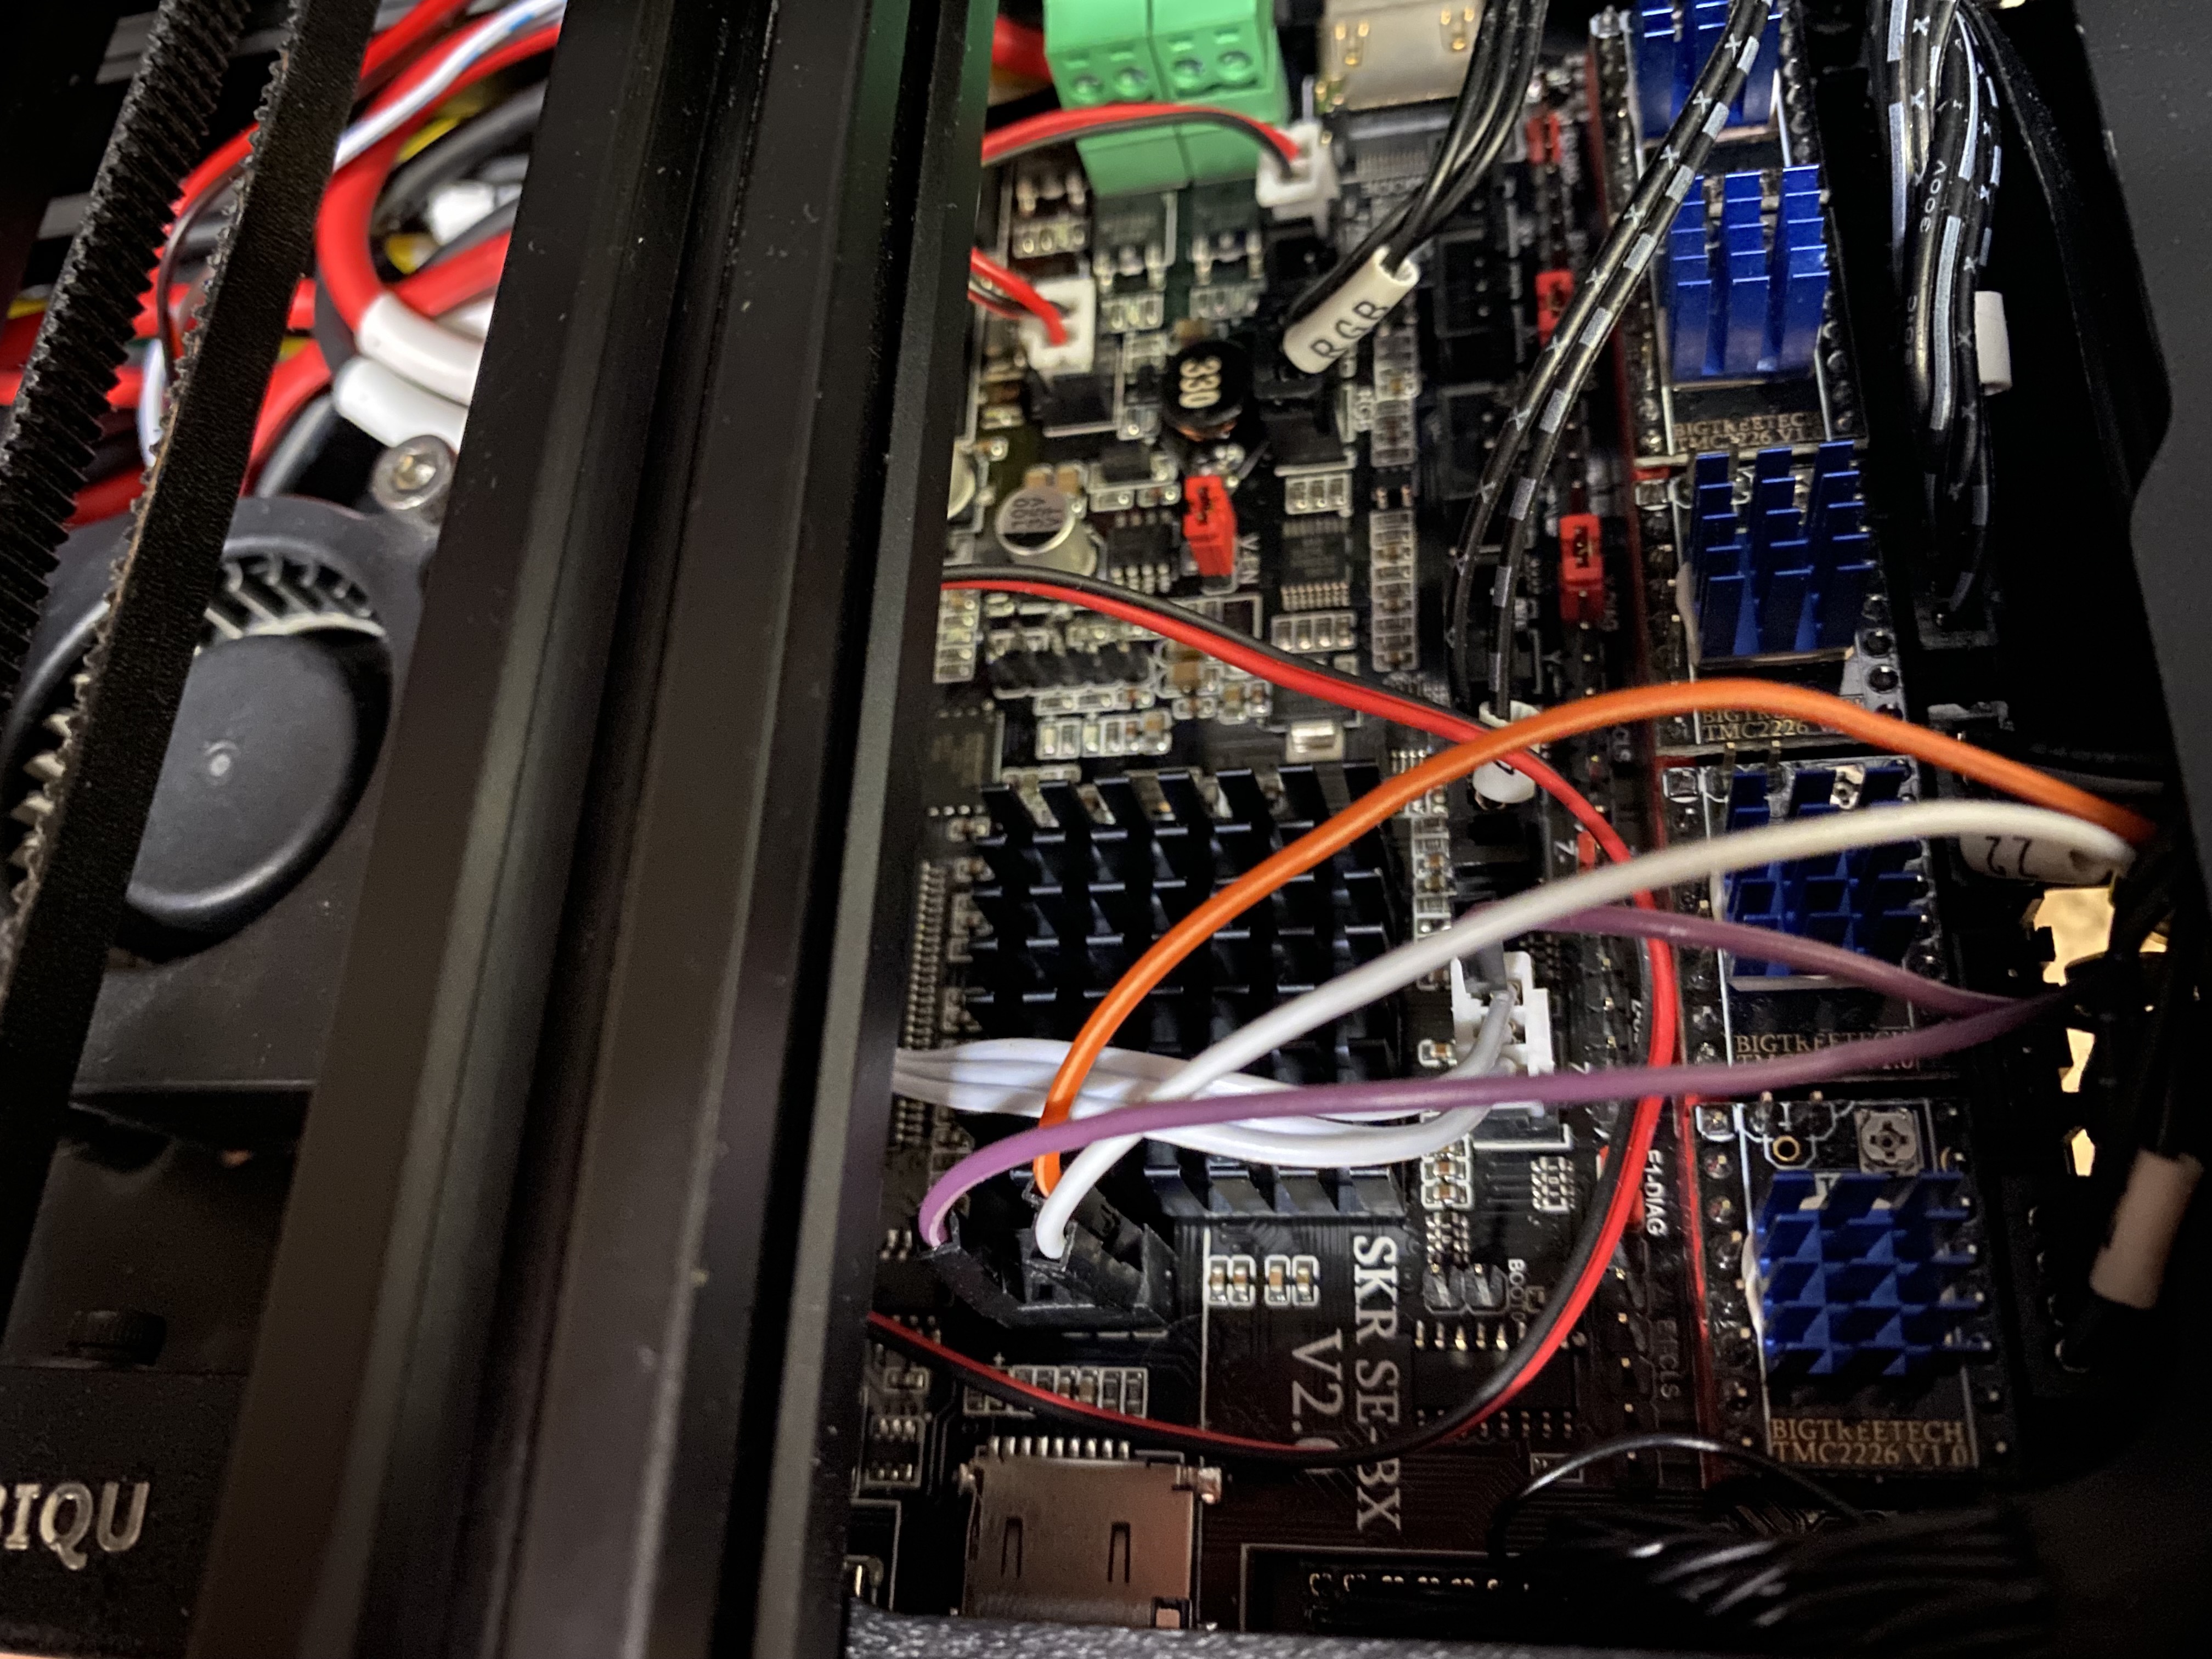
- Plug the ends of the dupont cables into GND, RX and TX on the WiFi connector. Note that GND is not essential but I recommend using it since it will likely offer a cleaner ground to the pi and reduce bit errors. Take note of what colour connects to what pin.
- With the wires plugged in, run them neatly around the motor driver heatsinks and then use the existing loop on the underside of the case to secure them alongside the LCD cable.
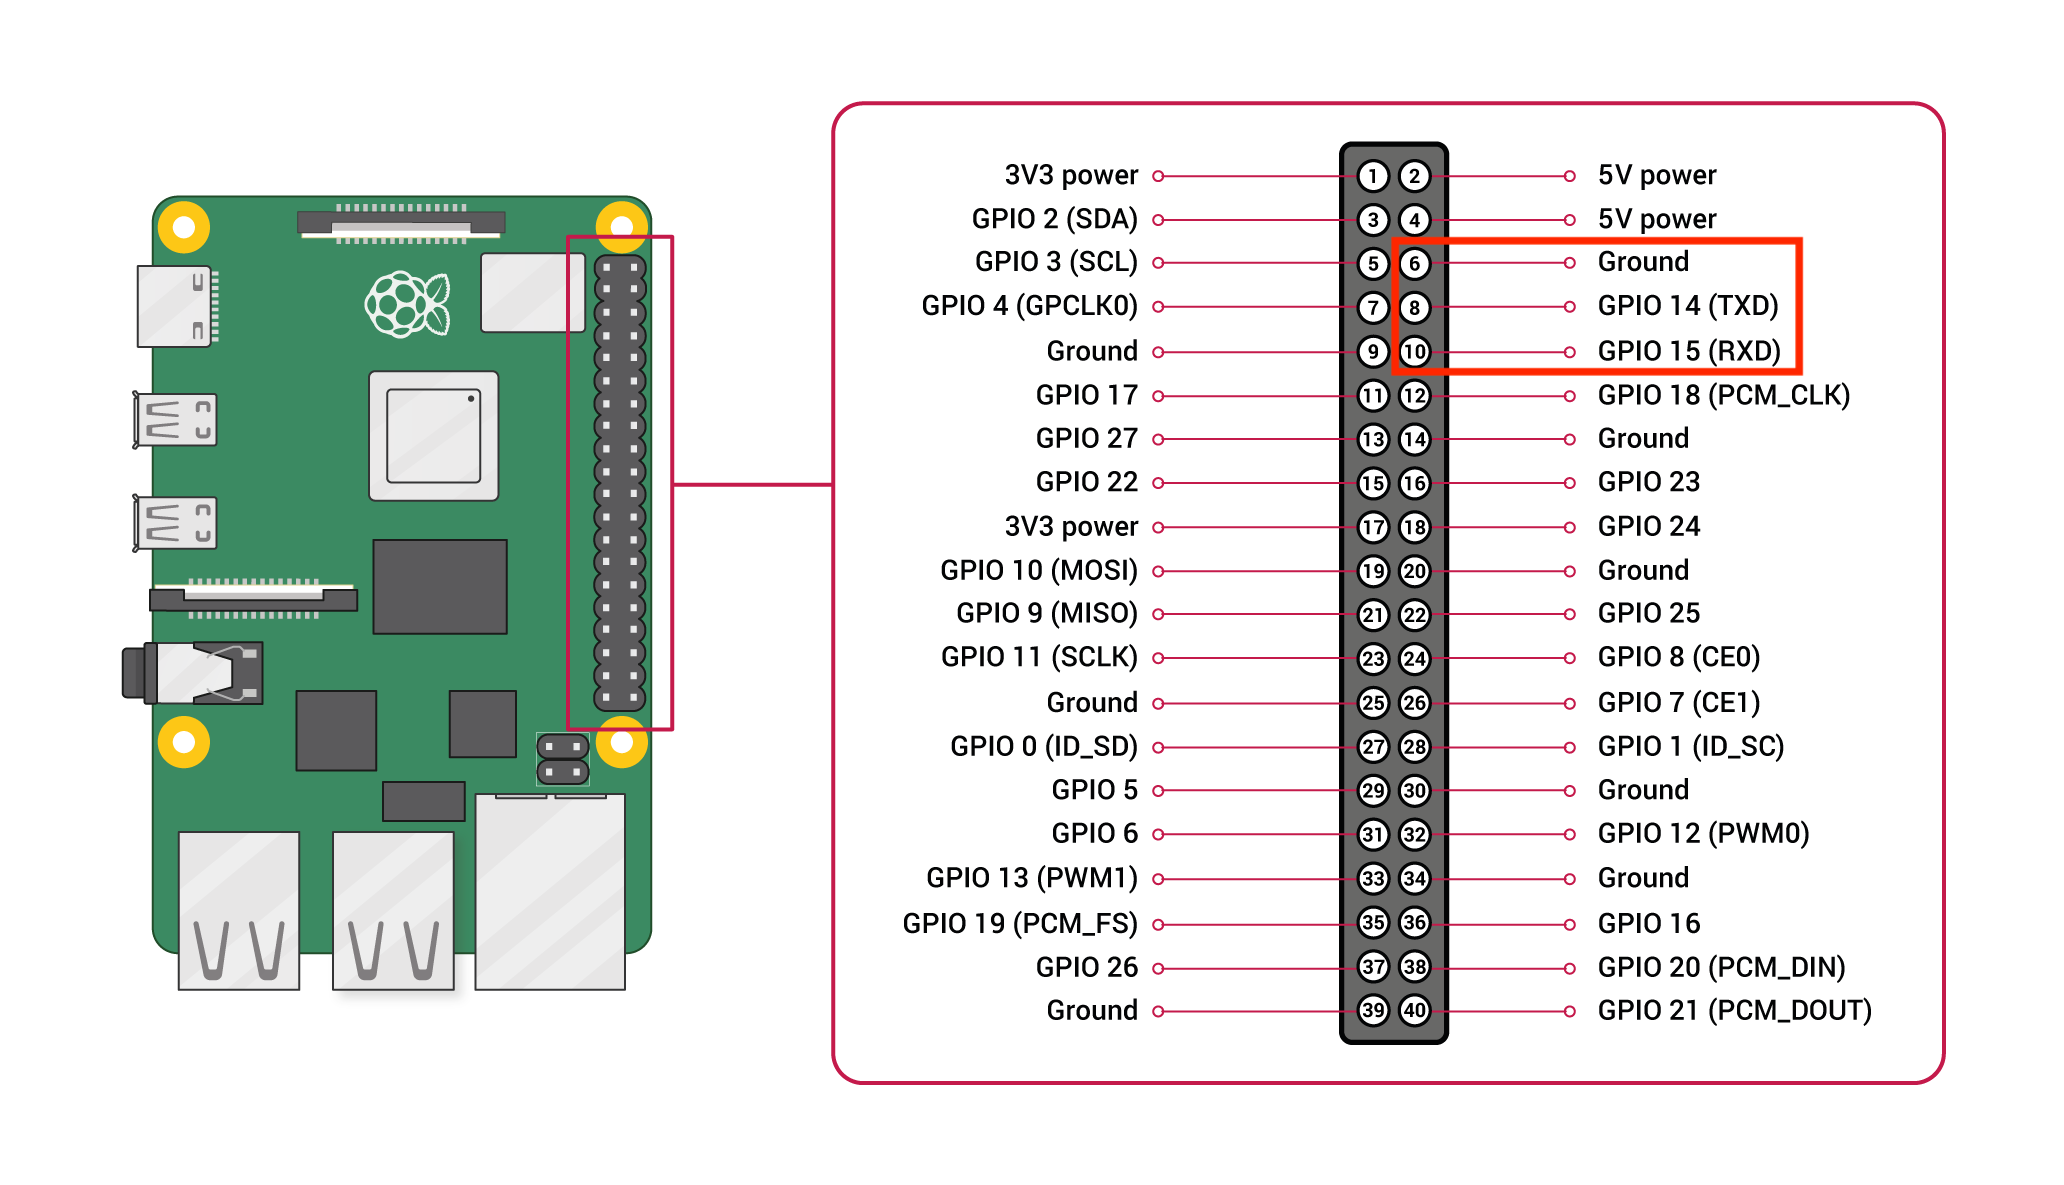
- Connect GND to GND on the pi. TX on the BX (I'm about to start beatboxing) to RX on the pi and finally RX on the BX to TX on the pi. Don't connect RX to RX and TX to TX. Resist the urge.
- You're done for the hardware part.


You'll need to use one of my custom firmware branches to get this to work. You can find them here: https://github.com/looxonline/Marlin
Finally you'll need to make some minor mods to the raspberry pi.
- Either place the raspberry pi SD card into your laptop and edit the config.txt file on the boot partition or ssh into your pi and edit the same file in /boot/config.txt. Choose an option that is easiest for you.
- Simply place the following two lines at the bottom of your config.txt file:
- enable_uart=1
- dtoverlay=disable-bt
- Now you have no choice but to ssh into your pi because the next step needs it. If you are on mac or linux you can ssh into the pi by opening a terminal window and typing ssh pi@octopi.local and then using "raspberry" as the password. If you are on windows you can use putty to ssh into the pi. You'll need to know the ip address of the pi on your local network and you can use the same credentials (UN: pi PWD: raspberry) to get in over ssh.
- Once the ssh terminal is open type "sudo raspi-config" into the command line and hit enter. Enter the same password you used to log in when prompted to do so.
- Within the config menu navigate to "Interface Options" --> Serial port
- When it asks whether you would like the shell to be accessible over serial say NO.
- When it asks if you would like the serial port hardware to be enabled say YES.
- Reboot the pi once you are done.
- After the reboot access the octoprint web interface.
- Click on the little spanner at the top of the web interface.
- On the "Serial Connection" menu item enter /dev/ttyAMA0 into the box labeled "Additional serial ports".
- Reboot the pi once more.


That's it! You should be able to simply tap the TFT when running in pi mode, wait a few seconds and hear the two beeps as it connects to the motherboard. I've tested this mod on highly detailed prints that span more than 24 hours and I've not had an issue so the communications are stable and reliable.
Oh...and about that fourth wire that I said would be useful. Keep it handy because the next little tweak I am working on is a way to safely and automatically cause the pi to shut down as soon as you flick off the power switch. Coming soon...
Thanks for some brilliant gists. I have installed the custom firmware and the Pi serial modification. All working seamlessly and now the BX is useable. Excellent work.......keep it up!!!