- iFixit iOpener Set
- T4 Screwdriver
- T3 Screwdriver
-
After about 60~90 seconds, use Opening Picks (or a slot screwdriver that's thin enough to fit) to pry open the back cover from upper right corner

-
Remove the screws (T4) that keeping the black plate attached to the frame and remove the black plate
-
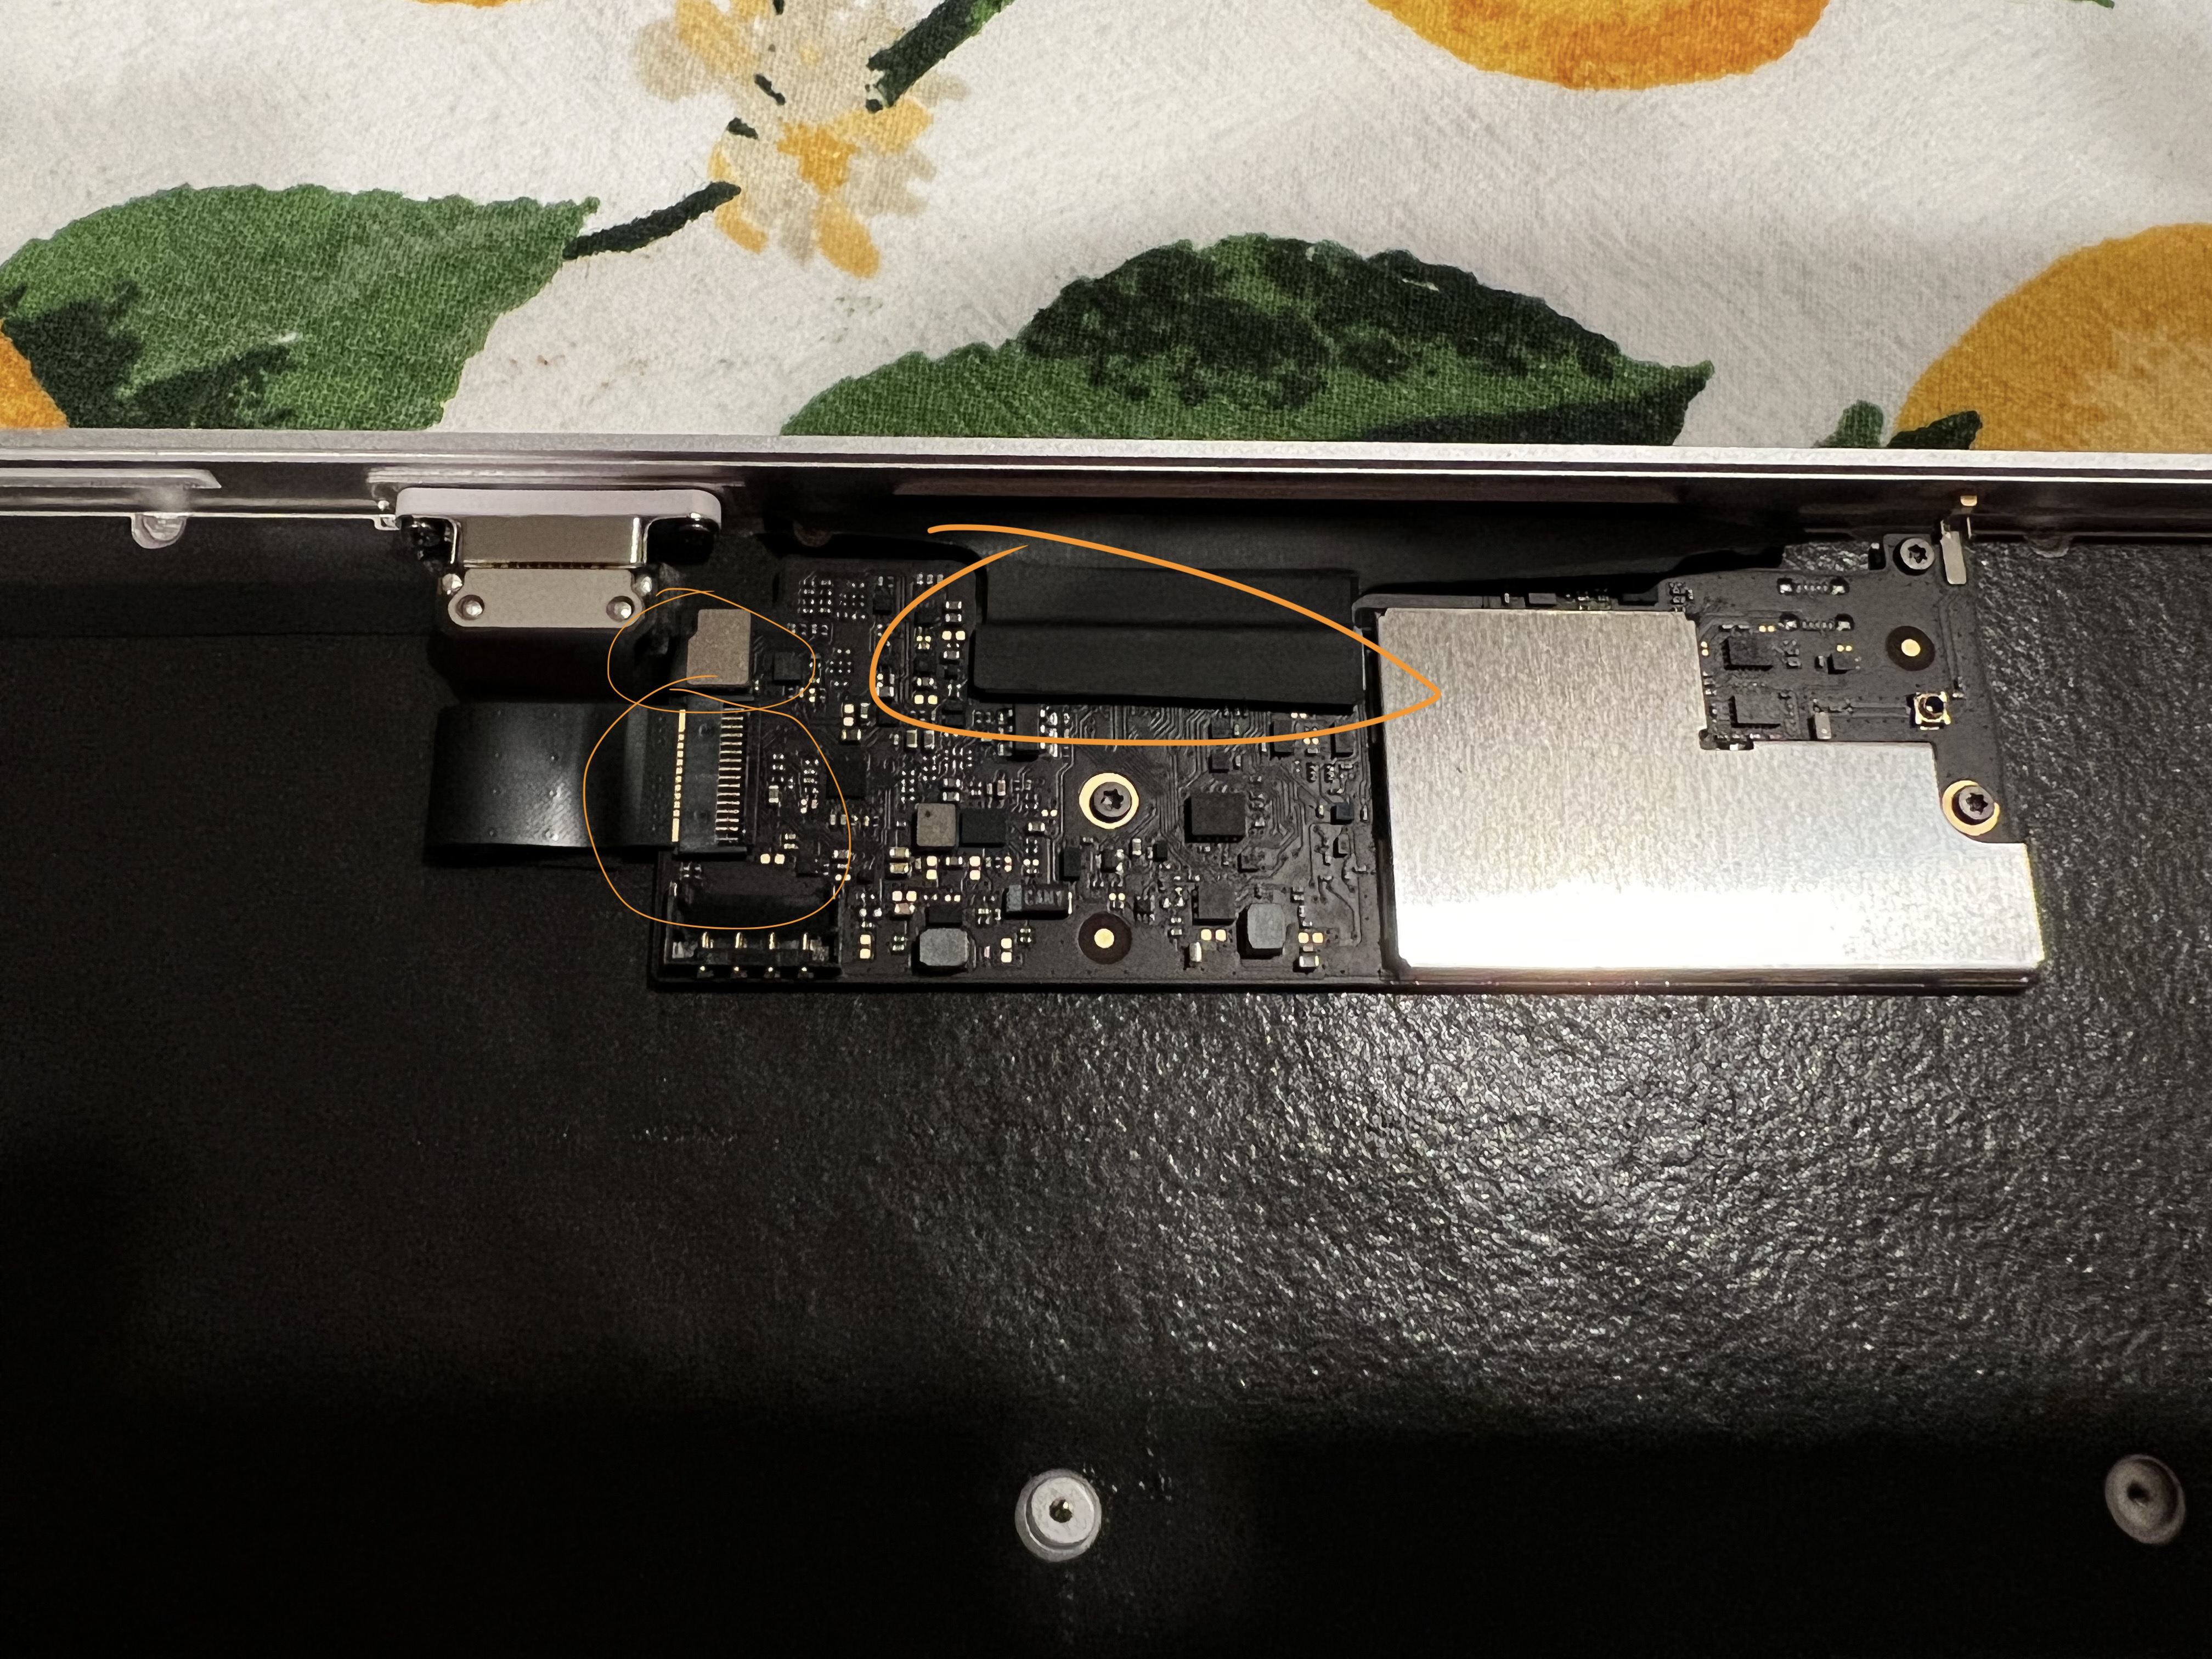
Disconnect all 3 connectors from the logic board and take out the logic board from the Keyboard frame


-
Remove the power switch from upper left corner (T3)
-
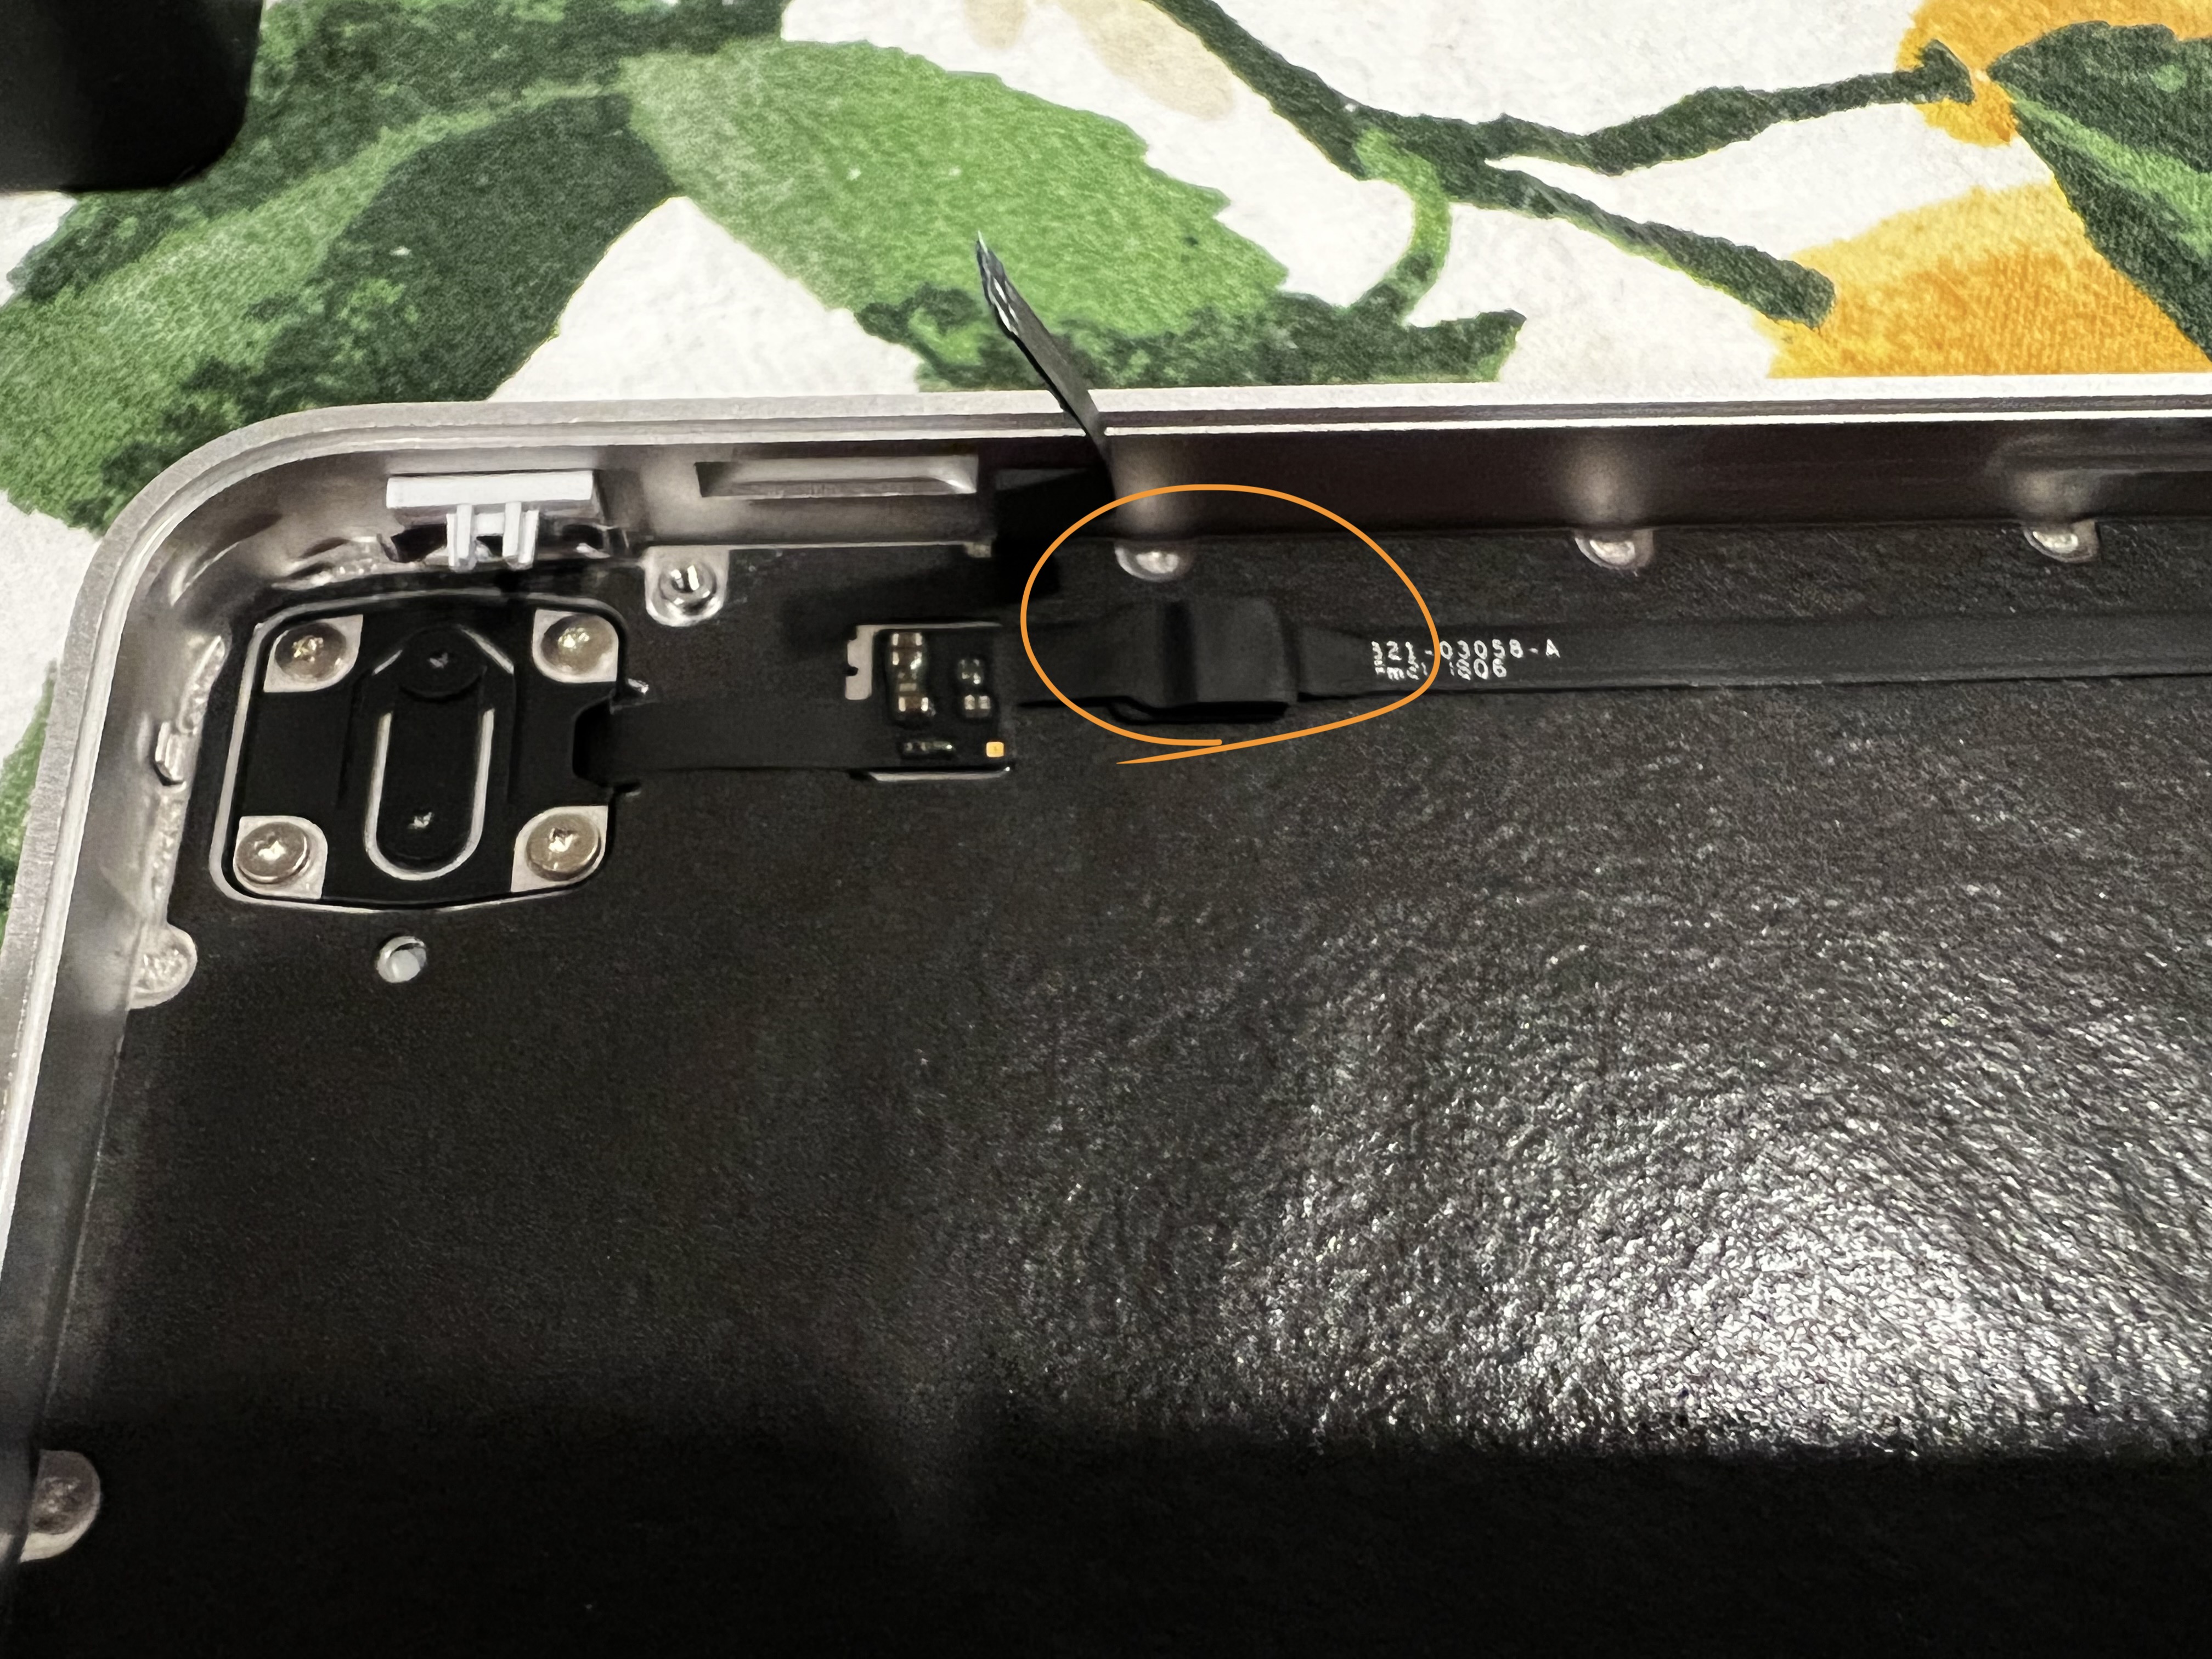
Carefully remove the sticker(?) from the connector and disconnect Touch ID sensor from the connector

-
Unscrew the mounting screws around the Touch ID sensor (T3), and remove the Touch ID sensor
-
Carefully remove the flex cable used to connect Touch ID sensor
Now you have all the parts to put together a standalone Touch ID device for your Apple silicon Mac.
After connecting the Lightning connector and Touch ID sensor back to the logic board, you can pair the Touch ID sensor with your Mac under System Preferences.
If the pairing step doesn't appear when you go to Touch ID settings -> add a new fingerprint, make sure the Touch ID sensor is correctly connected and try power cycle the Touch ID device.


Thanks added one recently to my Keychron Q1
