Blog 2020/2/4
<- previous | index | next ->
This is a tutorial on how setup a Raspberry Pi as a NAT router, with custom local DNS.
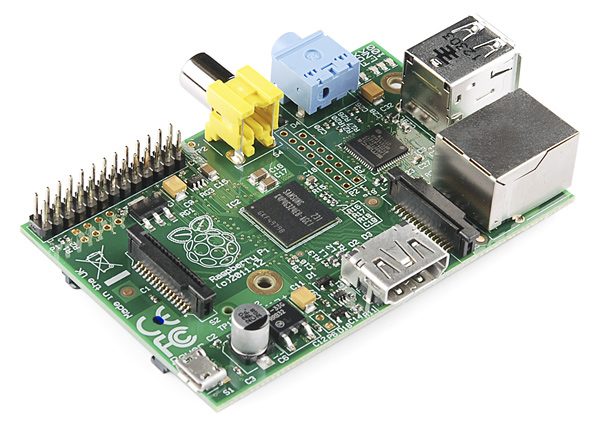
This tutorial is using a Raspberry Pi 1 Model B and a USB-Ethernet dongle.
(Search amazon for "usb ethernet raspberry pi".)
Note: plugging in the Ethernet dongle may reboot the Pi. I recommend you insert the dongle before booting up your Pi.
Grab the latest Raspbian Lite from https://www.raspberrypi.org/downloads/ and burn it to an SD card.
On my Linux box, that's pv 2019-09-26-raspbian-buster-lite.img > /dev/mmcblk0.
- Boot the Pi
- Login as
pi, passwordraspberry sudo raspi-config- Localisation Options -> Change Locale (to en_US.UTF-8)
- Localisation Options -> Change Timezone (to America / Chicago)
- Localisation Options -> Keyboard Layout (to Generic 104, Other -> English US)
- Interfacing Options -> SSH (enable)
- Make note of the IP address (
ifconfig eth0) - Logout
- Login via ssh as
pi, thensudo -i - Change root's password (run
passwd) - Append your
~/.ssh/id_rsa.pubto/root/.ssh/authorized_keys - Logout
- Login via ssh as
root deluser pi && rm -rf /home/pi
Disable systemd's DHCP:
systemctl disable dhcpcd.service
Note: on systems which predated systemd, this would have been update-rc.d dhcpcd disable.
Configure both interfaces in /etc/network/interfaces:
# eth0: LAN connection to local network
auto eth0
iface eth0 inet static
    address 192.168.4.1
    netmask 255.255.255.0

# eth1 is the WAN connection to cable modem and is handled by systemd.
auto eth1
iface eth1 inet dhcp
Install iptables:
apt-get install iptables
Create /usr/local/sbin/nat.sh:
#!/bin/sh

# this script adapted from
# https://www.debian-administration.org/article/23/Setting_up_a_simple_debian_gateway

set -e

LAN=eth0
WAN=eth1

PATH=/usr/sbin:/sbin:/bin/usr/bin

#
# delete all existing rules.
#
iptables -F
iptables -t nat -F
iptables -t mangle -F
iptables -X

# Always accept loopback traffice
iptables -A INPUT -i lo -j ACCEPT

# Allow established connections, and those not coming from the outside.
iptables -A INPUT -m state --state ESTABLISHED,RELATED -j ACCEPT
iptables -A INPUT -m state --state NEW ! -i $WAN -j ACCEPT
iptables -A FORWARD -i $WAN -o $LAN -m state --state ESTABLISHED,RELATED -j ACCEPT

# Allow outgoing connections from the LAN side
iptables -A FORWARD -i $LAN -o $WAN -j ACCEPT

# Masquerade
iptables -t nat -A POSTROUTING -o $WAN -j MASQUERADE

# Don't forward from the outside to the inside.
iptables -A FORWARD -i $WAN -o $WAN -j REJECT

# Enable routing.
echo 1 > /proc/sys/net/ipv4/ip_forward
chmod u+x /usr/local/sbin/nat.sh
Edit /etc/rc.local and add a call to this script:
/usr/local/sbin/nat.sh
Note: if there is an exit 0 line in your rc.local, ensure this call comes before that line!
apt-get install dnsmasq
Edit /etc/dnsmasq.conf:
# Set the domain for dnsmasq. this is optional, but if it is set, it
# does the following things.
# 1) Allows DHCP hosts to have fully qualified domain names, as long
#     as the domain part matches this setting.
# 2) Sets the "domain" DHCP option thereby potentially setting the
#    domain of all systems configured by DHCP
# 3) Provides the domain part for "expand-hosts"
# Note: only a few domains are safe from conflict with public TLD's.
# In particular, '.local' causes problems.
# See https://superuser.com/questions/117056/how-to-choose-a-sensible-local-domain-name-for-a-home-network
domain=home

# Add local-only domains here, queries in these domains are answered
# from /etc/hosts or DHCP only.
local=/home/

# Set this (and domain: see below) if you want to have a domain
# automatically added to simple names in a hosts-file.
expand-hosts

# Thanks to https://hugoheden.wordpress.com/2009/02/24/dnsmasq-and-etchosts/
# Use /etc/hosts.dnsmasq rather than /etc/hosts for local DNS.
no-hosts
addn-hosts=/etc/hosts.dnsmasq

# Use /etc/ethers to map MAC addresses to hostnames.
read-ethers

# Override the default route supplied by dnsmasq, which assumes the
# router is the same machine as the one running dnsmasq.
dhcp-option=option:router,192.168.4.1

# The range of IP addresses to use for DHCP "guests" (machines not listed
# in /etc/ethers).
dhcp-range=192.168.4.200,192.168.4.250,12h

# The DNS cache size (number of records, hard limit is 10000).
cache-size=10000

# Set the DHCP server to authoritative mode. This avoids long timeouts
# when a machine wakes up on a new network.
# See http://www.isc.org/files/auth.html
dhcp-authoritative

# Never forward plain names (without a dot or domain part).
domain-needed

# Never forward addresses in the non-routed address spaces.
bogus-priv

# Send an empty WPAD option. This may be REQUIRED to get windows 7 to behave.
#dhcp-option=252,"\n"

# Set the DHCP server to enable DHCPv4 Rapid Commit Option per RFC 4039.
# In this mode it will respond to a DHCPDISCOVER message including a Rapid Commit
# option with a DHCPACK including a Rapid Commit option and fully committed address
# and configuration information. This must only be enabled if either the server is
# the only server for the subnet, or multiple servers are present and they each
# commit a binding for all clients.
dhcp-rapid-commit

# For debugging purposes, log each DNS query as it passes through
# dnsmasq.
# Note: leaving this enabled will wear out your SD card.
#log-queries

# Log lots of extra information about DHCP transactions.
# Note: leaving this enabled will wear out your SD card.
#log-dhcp
Fill out /etc/hosts.dnsmasq:
192.168.4.10 larry
192.168.4.11 curly
192.168.4.12 moe
Fill out /etc/ethers:
01:23:45:67:89:AB larry
01:23:45:67:89:AC curly
01:23:45:67:89:AD moe
systemctl disable avahi-daemon
This will save a bit of wear-and-tear on your SD card. Add this to /etc/sysctl.conf:
vm.swappiness=1
apt-get update
apt-get dist-upgrade
reboot
apt-get install openntpd


There's an error in /usr/local/sbin/nat.sh
iptables -A FORWARD -i $WAN -o $WAN -j REJECT
should be
iptables -A FORWARD -i $WAN -o $LAN -j REJECT