Out of the box, the MakerFabs ESP8266 shield appears to be shipping with a broken firmware that is unstable when used with DCC-EX. I needed to flash version 1.7.4 onto the board. Here's how I did it - hopefully it works for you.
- The WiFi Shield itself - https://www.makerfabs.com/esp8266-wifi-shield.html
- USB to TTL adapter - https://www.amazon.com/gp/product/B07D6LLX19/
- 4x female to female jumper wires
- 1x male to male jumper wire
- The flash download tool and firmware files from DCC-EX - https://dcc-ex.com/download/esp8266.html
- A Windows PC
- Extract both the download tool and firmware files zips
- Open the download tool, select "Developer Mode", then "ESP8266 DownloadTool".
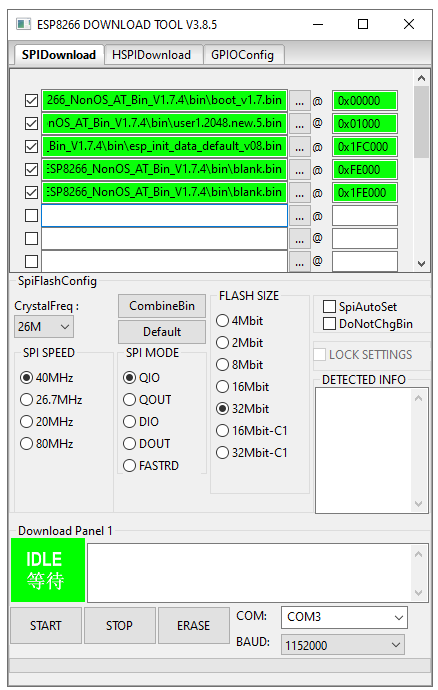
- Ensure all these settings in the screenshow are set. Take special note of the files and the offset number next to them.
- Ensure all five files are green - enable the checkbox next to each file after setting it.
- Ensure the COM port is set to that of your adapter (You can find this in device manager after plugging it in and installing drivers).
- Leave the window open, but DO NOT PRESS START YET.
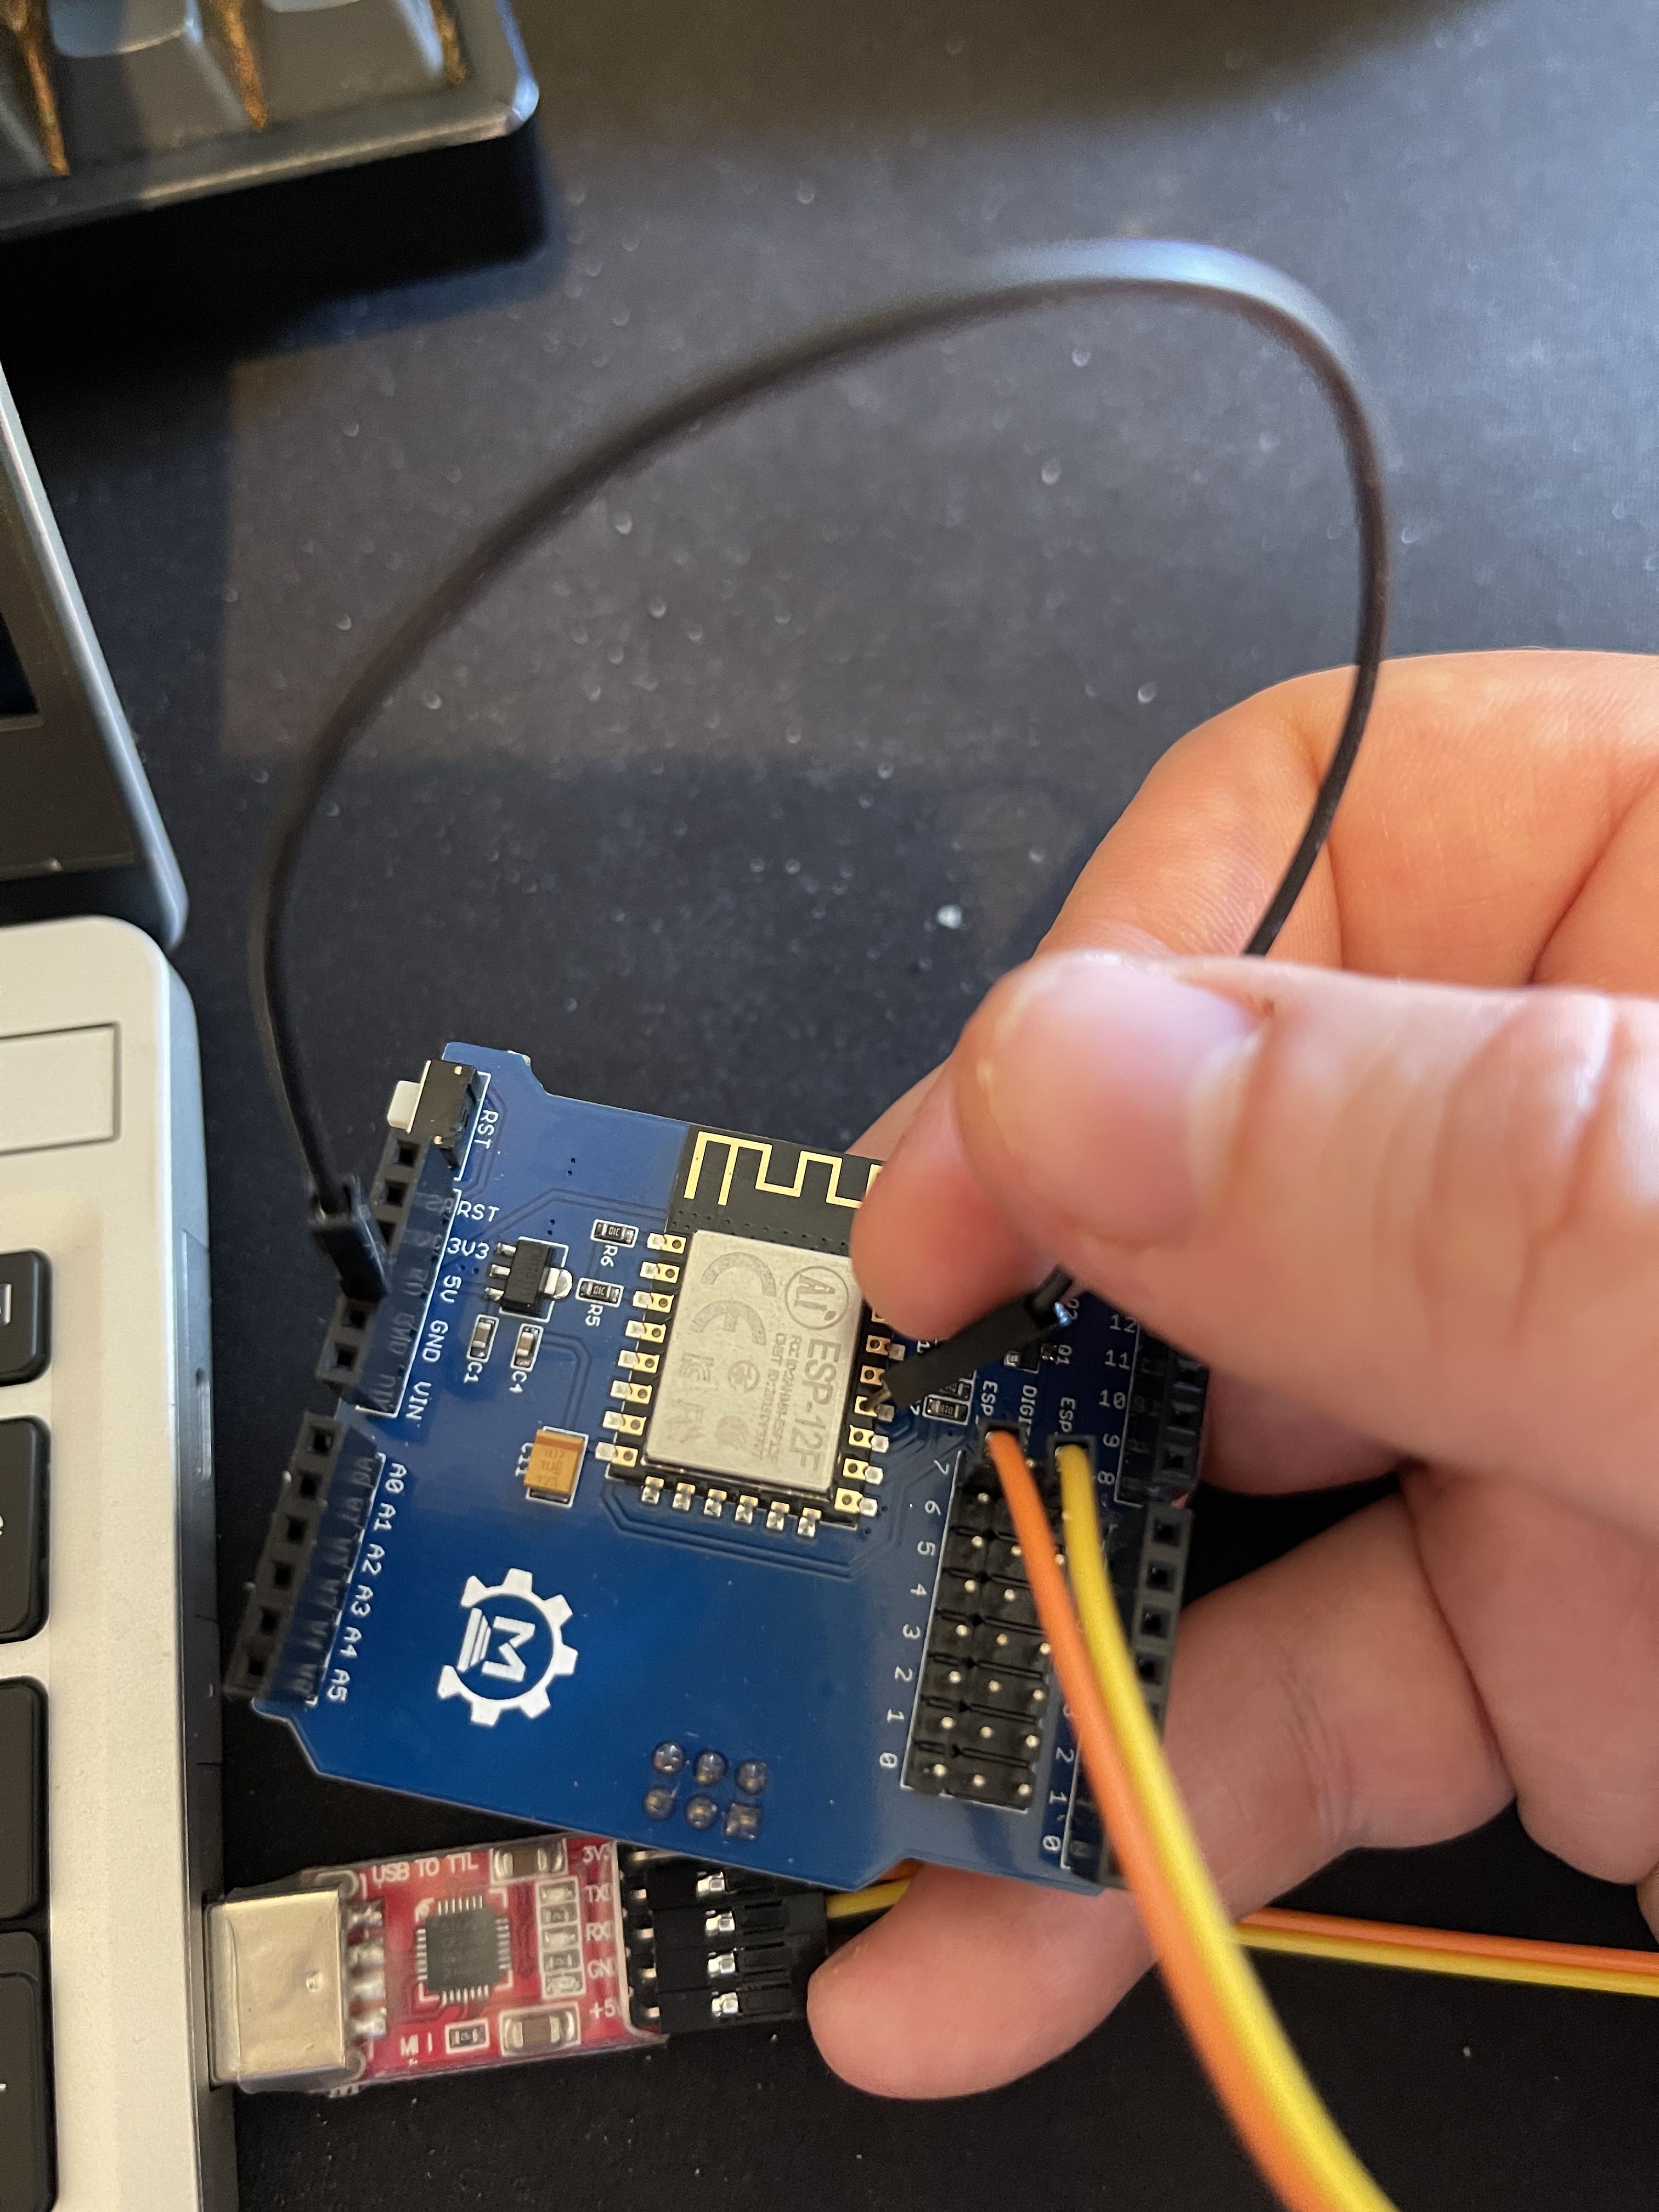
Assuming you're using a similar adapter to the one I linked to above:
- Connect one jumper wire from the "+5V" pin on the adapter to the underside of the "5V" pin on the WiFi shield
- Connect one jumper wire from the "GND" pin on the adapter to the underside of the "GND" pin on the WiFi shield
- Connect one jumper wire from the "RXD" pin on the adapter to one of the "ESP_TX" pins on the top of the WiFi shield
- Connect one jumper wire from the "TXD" pin on the adapter to one of the "ESP_RX" pins on the top of the WiFi shield
Your connections should look like this:

The adapter should be unplugged from the USB port at this stage.
- Connect one end of the the male-to-male jumper to the top of the "GND" pin on the WiFi shield.
- Hold the other end of the male-to-male jumper onto the GPIO0 pin on the ESP-12F. (Note: The GPIO0 pin is the fourth pin from the bottom on the right, next to the "P" in "ESP-12F". See picture below.
- KEEP HOLDING THE JUMPER ON THE PIN
- Plug the adapter into a free USB port on your PC
- KEEP HOLDING THE JUMPER ON THE PIN
- KEEP HOLDING THE JUMPER ON THE PIN
- Return to the download tool.
- Press start.
- KEEP HOLDING THE JUMPER ON THE PIN
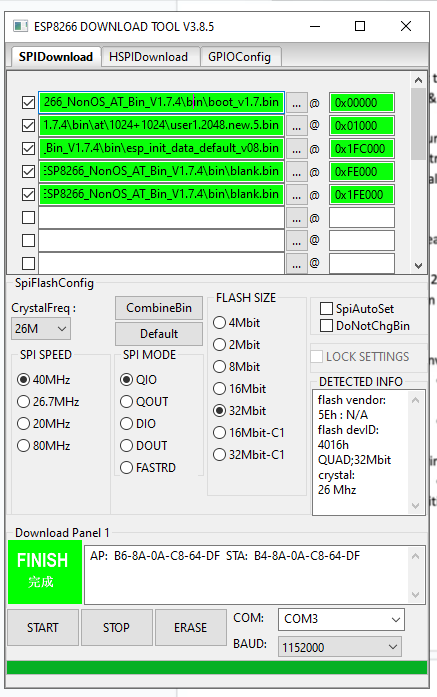
- Wait until the green box in the tool says "FINISH".
- You can let go of the jumper now. :)
If you get an error, unplug the adapter, plug it back in, and press Start again. It can take a couple of tries. BUT KEEP HOLDING THE JUMPER ON THE PIN.
If at any point you let go of the jumper, unplug the adapter from the USB port, place the jumper back on the pin, and plug it back in, then click Start again. Remember to keep holding it.
When finished, it should look like this.
You should now be able to unplug the WiFi shield, place it onto your DCC-EX setup, and if all went well it should work.


After much trial and error I successfully reached "Finish". Here's what I learned. The settings for the download tool are neither typed in nor automatically loaded. They are binary files inside the "ESP8266_NonOs_AT_Bin_V1..4" file and they need to be attached to the download tool. There are many items in this file after all the file folders are opened, but the four needed are all ".bin" files: boot_v1.7.bin, user1.1024.new.5.bin' esp_init_data_default_v08.bin and blank.bin. Loading these files to the download tool is similar to attaching a file to an email. Click the ... Button. A window opens permitting you to browse your files and find the right bin file. When found click it, and when it appears below click the Open Button. The file will be loaded to the tool and will turn green. NOTE that only the last part of the line will look like the example above. The parts to the left are the path to the file on your computer and will never look like the example. Continue to load all five lines. The boxes to the right must be typed in accurately. Note that the first character is zero and NOT a capital o.
Now for the bloody IZOKEE adapter. It needs a driver. Most of the time when a new device is plugged in, Windows searches its inventory of drivers and installs the right one automatically. In my case, Win10 crossed its arms and said "It don't recognize this device and can't help you." Off to the internet to find a driver. There are many warnings that loading a driver manually is difficult. Loading a driver manually is easy; finding the right driver is difficult. I settled on the Silicon Labs universal CP210x driver for windows. I suggested inserting the adapter into a USB port and getting it setup before attaching the jumper wires. Use Device Manager to do this. Win10 set it up as COM4. So at the bottom of the tool in the box to the the right of COM: I inserted COM4. I got "Open Port Failure" over and over. Finally I deleted "COM4" and entered just 4. Three seconds later it was done. I WISH I HAD KNOWN ALL THIS BEFORE I STARTED THE JOURNEY.